How to design a custom menu
Here you will learn how to design a custom menu.
Here’s how you build it:
View
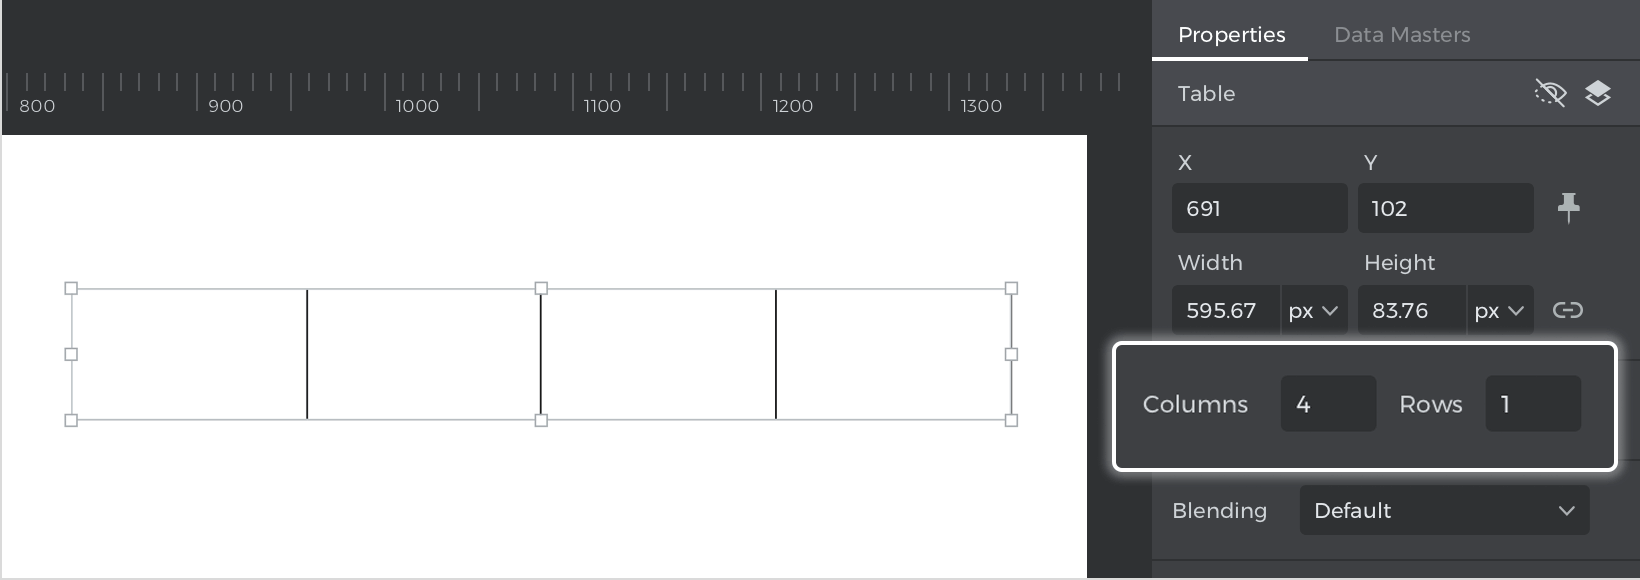
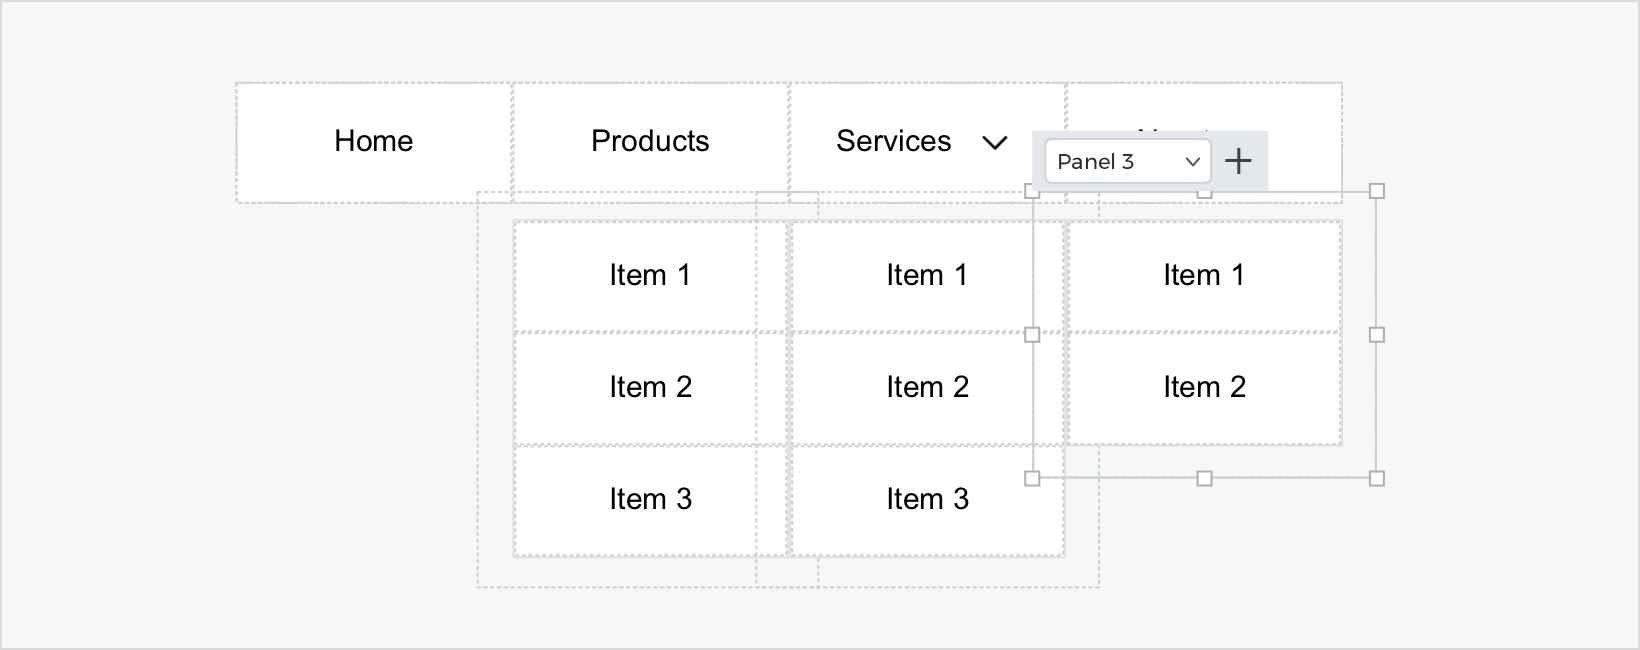
- Select a “Table” and place it on the canvas; from the Properties palette, edit the numbers of columns and files to one file and four columns, also, adjust the height of the table to simulate a header.

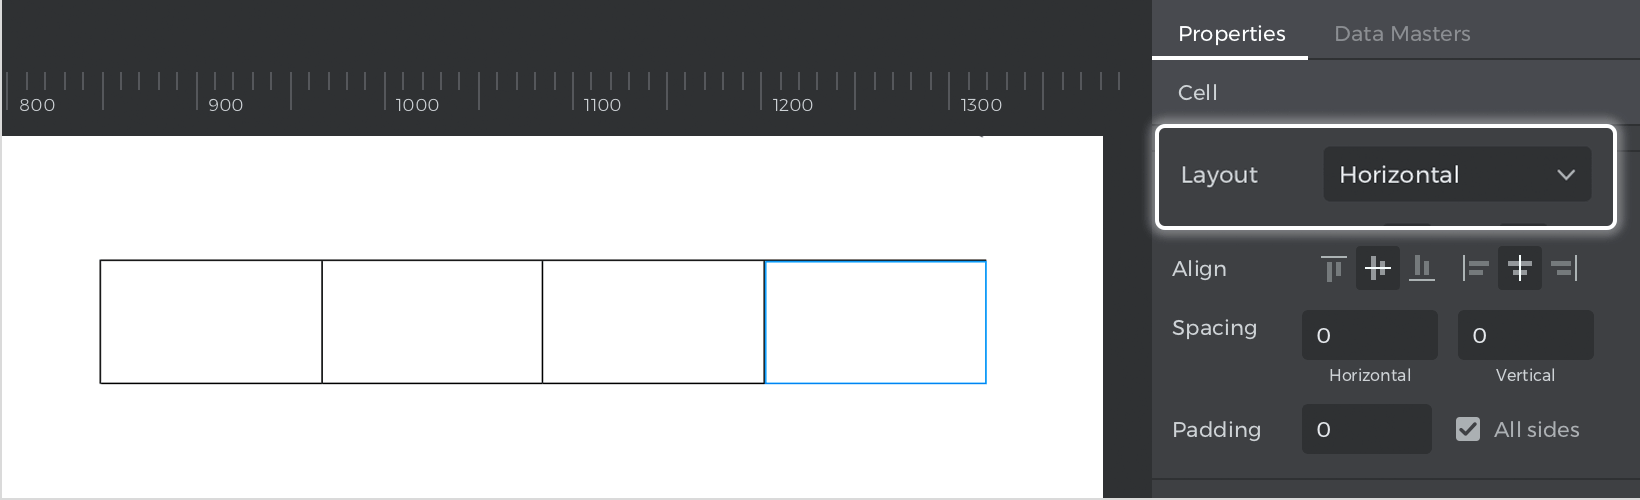
- Select each cell one by one and from the Properties palette change the layout to “Horizontal”.


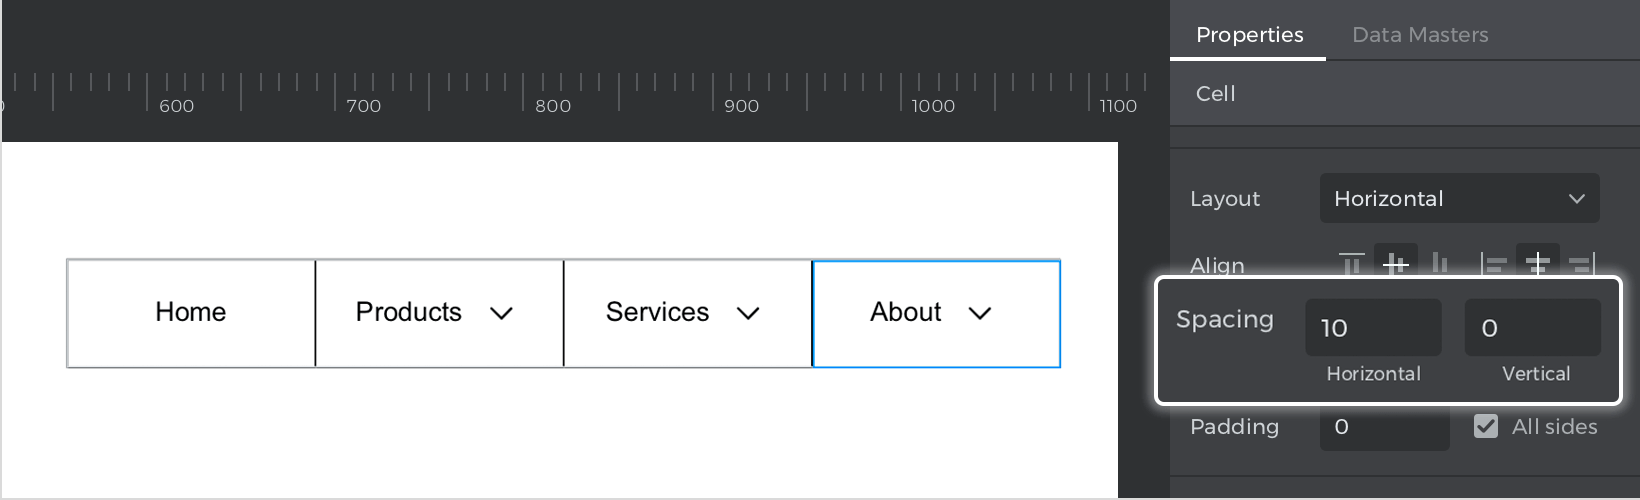
- Place four centered text on the canvas and write: “Home”, “Products”, “Services” and “About”, hold command (Mac) or control (Windows), and drag the items inside the cells, you’ll see a blue tint.


- From the “Web Components” library, enter a “Chevron down” icon next to “Products”, “Services” and “About”. Having given each cell a horizontal layout, the icon will be positioned horizontally to the text. In the Properties palette, you can adjust the space between the text and the icon.

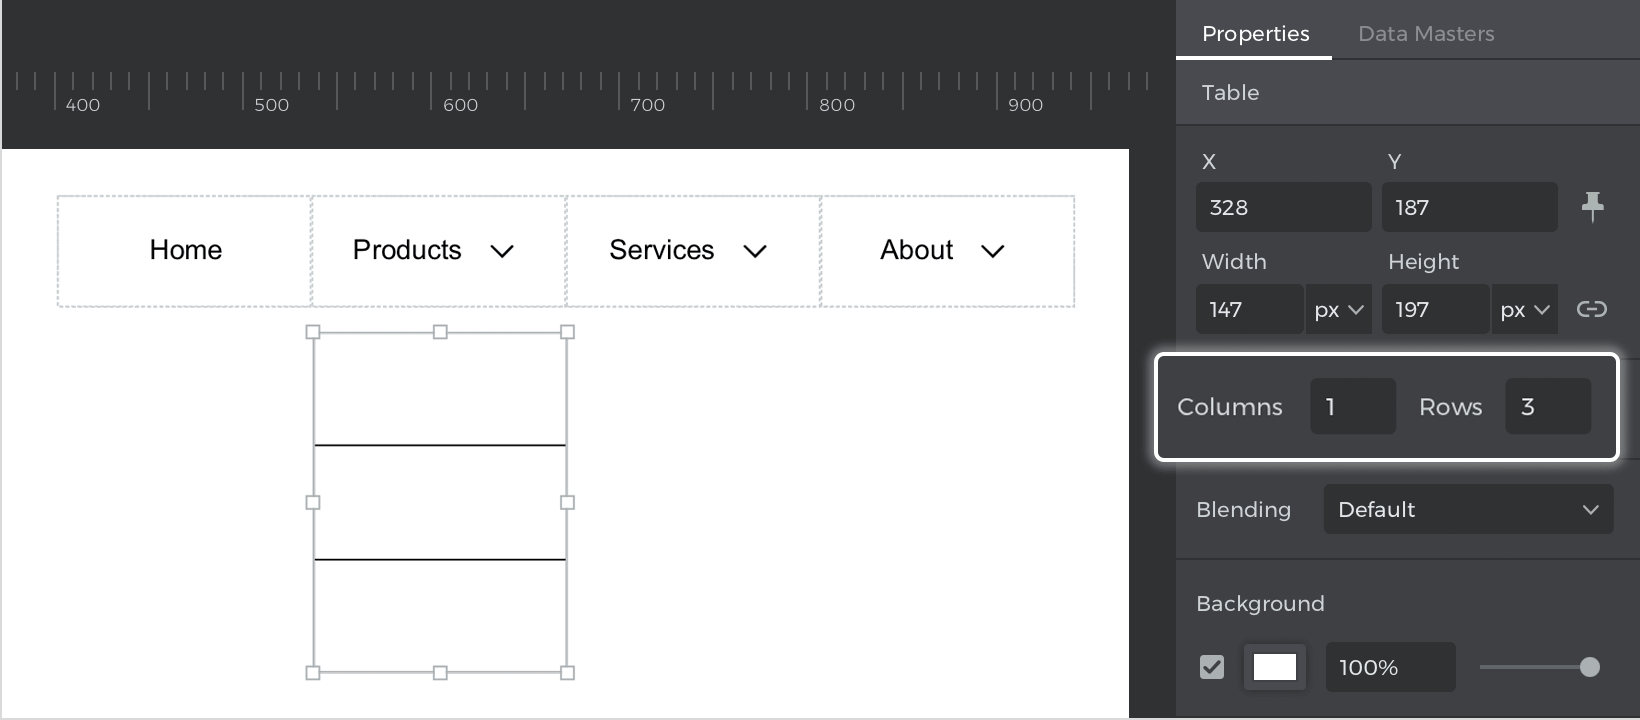
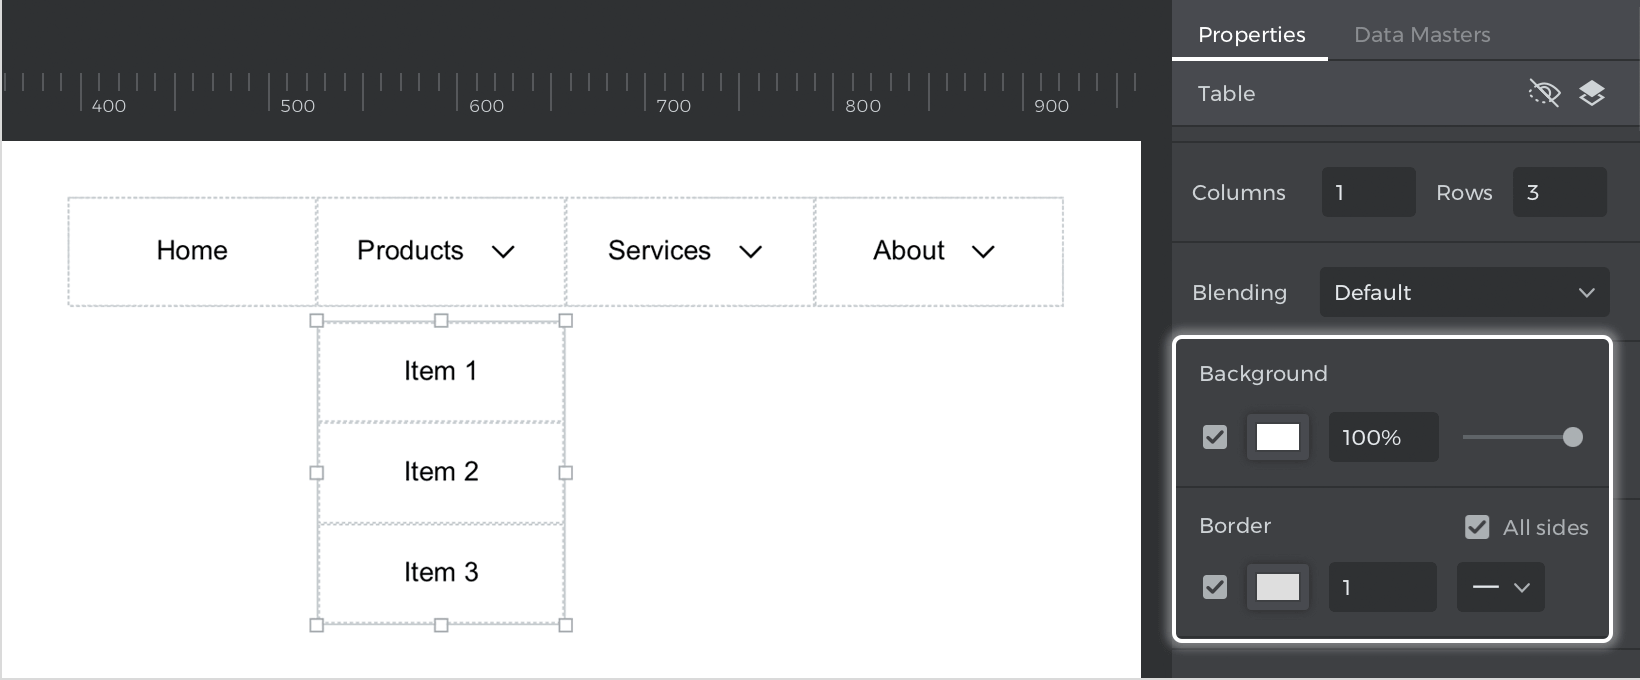
- For the menu options, place a new “Table” and from the Properties palette edit the columns to one and the rows to three.

- Hold command (Mac) or control (Windows) and place 3 texts inside each cell for “Item 1”, “Item 2” and “Item3”.
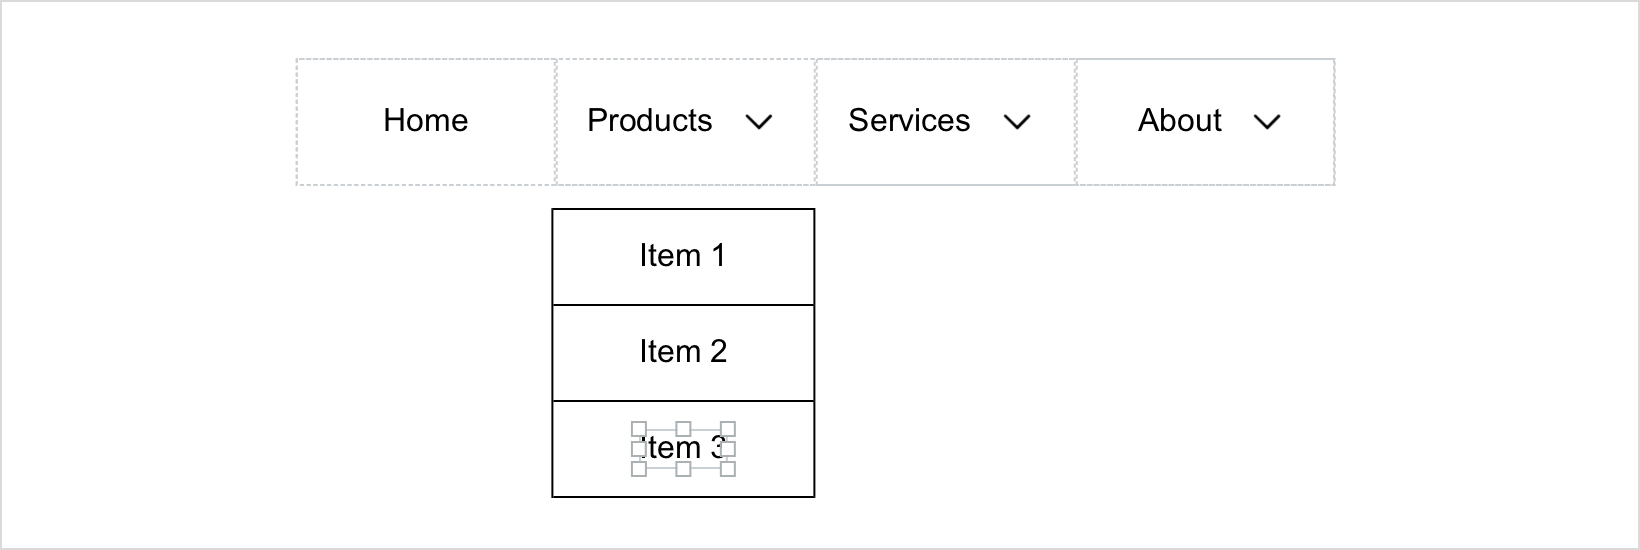
- With the “Table” selected go to the Properties palette and change the color of all border options to light gray and uncheck the inner border that separates the cells.

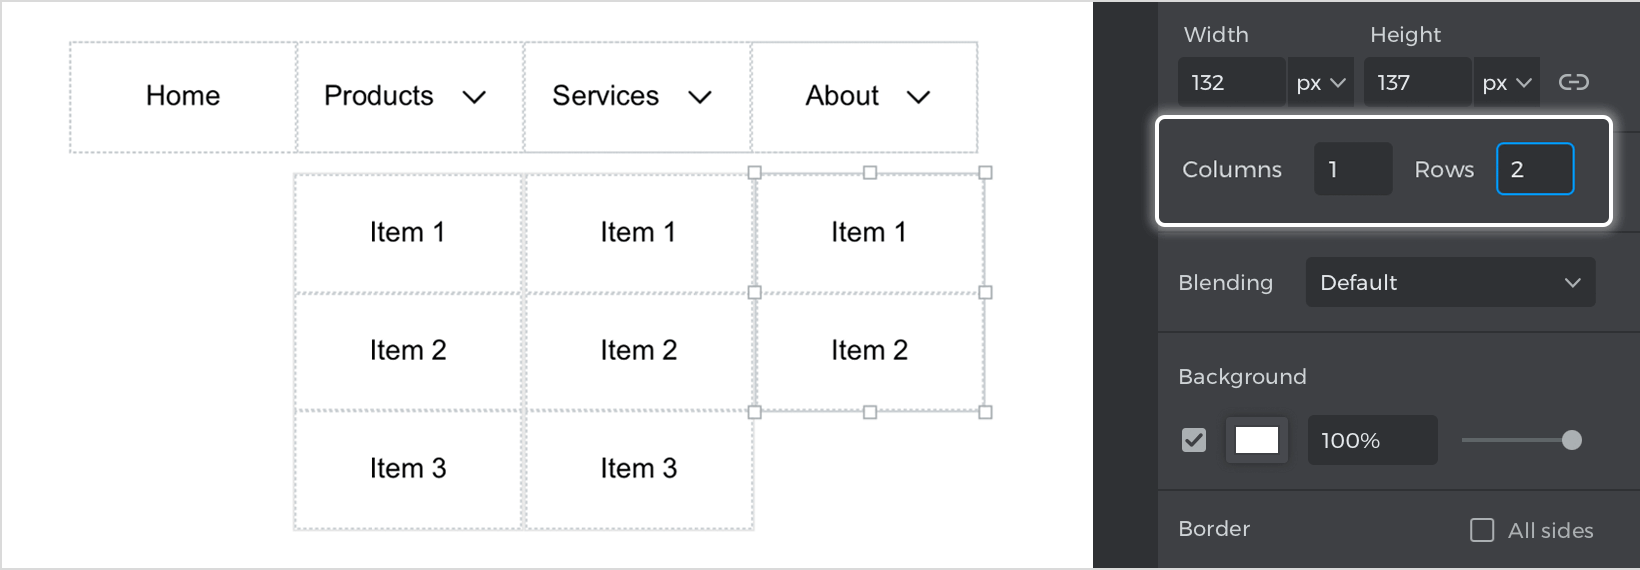
- With the “Table” we created selected, hold alt and drag to duplicate it, place it under “Services” and duplicate once more for “About”. With the “Table” under “About” selected, go to the Properties palette and edit the number of rows to two.

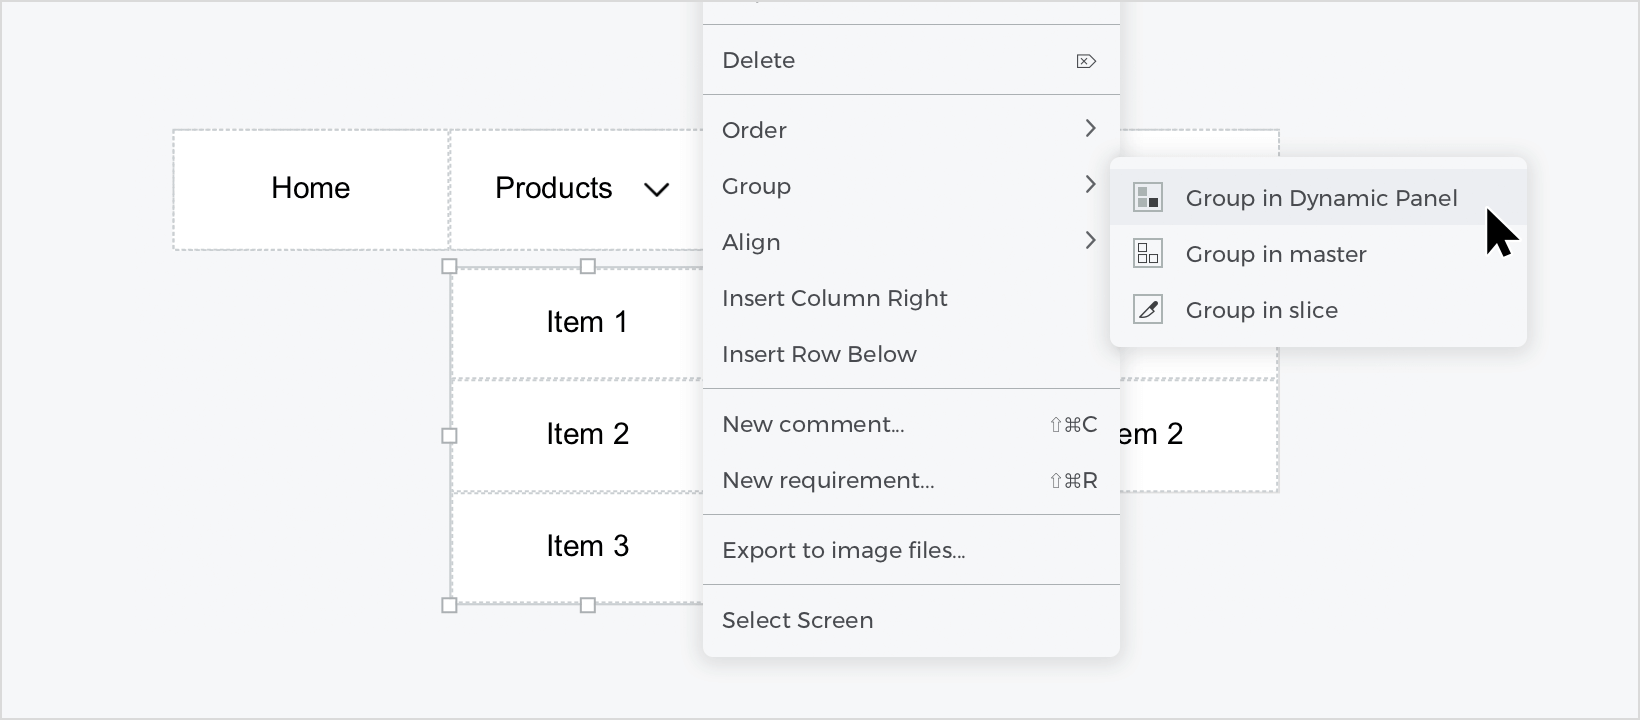
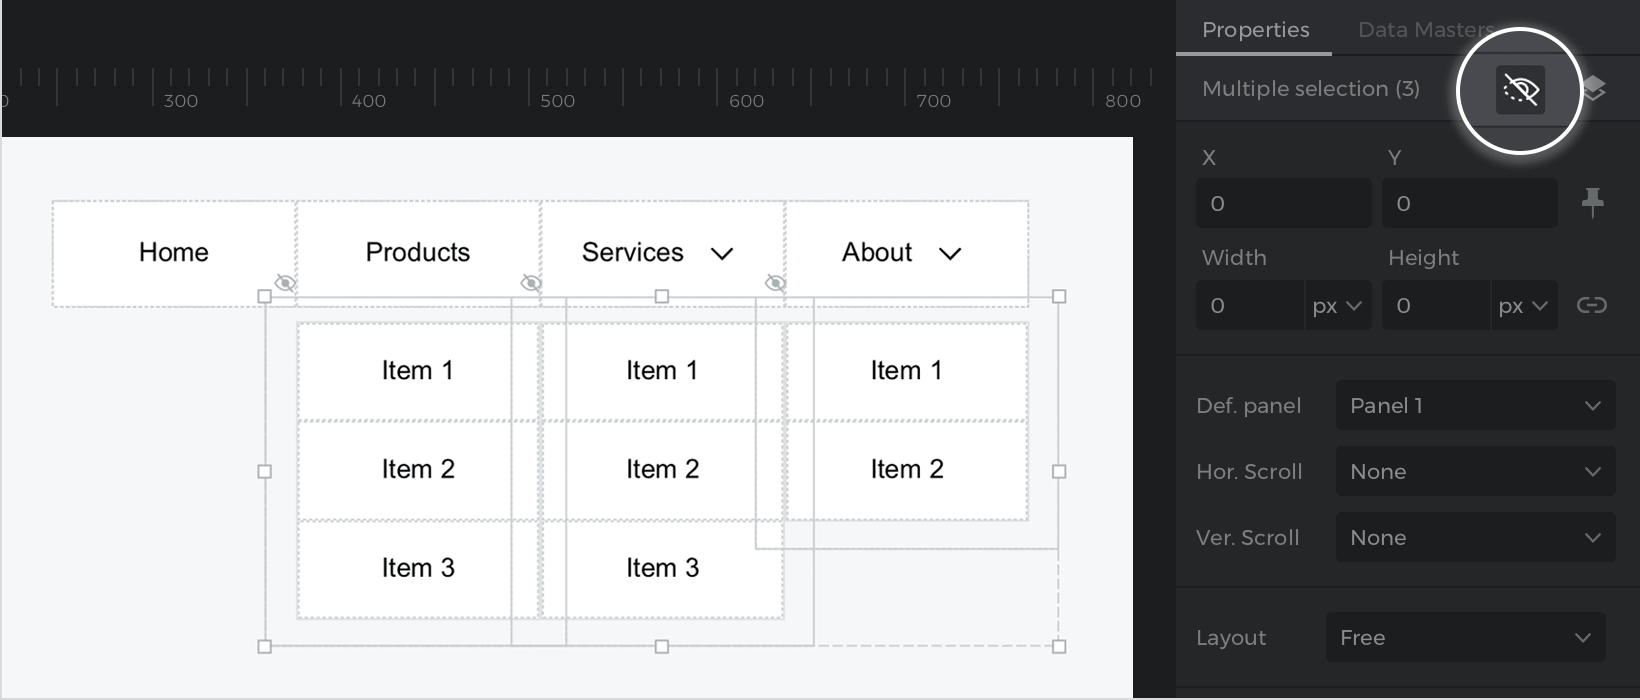
- Select the Items tables one by one, right-click on them, and select the “Group in Dynamic Panel” option.

- Make sure that each “Dynamic panel” overhangs the edge of the table it contains so that the events we create next work correctly.
- Select the three Dynamic panels that work as dropdowns, go to the Properties palette and click on the “Hidden in simulation” icon. The dropdowns will not be visible in simulation by default.


Events
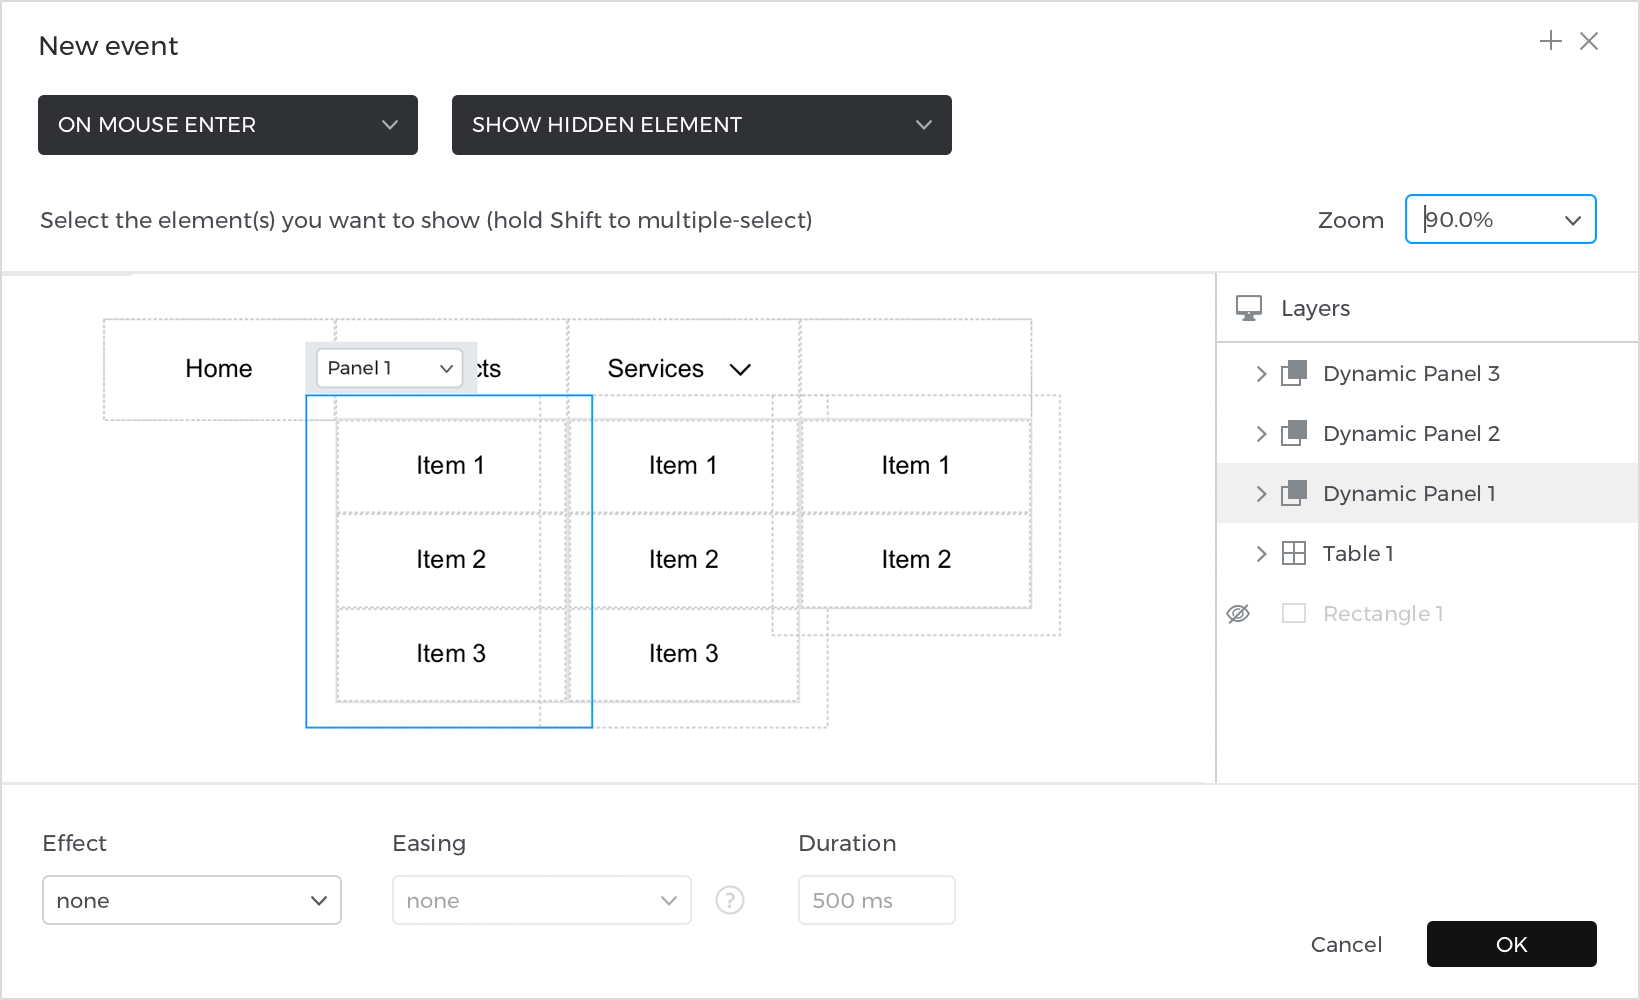
With the “Products” cell selected, go to the Events palette and click on “Add event”. 
- In the dialog box, click on “Choose Trigger”, hover over the “Mouse” section, and select “On mouse enter”.
- In “Choose Action”, select “Show hidden element” and select the “Dynamic panel” that acts as a dropdown for the “Products” option. Click “Ok” to finish creating the event.

With the “Products” cell still selected go to the Events palette and click on the “+” to add an event.
- In the dialog box, click on “Choose Trigger”, hover over the “Mouse” section, and select “On mouse enter”.
- In “Choose Action”, select “Hide element” and select the two “Dynamic panels” that act as dropdowns for the “Services” and “About” options. Click “Ok” to finish creating the event.
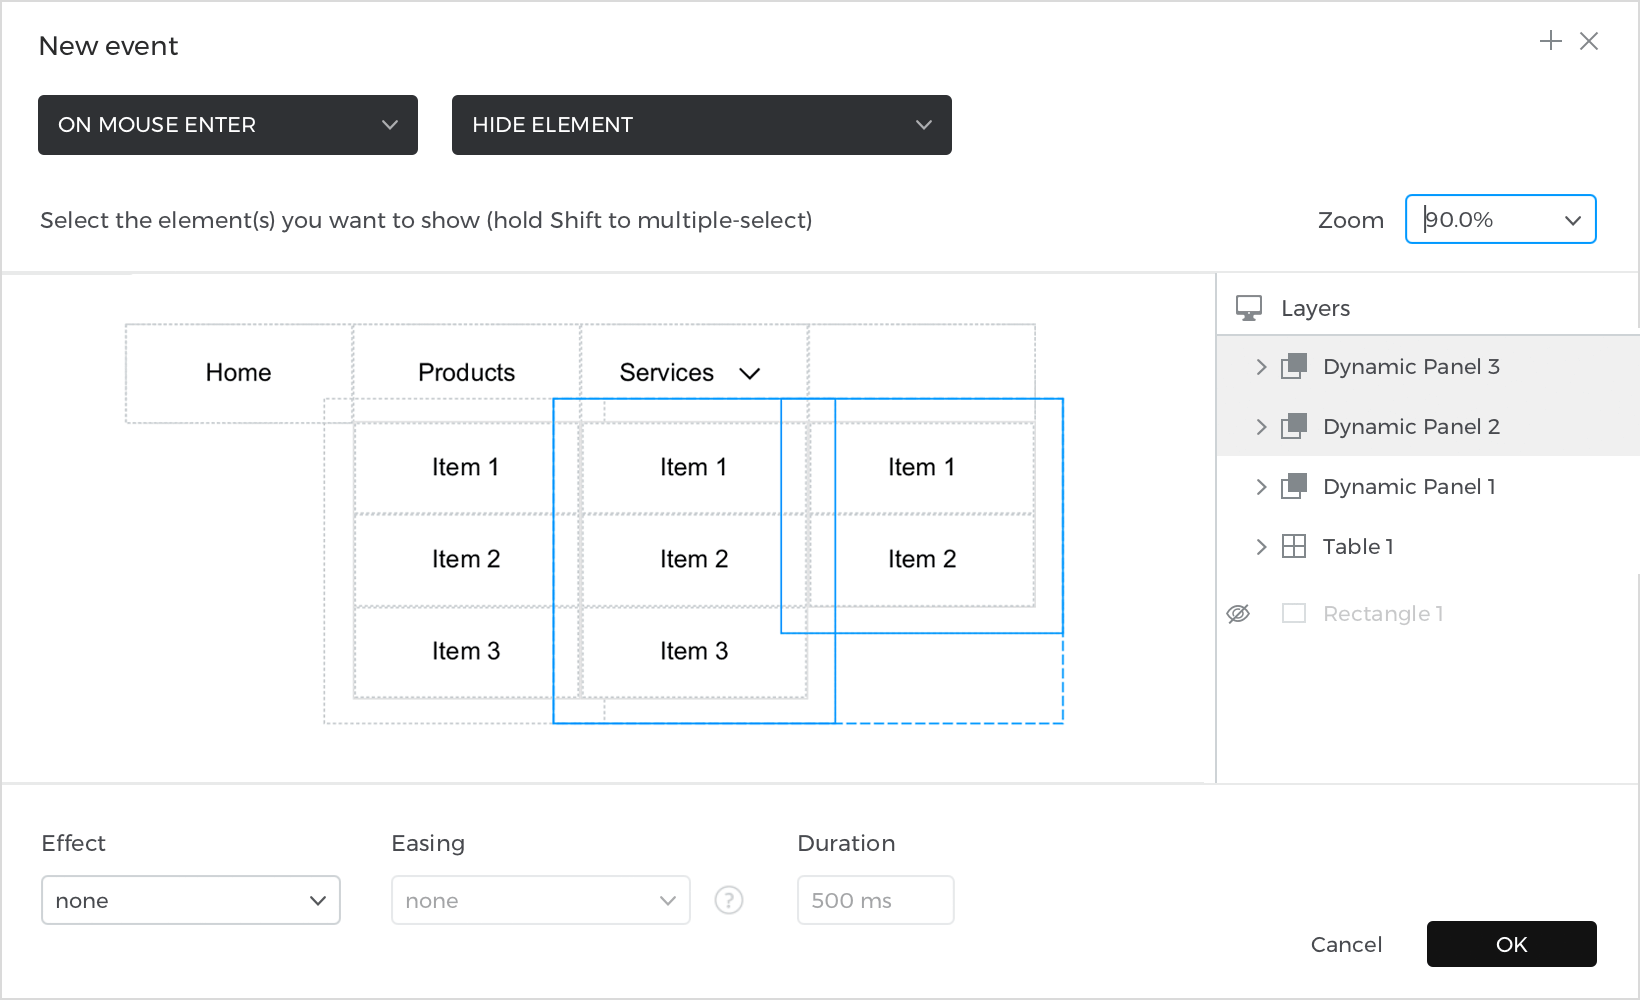

In the Events palette, between the two options, click on the arrow, and change it to the “WITH previous” option, so that both actions are carried out at the same time.
Repeat the events for each top menu option, and its corresponding dropdown. In each case, we must select the “Dynamic panel” that we want to display and those that we want to hide.
Select the “Home” cell and go to the Events palette, click “Add event”.
- In the dialog box, click on “Choose Trigger”, hover over the “Mouse” section, and select “On mouse enter”.
- In “Choose Action”, select “Hide element” and select the three “Dynamic panels” of the options. Click “Ok” to finish creating the event.
Select the “Dynamic panels” of the “Products” option and go to the Events palette, click “Add event”.
- In the dialog box, click on “Choose Trigger”, hover over the “Mouse” section, and select “on Mouse Leave“.
- In “Choose Action”, select “Hide element” and select the same “Dynamic panel”, In this way, when leaving the “Dynamic panel”, it will no longer be displayed. Click “Ok” to finish creating the event.
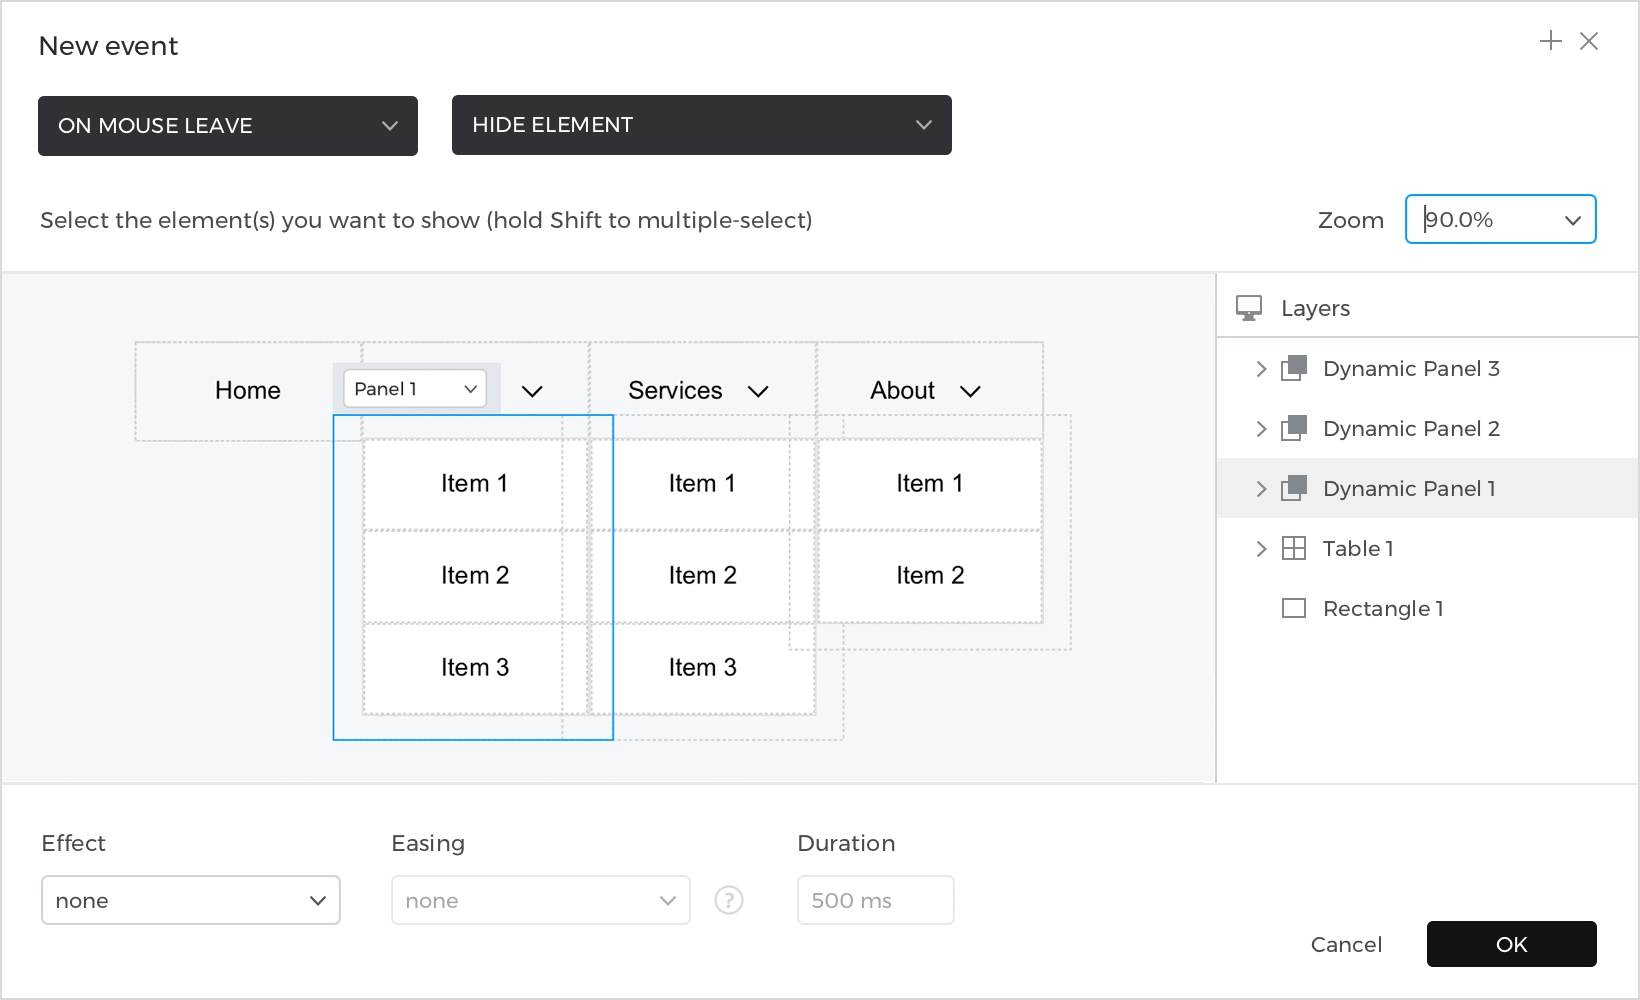

Repeat the same event for each of the “Dynamic panel”.
Select the first cell (Item 1) of the column in the “Dynamic panel” of the “Products” option, go to the Events palette and click on “Add event”.
- In the dialog box, click on “Choose Trigger”, hover over the “Mouse” section, and select “on Mouse Over“.
- In “Choose Action”, select “Change style” and in the drop-down menu “Select style to change” choose background and edit the color. In this way, when hovering over “Item 1”, we will achieve a feedback effect. Click “Ok” to finish creating the event.


With the cell (Item 1) still selected, go to the Events Palette and click on the “Copy all events” button. Then, select each of the cells and click on the “Paste all events” option. The target will be changed automatically.
Simulate your prototype.