How to prototype forms with mandatory fields
This article teaches you how to prototype forms with mandatory fields.
Here’s how you build it:
View
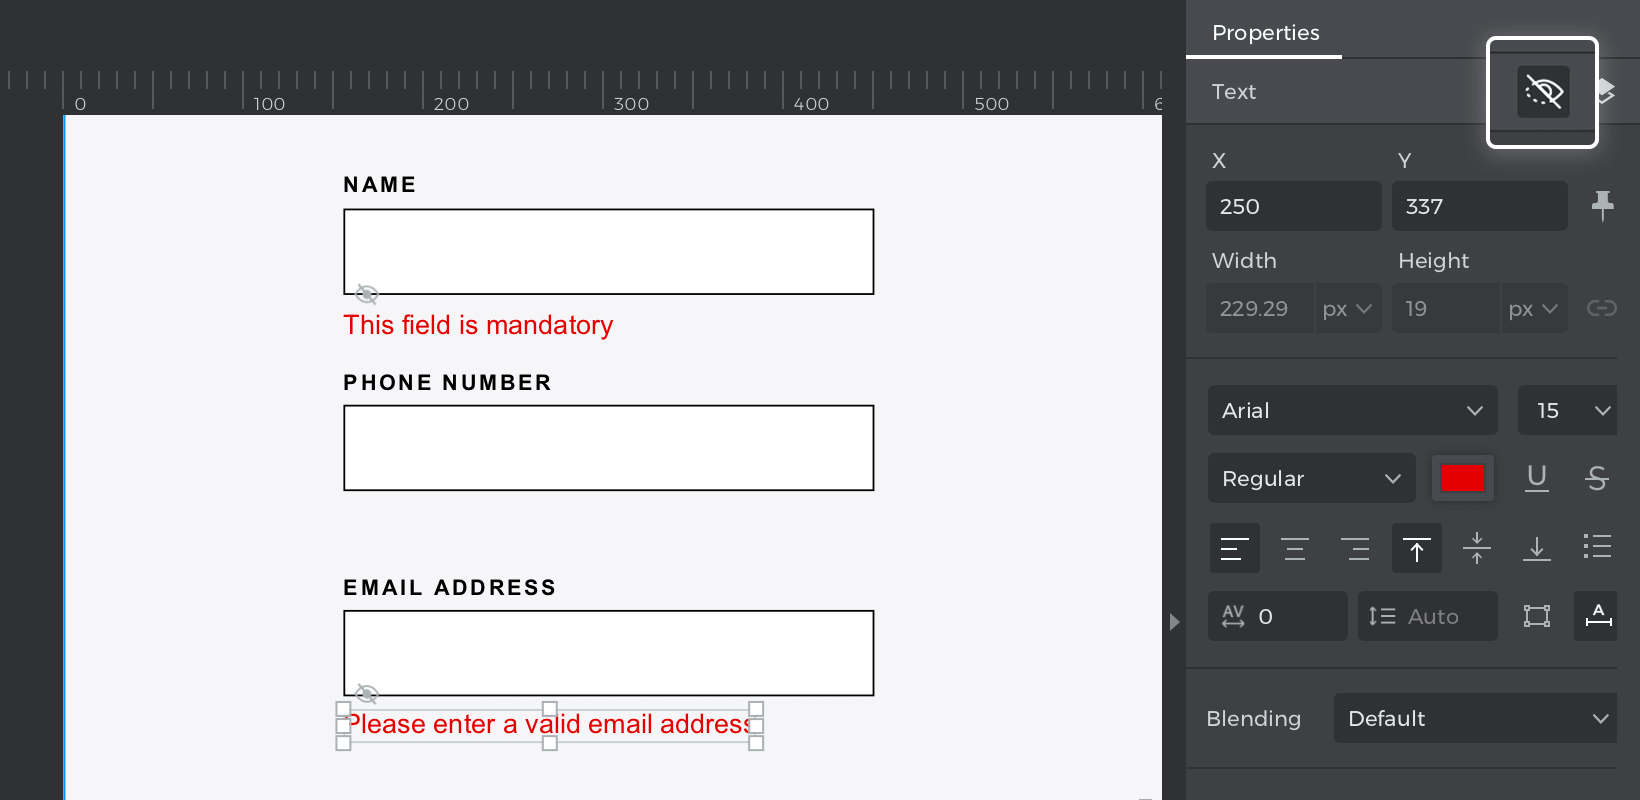
- From the “Interactive input fields”, place three “Input text fields” on the canvas.
- Select “Text” and place one next to each “Input text field” and write “Name,” “Phone number,” and “Email address.”
- Place a new “Text” next to the first “Input text field” and write your error message; this error will check if the first input field is empty; with this text selected, go to the Properties palette and click the “Hidden in simulation” icon.
- Place a new “Text” below your last “Input text field” for the email address validation, go to the Properties palette and click the “Hidden in simulation” icon.
- Place a “Button” below to finish your form.

Events
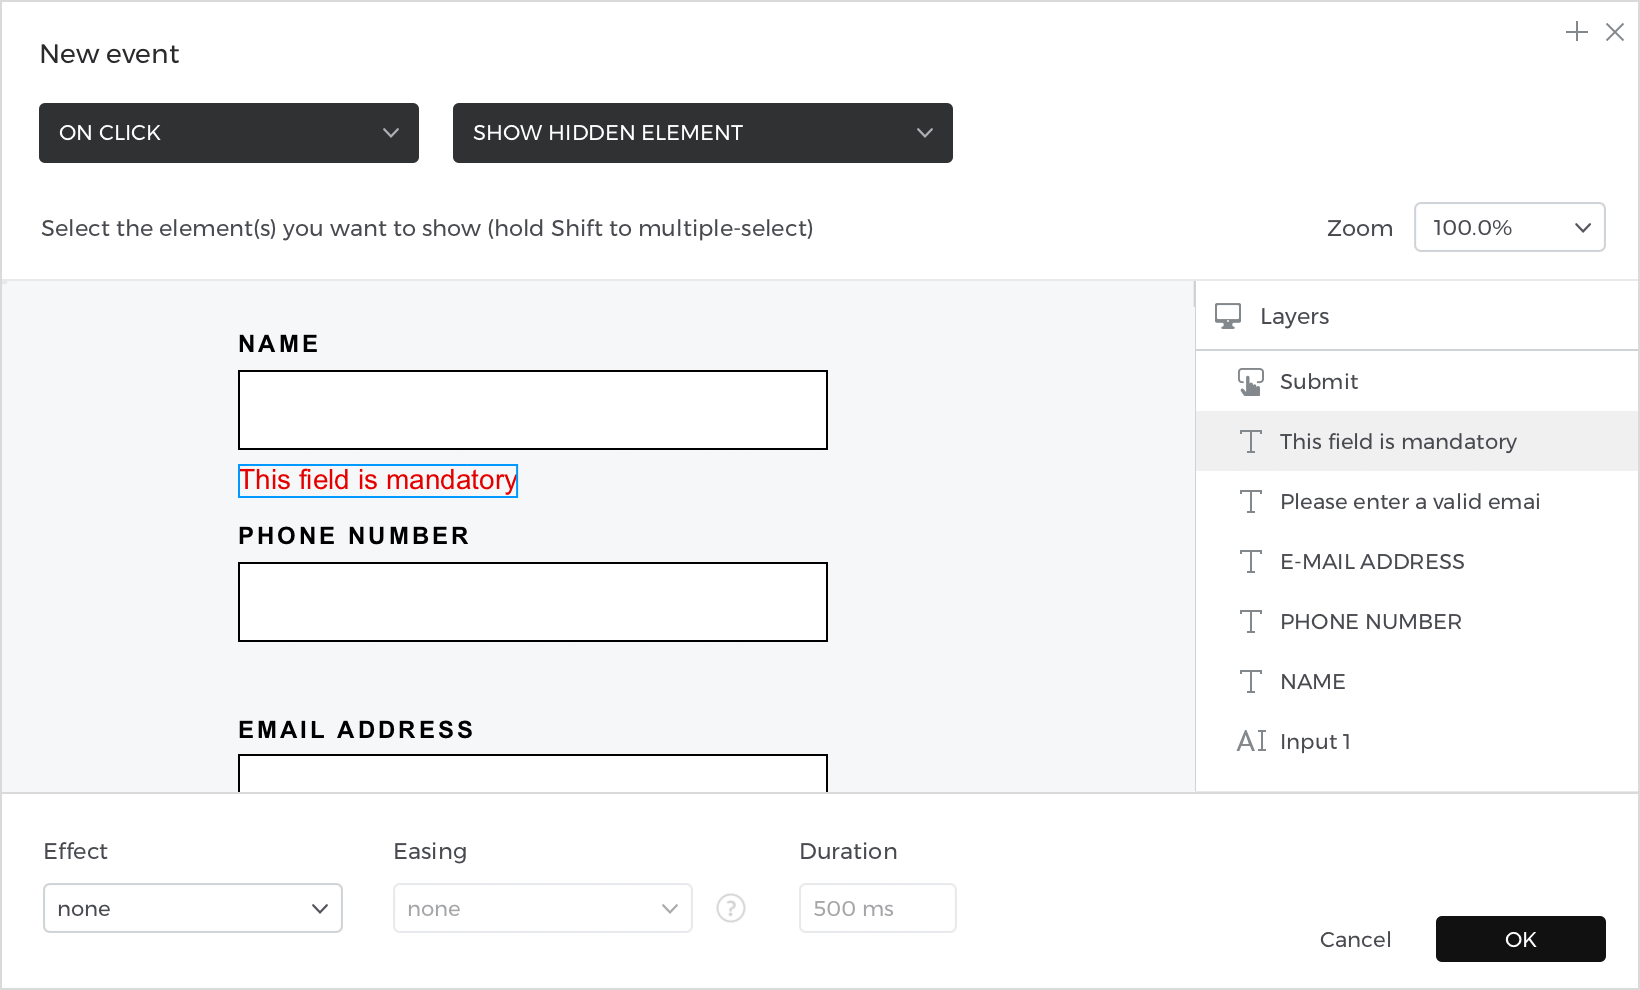
With the “Button” selected, go back to the Events palette and click “Add event.”
- In the dialog box, click “Choose Trigger,” hover over the “Mouse” section, and select “on Click.”
- In “Choose Action,” select “Show hidden element” and select the name validation hidden text. Click “Ok” to finish creating the event.


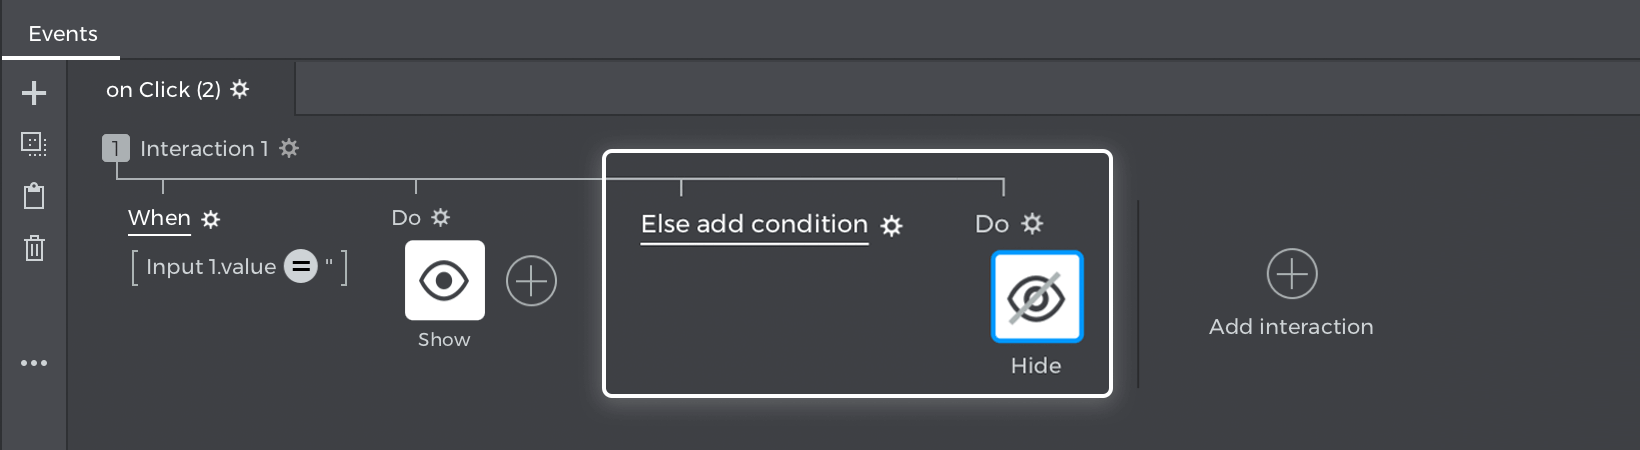
Go to the Events palette and click “Add condition” to open the expression builder.
Drag and drop the name “Input text field” into the open space in the expression; next, drag an “Equals” (=) logic function, and leave the next field empty. When the “Name” input is empty, the error message will be displayed. Click “Ok” to finish building the expression.
Go back to the Events palette and click “Else”; the events dialog will open.
- In the dialog box, click “Choose Trigger,” hover over the “Mouse” section, and select “on Click.”
- In “Choose Action,” select “Hide element” and click on the error message. Click “Ok” to finish creating the event (if the “Name” field is complete, clicking the “Submit” button causes the error message to disappear).

With the “Button” selected, go to the Events palette and click “Add interaction”.
- In the dialog box, click “Choose Trigger,” hover over the “Mouse” section, and select “on Click.”
- In “Choose Action,” select “Show hidden element” and select the email validation hidden text. Click “Ok” to finish creating the event.
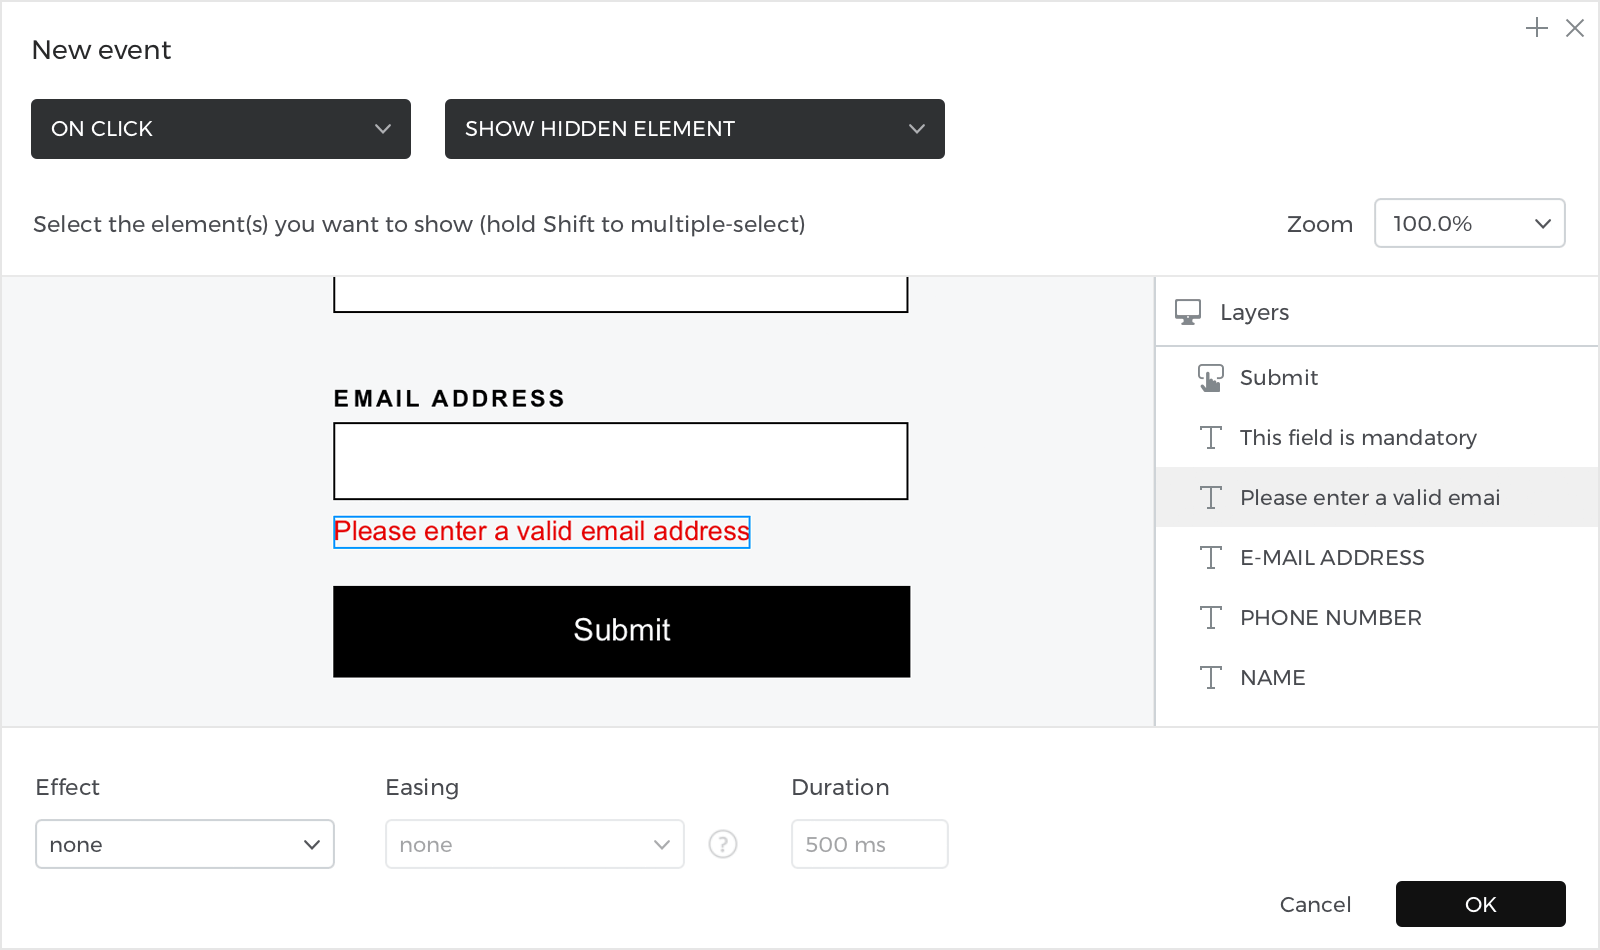

Go to the Events palette and click “Add condition” to open the expression builder.
Drag and drop a “Not” function, then drag the “RegExp” logical function, and in the following field, pull the email validation “Input text field,” last, from the “Constant” tab the “@” regular expression. Click “Ok” to finish building the expression.
Go back to the Events palette and click “Else”; the events dialog will open.
- In the dialog box, click “Choose Trigger,” hover over the “Mouse” section, and select “on Click.”
- In “Choose Action,” select “Hide element” and click on the email validation error message. Click “Ok” to finish creating the event (if the “Email” field is complete, clicking the “Submit” button causes the error message to disappear).


Simulate your prototype.