How to move from one list to another
In this example, you will learn how to move items from one list to another.
Here’s how you build it:
View
- From the “Interactive input fields”, place two “Multiselect list” next to each other on the canvas.
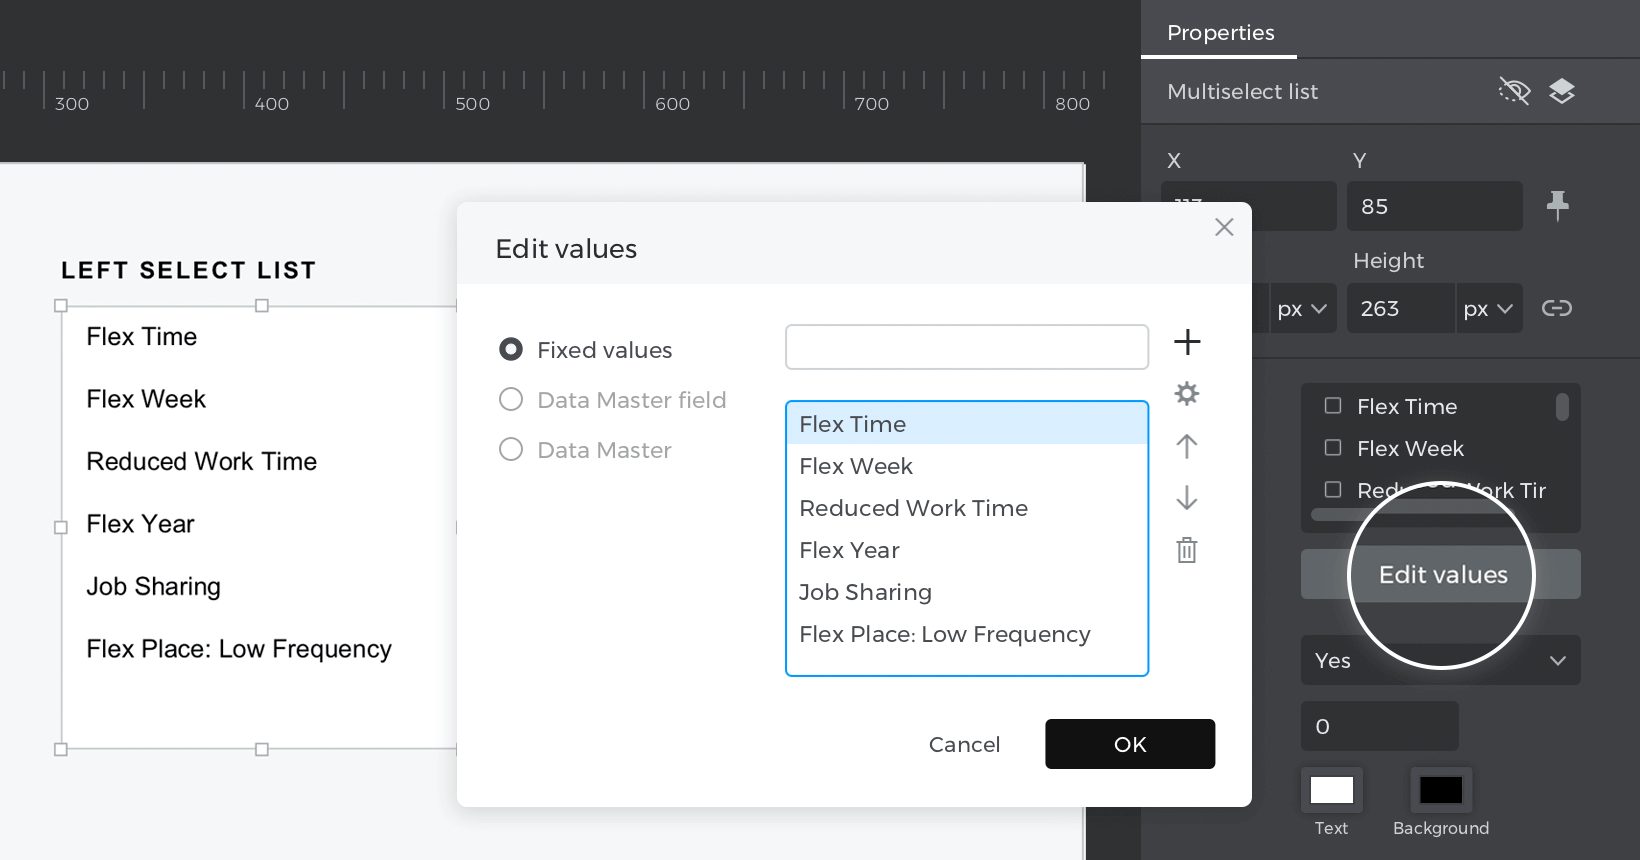
- With the left side “Multiselect list” selected, go to the Properties palette and edit the values; you can also add values to the default.
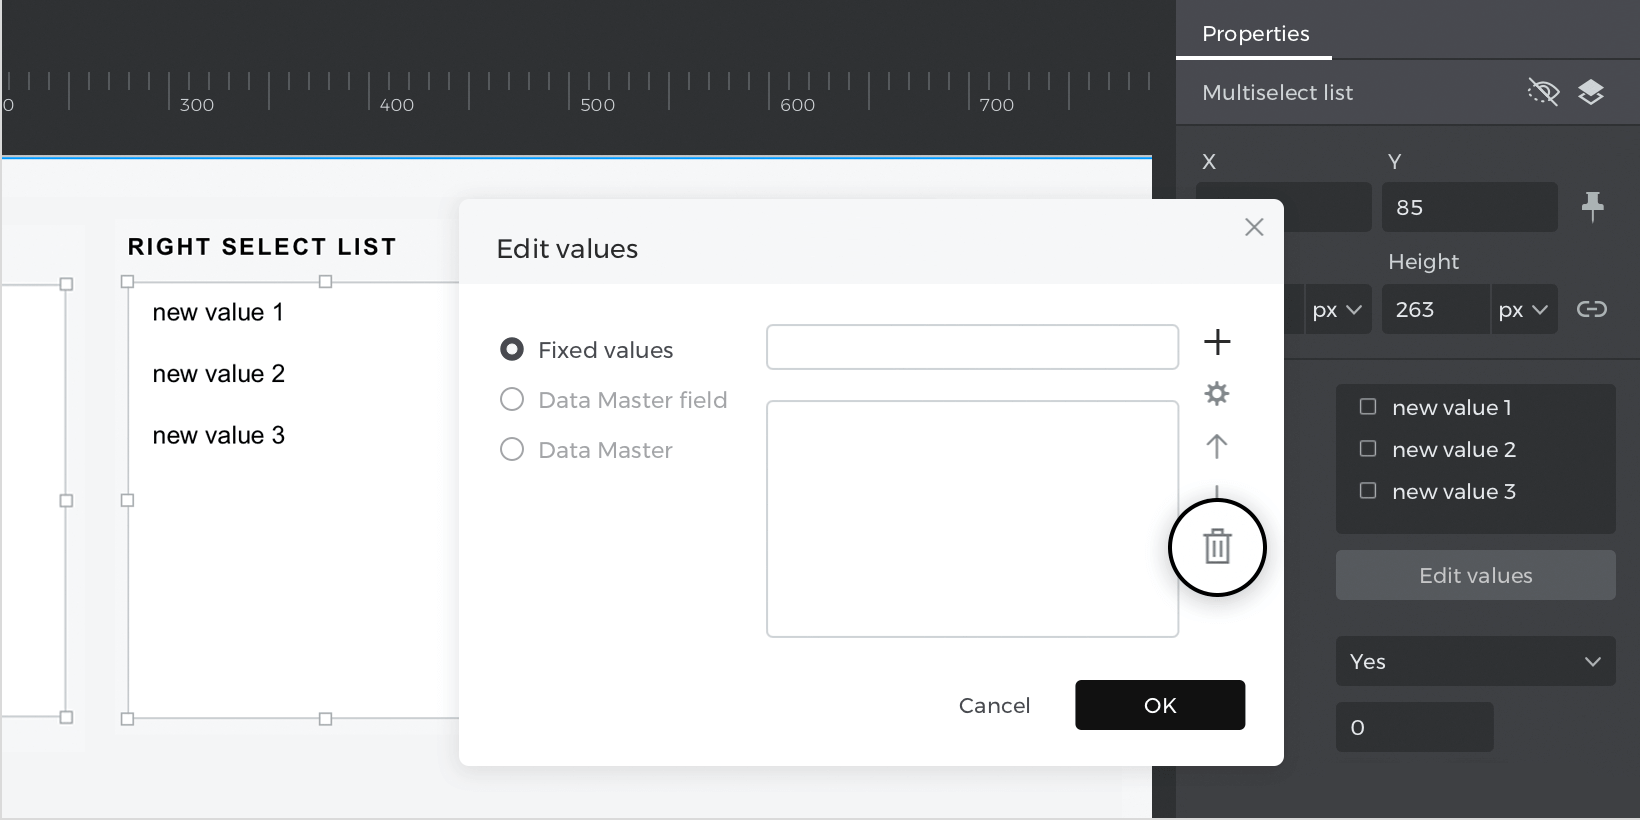
- With the right side “Multiselect list” selected, go to the Properties palette and delete the default values to leave it empty.

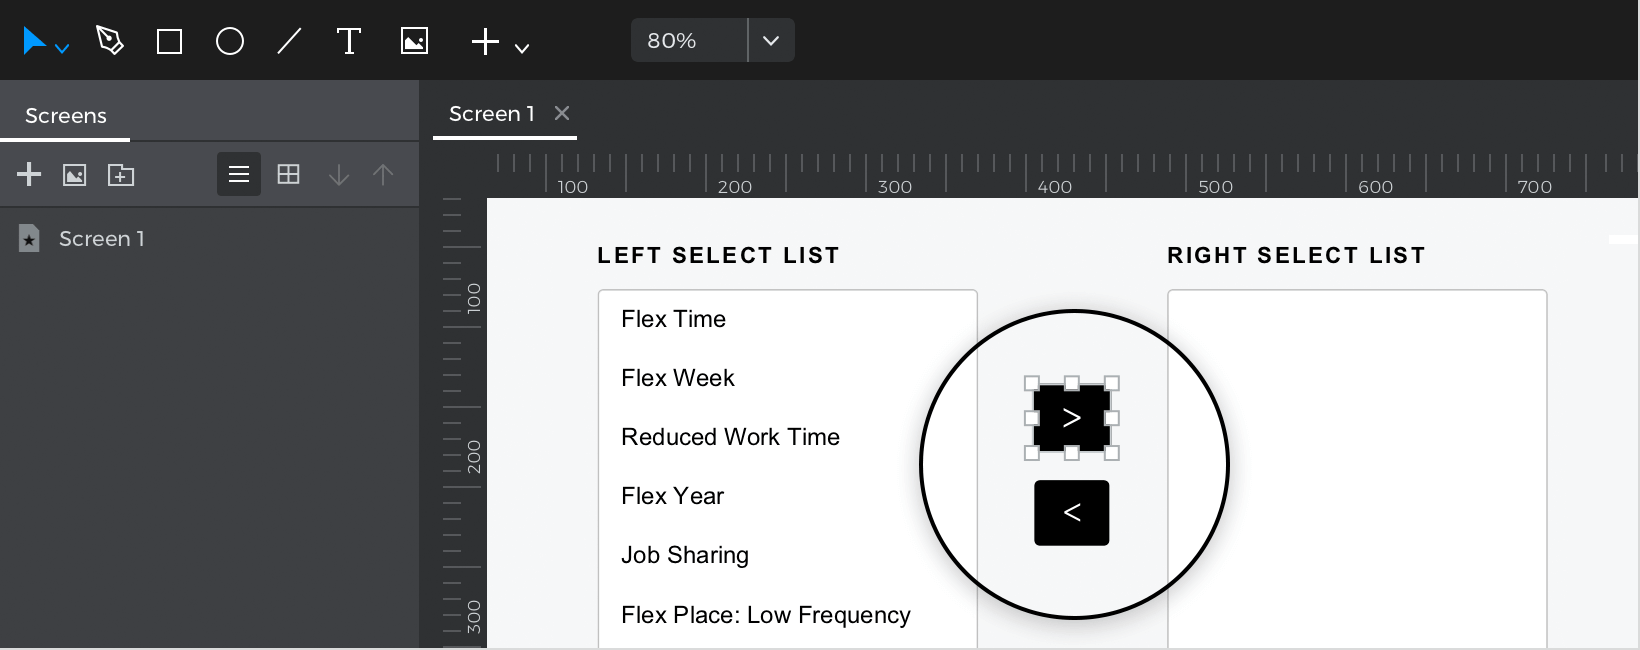
- In between the “Multiselect list”, place two buttons, one below the other, and give them the value “<” and “>”.


Events
With the “>” button selected, go to the Events palette and click “Add event”. 
- In the dialog box, click the “Choose Trigger” and select “on Click”.
- In “Choose Action”, select “Set value to an element” and click on the right side “Multiselect list”.
- Select the “Calculated” radio button for the value and click “Add expression”.

- In the expression builder, drag and drop the right side “Multiselect list” in the first field with “all values” in the value below; next, place the function “Data +”.,and for the last area, drag and drop the left “Multiselect list” with “selected” in the value below. Click “Ok” and “Ok” to finish creating the event.

With the same button selected, go to the Events palette and click on the “+” to add a new event.
- In the dialog box, click on “Choose Trigger”, hover over the “Mouse” section and select “on Click.”
- In “Choose Action”, select “Set value to an element” and click on the left side “Multiselect list”.
- Select the “Calculated” radio button for the value and click “Add expression”.
- In the expression builder, drag and drop the left side “Multiselect list” in the first field with “all values” in the value below; next, place the function “Data -” and for the last area, drag and drop the left side “Multiselect list” again with “selected” in the value below. Click “Ok” and “Ok” to finish creating the event.
With the “<” button selected, go to the Events palette and click “Add event”.
- In the dialog box, click the “Choose Trigger,” hover over the “Mouse” section and select “on Click”.
- In “Choose Action”, select “Set value to an element” and click on the left side “Multiselect list”.
- Select the “Calculated” radio button for the value and click “Add expression”.
- In the expression builder, drag and drop the left side “Multiselect list” in the first field with “all values” in the value below; next, place the function “Data +”, and for the last area, drag and drop the right side “Multiselect list” with “selected” in the value below.
Click “Ok” and “Ok” to finish creating the event.
With the same button selected, go to the Events palette and click on the “+” to add a new event.
- In the dialog box, click the “Choose Trigger” hover over the “Mouse” section and select “on Click”.
- In the “Choose Action” drop-down menu, select “Set value to an element” and click on the right side “Multiselect list”.
- Select the “Calculated” radio button for the value and click “Add expression”.
- In the expression builder, drag and drop the right side “Multiselect list” in the first field with “all values” in the value below; next, place the function “Data -” and for the last area, drag and drop again the right side “Multiselect list” with “selected” in the value below. Click “Ok” and “Ok” to finish creating the event.
Simulate your prototype.