How to design a selectable row list
In this example, you will learn how to create a data list where you can change the color of the row to give it a selection effect.
How to build it:
View
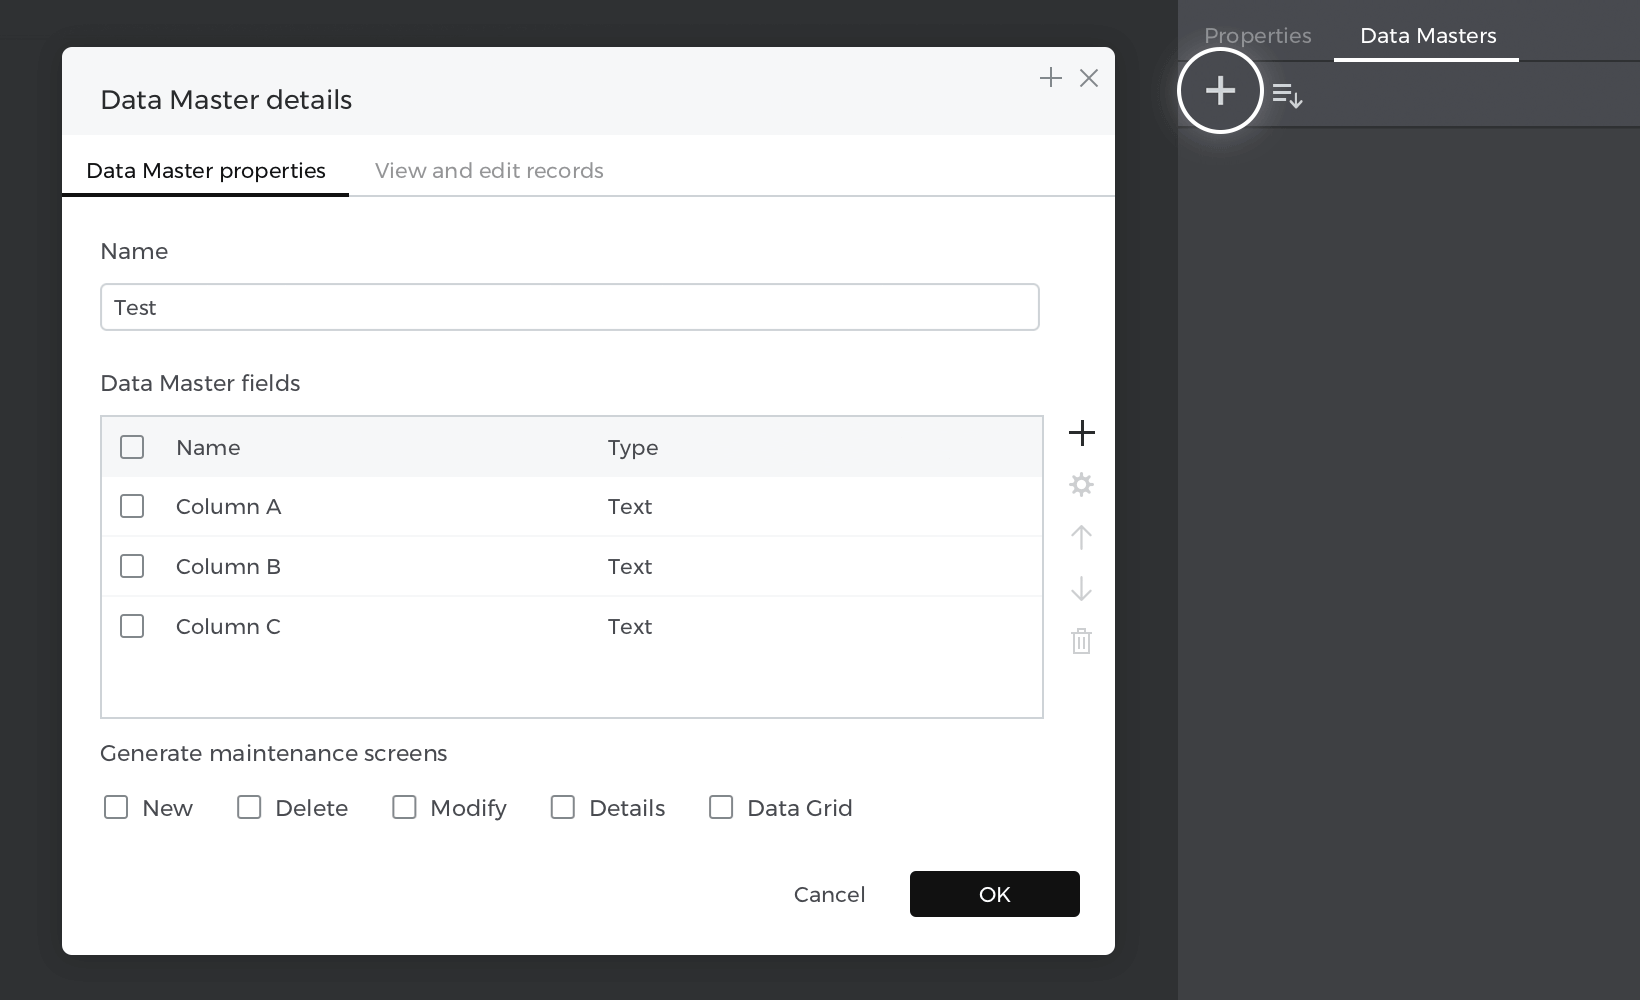
- Go to the Data masters palette and create a new “Data master”, name it “Test” and make three attributes: “Column A”, “Column B” and “Column C”, then press “Ok.
- Right-click on the “Data master” you’ve just created and select “View and edit records”, write your example data there, and press “Ok”.


- Select “Data list” from the “Dynamic content” section and place it on the canvas; the “New data list” window will be enabled; give your list a name, next choose the “Data master” you have created before and select all the attributes.


Events
Place the mouse cursor at the left of the row until it turns into an arrow pointing to the right and click to select the entire row, go to the Events palette and click “Add event”.
- In the dialog box, click on “Choose Trigger”, hover over the “Mouse” section, and select “on Click”.
- In the “Choose Action”, select “Change style” and click on the “Data list”.
- Pick the background color odd and even as default. Click “Ok” to finish creating the event.
Go to the Events palette again and click the “+” to add a new event.
- In the dialog box, click on “Choose Trigger”, hover over the “Mouse” section, and select “on Click”.
- In “Choose Action”, select “Change style” and select the current row in the “Data list”.
- Pick a style background color and set the color blue. Click “Ok” to finish creating the event.
Simulate your prototype.