The Requirements module
The Requirements module offers a complete Requirements Management Tool inside each of your prototypes. It allows to define software requirements in text and even comply with CMMi specifications. These Requirements can be linked to Scenarios or Screens or even elements within both defining a level of traceability never seen in any other softwares. This module is also a point of integration with other tools like JIRA or Azure DevOps.
The Requirements module overview

- The Requirements toolbar, where you can find the basic options for requirements plus the check in/out controls if it’s a shared prototype.
- This section contains a powerful search box to filter out the list of the requirements below. The fields in this search box can be customized.
- This section lists all the requirements in the prototype or the ones selected in your current search.
- The Requirements Details palette displays all of the information related to the selected requirement. Here you can modify information related to the selected requirement, such as the Author, Name, Type, Source, and Description.
At the bottom of this palette, you’ll see three options:
- New version – creates a new version of the selected requirement with the new information introduced.
- Save changes – saves any changes made to a modified requirement
- Activate – reactivates an older version of a requirement to become the newest and active version
The Requirements module toolbar
Create and customize requirements from the toolbar:
- Create new requirement – this option will launch a dialog to create a new requirement in this prototype. This new requirement won’t be linked to any element in the prototype.
- Import requirements to your prototype from a .csv file – you can import requirements from a CSV file into your prototype as long as the column names match the fields of the requirements.
- Export requirements to a .csv file – Exports all the requirements of the prototype into a CSV file in case you want to import them in third party softwares.
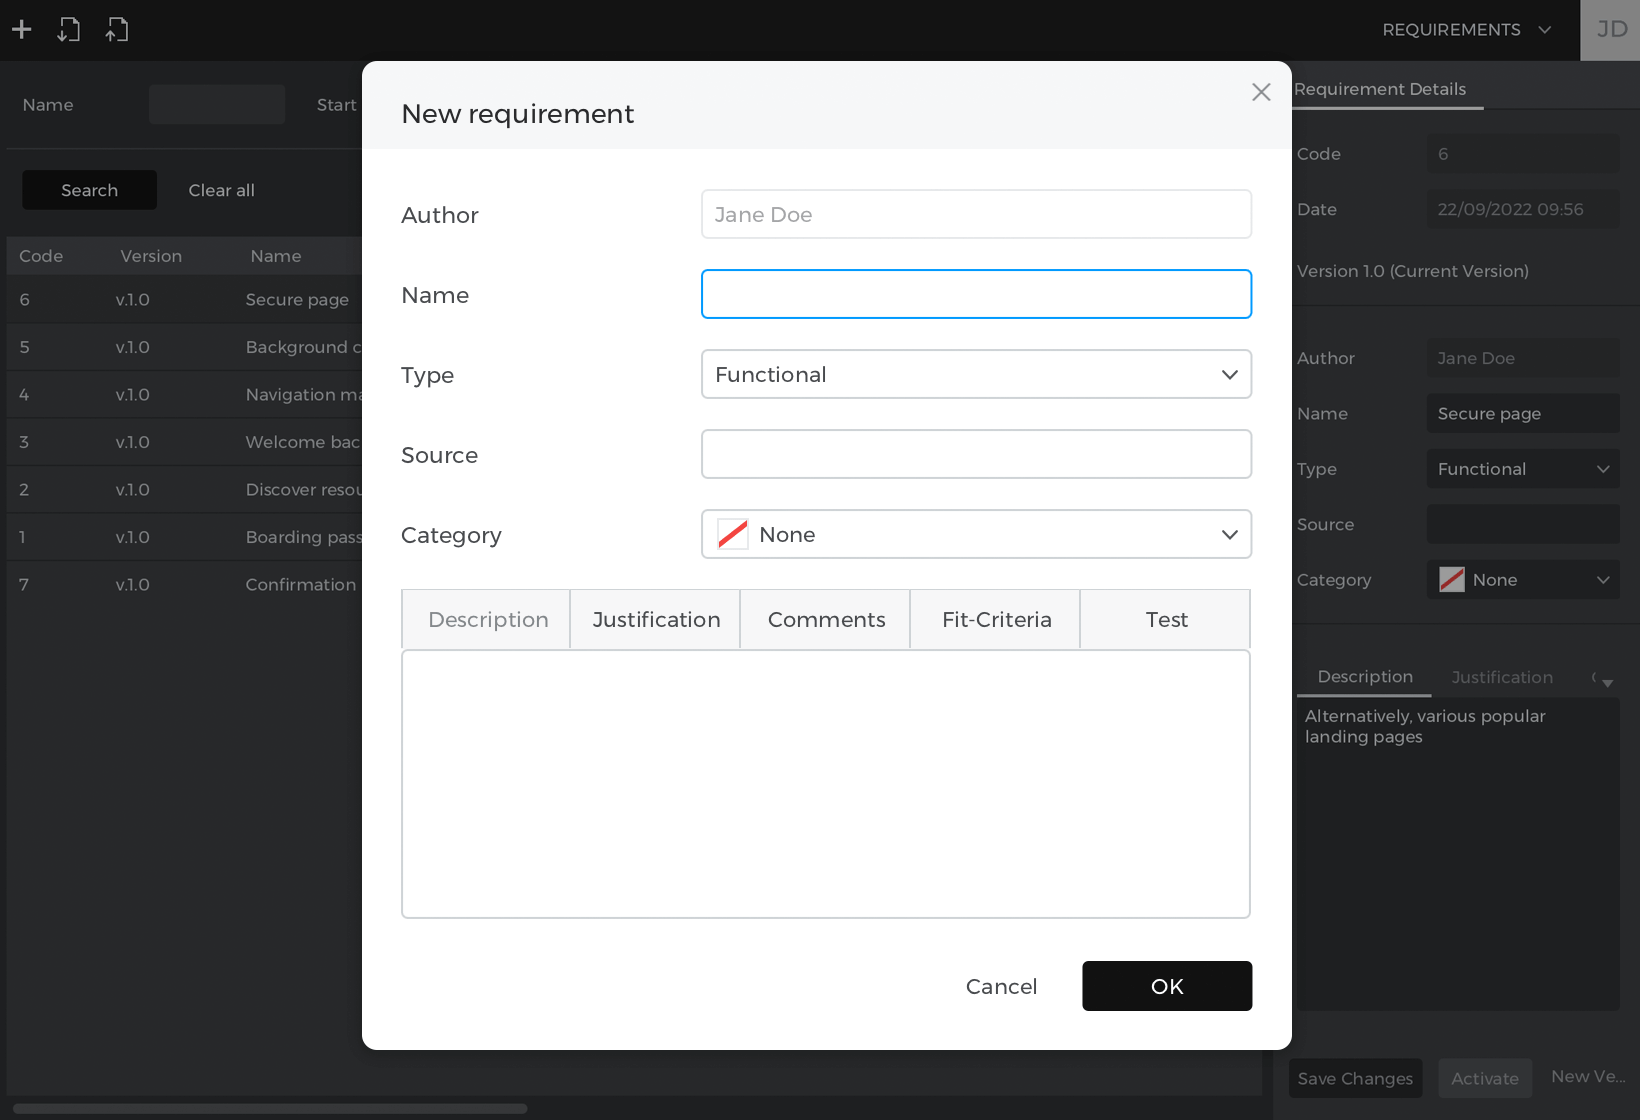
Creating a new requirement
To create a new requirement:
- Click the “New Requirement” icon in the toolbar.
- In the dialog that appears, fill in the details of your requirement (e.g. Author, Name, Type, and any other field that you have defined). Then click “OK”. The requirement that you have just created will now appear in the list of requirements.


Creating a new requirement for a specific Justinmind element
To create a requirement for a specific Justinmind element:
- Go to the User Interface module and select the UI element in the Canvas that you wish to associate a requirement to.
- Right click on the element and select “New Requirement”. As above, fill in the details of your requirement.
Associating requirements to elements
You can associate a requirement to elements in a Screen or a Scenario. To do so, first go to the Screen or the Scenario you want, activate the Requirements palette and click on the ‘bubble’ icon in that palette to show all the requirements. Than, simply drag and drop the requirement from the requirements palette to the element(s) in the Canvas.
Requirement options
Once you have created your requirements, you can modify them in the Requirements module. To do so, right click on a requirement from the list of requirements. The following menu will appear:
- Modify – edit the details of the selected requirement
- Show component – go to element associated with this requirement in the User Interface module (only available for requirements associated to UI elements)
- Category – click to select a category. See “Requirement categories” below for more information.
- Delete – delete the selected details in the list. Note that you can only delete one detail at a time.
Requirement categories

- Accepted – click to label requirement as “accepted”
- Confirmation required – click to label requirement as “confirmation required”
- Purposed – click to label requirement as “purposed”
- Revised – click to label requirement as “revised”
- Discarded – click to label requirement as “discarded”
- None – click to revert requirement to default (no label)
- Edit Legend – click to configure the categories’ labels and colors
Customizing requirements
In addition to the default requirements fields, you can create an unlimited number of additional requirements fields and customize them as required for your prototype.
You can create custom requirements fields for prototypes in two ways:
You can customize requirements fields for individual prototypes by configuring requirements on a per-prototype basis. To do so:
- Go to the “Requirements configuration”, from the “Justinmind” main menu option for Mac or “File” for Windows.
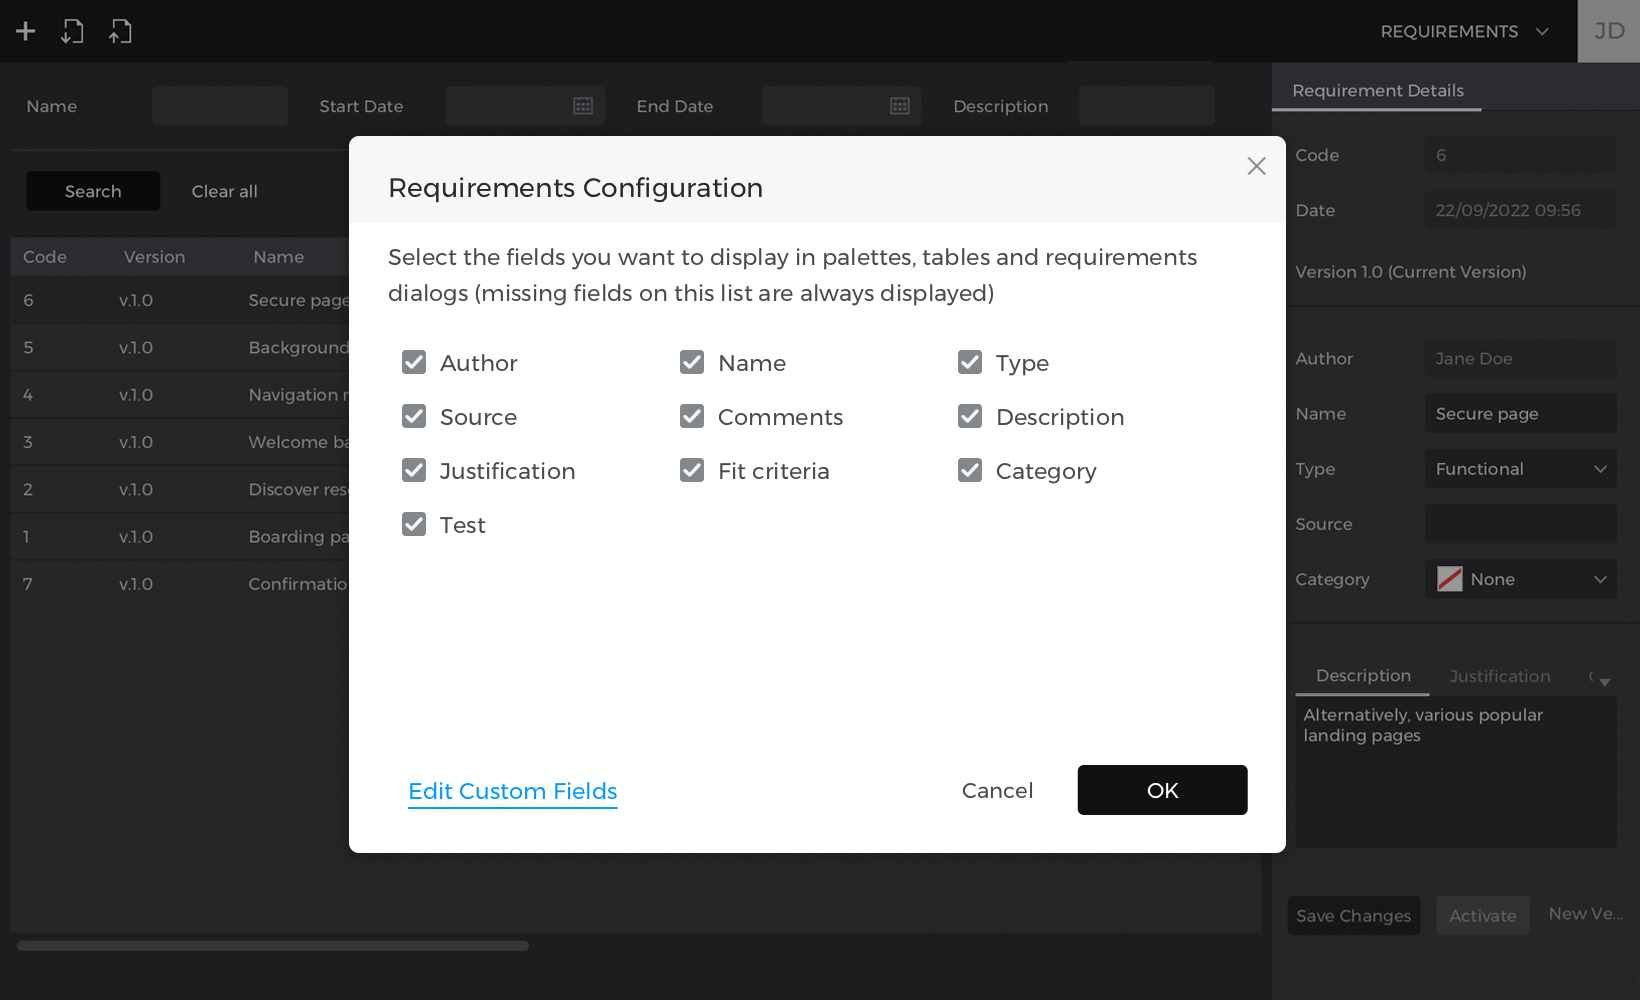

- At the bottom of the dialog that appears, click the “Edit Custom Fields” link.Click “Add Custom Field” to create an additional requirements field to your prototype. You can add, rename, hide or delete them as necessary. However, you won’t be able to hide default fields with this option. Click “OK”. Back in the “Requirements configuration” dialog, you’ll see your new requirements field appear.

You can also set and customize master requirement fields, so that all of your prototypes will take on the changes. To do so, select “Preferences” from the “Justinmind” main menu option for Mac or “File” for Windows. In the dialog that appears, go to “Requirements”. There you can add an unlimited number of additional requirements fields, as well as rename, hide or delete them.