The comments module
The Comments module contains all the comments that have been creating manually in the prototype or that reviewers have added in the published version. It’s a convinient way to see all the comments that might be in different screens or scenarios all listed together in case you want to jump to one of those conversations in the prototype.
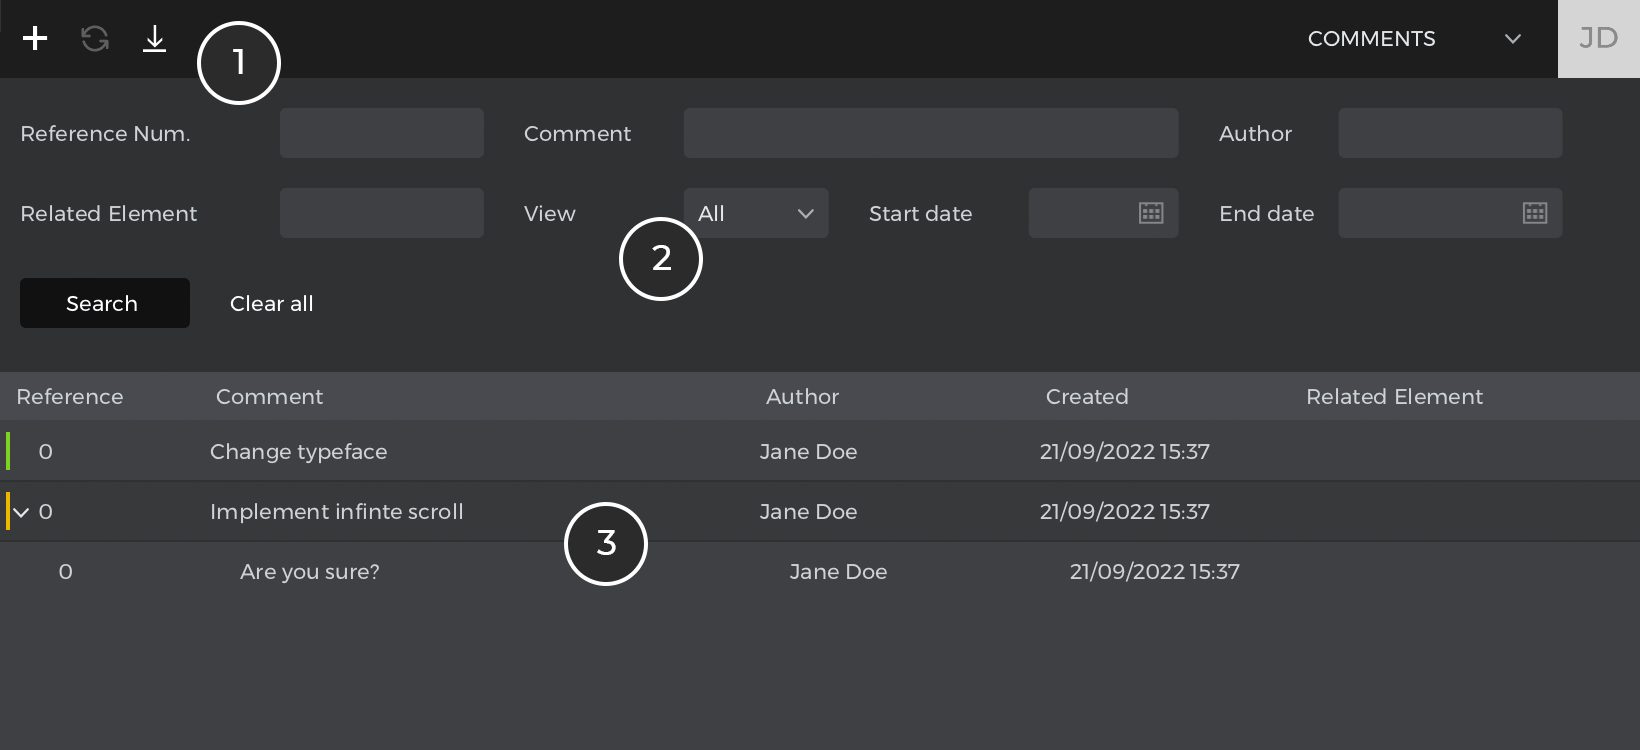
The comments module overview

- The toolbar: In the toolbar you can find the basic options for the entire set of comments. You can create a new comment which won’t be linked
to any specific element in your prototype. You can also refresh the list of comments with the ones added by the reviewers if you have this prototype published. And finally you can import comments from other published prototypes to consolidate the feedback in one prototype. - Choose which comments to display by filtering the list by the text of the comment, related components, authors, dates etc.
- A list of all the prototype’s comments or those displayed upon filtering the comments
If you right click on a comment (ctrl+click in Mac) you will see an additional set of options for the comment/s selected.
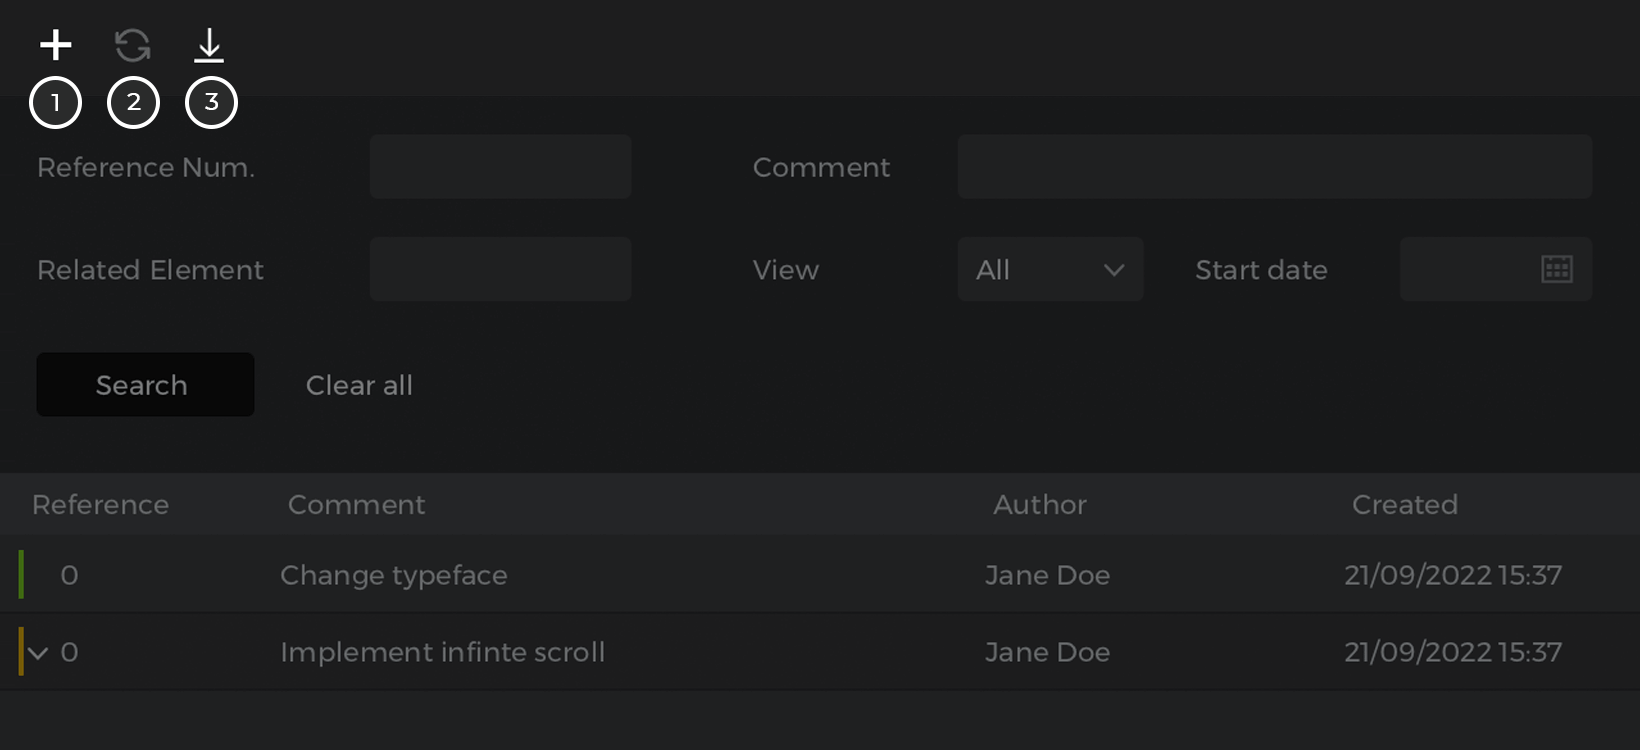
The comments toolbar
The comments toolbar contains most of the prototyping editing options available in the User Interface module, plus two additional options specific to the Comments module:
- New comment: opens a dialog to create a new comment. This comment won’t be linked to any screen or scenario.
- Refresh comments: synchronizes the current comments with the ones introduced by reviewers of a shared prototype. Learn more here.
- Import comments: allows to import comments from a different prototype that has been published in the account. This is useful when you publish different copies of the same prototype to share it with different groups of reviewers. This toolbar will also display additional options if this is a synchronized prototype.
Advanced operations for your comments
If you right click (ctrl+click in Mac) on a comment you will see this set of options:
- Reply: creates a comment as a reply to the selected comment
- Modify: edits information (e.g. author) of the selected comment and it’s also used to see details about the comment such as the attachements if there are any.
- Show component: jumps to the element linked to this comment. Elements such as screens, scenarios or visual elements inside a screen.
- Create Requirement: creates a new requirement using the information on this comment
- Category: changes the color of the selected comment. There is a set of categories by default but you can customize that list using the ‘Edit legend’ option.
- Delete: deletes the selected comment. You can delete more than one comment at once.
Synchronizing reviewer comments in your prototype
If you have shared your prototype to your online account and reviewers have left comments on your prototype, you can synchronize and update all comments in the Justinmind editor.
To do so, go to the Comments toolbar and select the “Refresh comments”. A dialog will appear prompting you to either replace or copy comments that have the same ID. Select the preferred action from the drop-down. You can also assign the new comments a category within this dialog. Then, click “OK”.
Visualizing a UI element associated with a comment
To visualize a UI element associated with a comment in the User Interface module, go to the Comments palette. Right click on the relevant comment. Select “Show component” from the menu.
On the Canvas, the associated UI element will appear selected.