Pinned elements
Elements are able to stay in the same position on the screen when the user is scrolling up or down. This is called pinning and you can use it to create Parallax effects with floating labels, centered content, sticky headers, and much more.
To pin an element:
- Select the element of your choice, go to the Properties palette and click on the pin needle in the upper right section of the palette. This will make the ‘X’ and ‘Y’ parameters editable.
- Using the dropdown, select the type of pin position you want for the element. You can add margin in px from the pinned position if you’d like some spacing from the pinned position.
Pin position options
The following are the options for pinning an element. The X and Y options can be combined so then you can pin an element to the top and to the left.
X Axis
- Not Pinned (default): the element will not be pinned; it will not move with the screen
- Pin left: the element will be pinned to the left of the screen
- Pin center: the element will be pinned to the center of the screen
- Pin right: the element will be pinned to the right of the screen
Y Axis
- Not Pinned (default): the element will not be pinned; it will not move with the screen
- Pin top: the element will be pinned to the top of the screen
- Pin center: the element will be pinned to the center of the screen
- Pin bottom: the element will be pinned to the bottom of the screen
How to Pin Multiple Elements
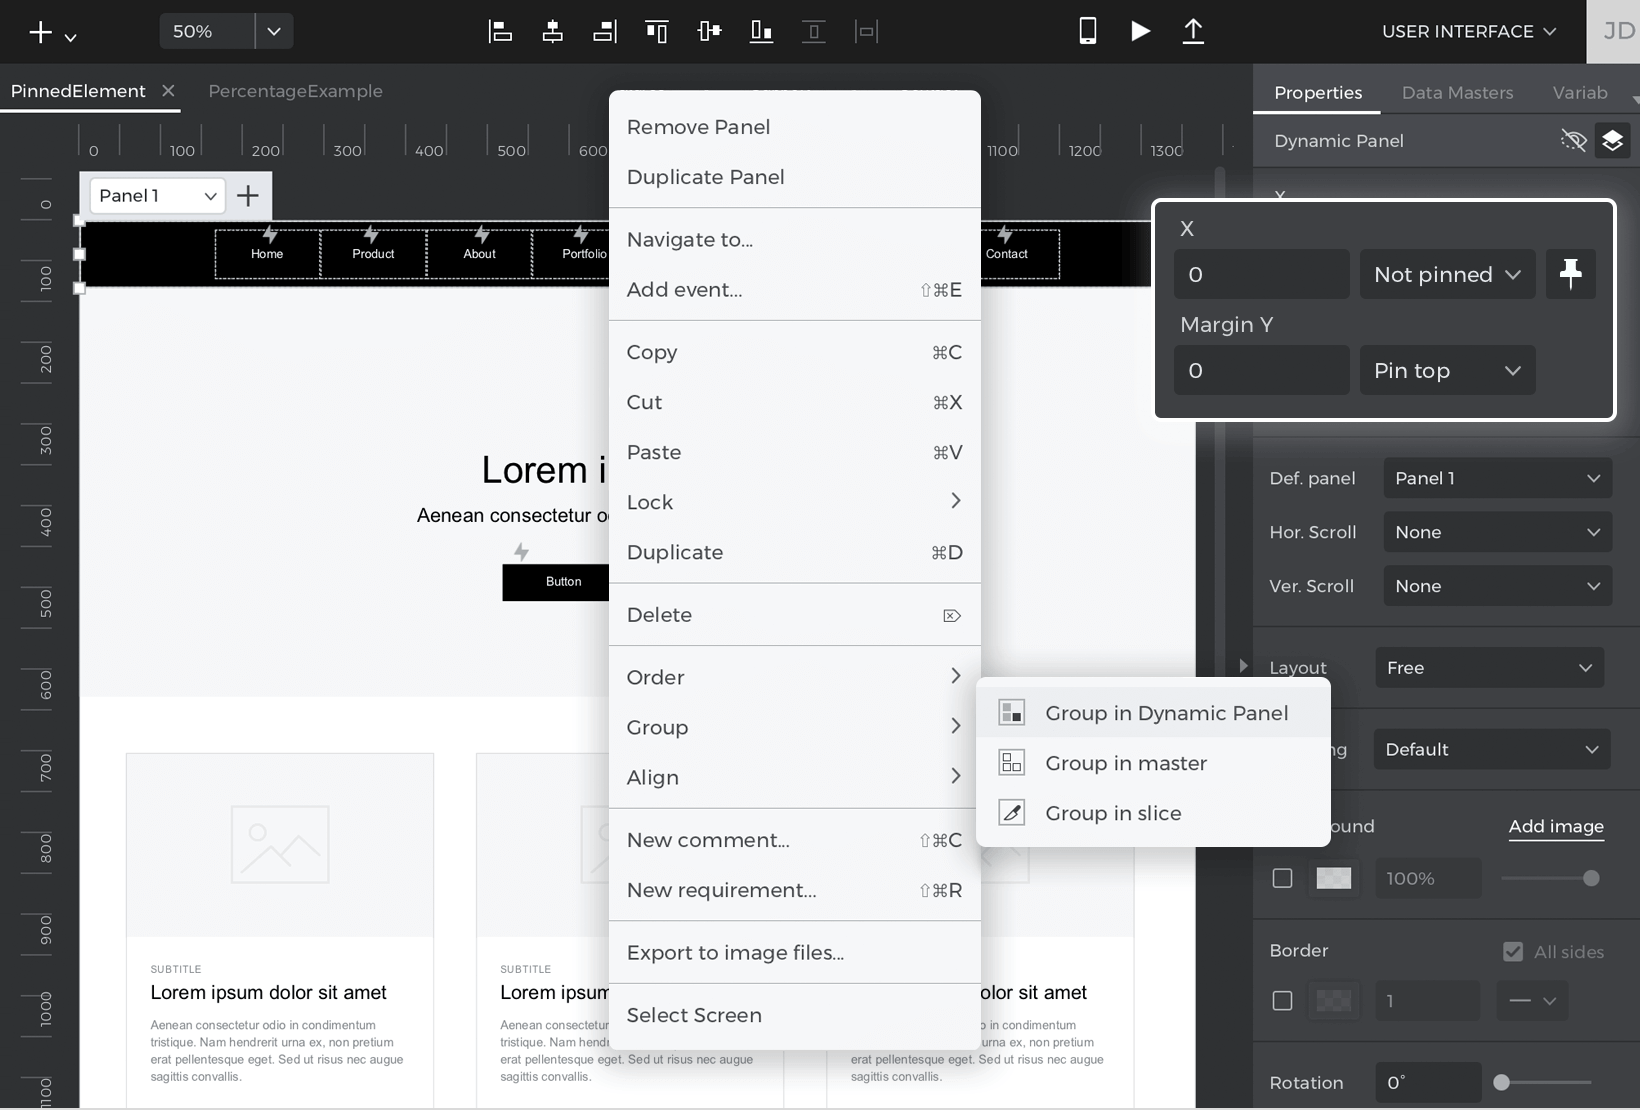
Groups can’t be pinned, only individual elements. Alternatively to pinning groups, you can group elements into a Dynamic Panel and pin the panel. For example, you can create a navigation menu that will stick to the top of the page when you scroll following these steps:
- Drag four Text Elements to the canvas and give them titles as if they were different sections of your website.
- Select them all and then right click when you’re hovered over one and go to Group – Group in Dynamic Panel.
- Organize them in the order you want and then go to the Properties palette and click the pin needle. Then set the Y dropdown to ‘Pin top’.
- Then add content to the screen so you create a long page. Simulate and the result should be similar to the image below
