
In this post, we’ll take you through some of the best prototyping methods, including how to present a prototype to clients and stakeholders.
Have you ever asked yourself what exactly defines a web or mobile prototype? Sometimes we get very concrete and inflexible ideas of what something is.
Start prototyping your ideas today. Enjoy unlimited projects!

However, when we look at the variety of prototyping methods out there, it’s clear to see that a prototype is really a representation of what a future product or feature will be. How you represent that idea doesn’t matter. What does matter is how well your representation communicates functionality.
In this post, we’ll explore some common and less common prototyping methodologies for UI/UX designers. We’ll also look at some great techniques for presenting prototypes to an audience, whether that be clients, stakeholders, design colleagues or even developers.
Every UX designer is familiar with digital prototypes. But were you aware of some of the less common prototyping methodologies on this list? See for yourself – some of the more abstract methods may even be worth trying out when it’s particularly challenging to think outside the box or when you have a particularly complex problem you’re trying to solve.
Paper prototyping is basically as it sounds – prototyping on paper. This method involves sketching a quick outline of your product and its different screens, UI layouts and elements. It’s a fast and cheap way to get ideas down on paper so that you can communicate them to your team and other stakeholders. For this reason, the paper prototyping methodology is also brilliant for brainstorming and ideation sessions.

Paper prototyping doesn’t require much detail, as designers normally do it in the very early stages of the design process. The drawings don’t have to be a work of art, but they should clearly communicate your design ideas, to the extent that you could even perform a bit of early usability testing. This is a great way to work out the information architecture of the design.
Low-fidelity prototypes are next on our list. Like the paper prototyping method, designing a low fidelity-prototype is an optional step but we at Justinmind highly recommend following it. Here’s why: a low-fidelity prototype is the crucial foundation that the majority of the product’s design will be built around.
The low-fidelity prototyping methodology consists of quickly designing a digital outline of your screen’s UI consisting of various elements on the screen along with basic content. It cuts out distraction by focusing on only the fundamental details, such as layout, spacing, element positioning, screen flow and information architecture. You can test low-fidelity prototypes on your users to check your product’s layouts and screen flows are intuitive.

After these basic details are validated, you can then push ahead with more advanced UI design and complex interactions.
Start prototyping your ideas today. Enjoy unlimited projects!
The high-fidelity prototype is the method you definitely don’t want to skip or skimp on before you hand off your design to the development team. Why? High-fidelity prototypes leave nothing to the imagination and absolutely nothing open to interpretation. This results in a cohesive and intuitive product, as the end result reflects all of the research and work the design team put into it.
The high-fidelity prototyping methodology means designing a pixel-perfect prototype with real images, graphics font and complex interactions. High-fidelity prototypes are brilliant for testing on your users as they represent how the final product will be. Once validated, it’s the last thing you’ll be handing off to your developers.
To get an idea of how a design evolves into a polished final design, check out this speedy tutorial on how to design a responsive website prototype. The whole thing takes only 10 minutes.

The beauty with this method is that your developers will get everything they need from the start – assets, images, color codes, fonts and they will also understand how to program the functionality and interactivity of the product.
Sometimes you’re working with a shoe-string budget, or pushing against the last minute – sometimes both. Sometimes the types of interactions or functionalities may be too complex to test in a prototype because they would require backend development. When this happens you have options: one of those is the Wizard of Oz method.
Wizard of Oz prototyping refers to a scenario where you’re testing a prototype out on a user while a human computer sits on the other end providing the interaction. The idea is that the user isn’t aware there’s a human computer behind the interaction. The Wizard of Oz method gets its name from a scene in the film where Toto the dog draws back a curtain to reveal that the “wizard” is just a man pressing buttons and pulling levers.

This type of prototyping methodology is excellent for trying out features such as chat bot functionality or when you’re doing rapid prototyping. It allows you to improvise in terms of product interaction and explore a more diverse range of interactions that you otherwise wouldn’t have time to implement. It can also help you discover new workarounds, come up with new ideas or anticipate problems you didn’t see before.
So what’s the deal here? Are we getting users to design our prototypes now while we just sit back and relax? No, definitely not. The user-driven prototyping methodology is merely an exercise where you sit down with a user and ask them to draw out how they expect a UI to look or a feature to work.
If this person represents your target user personas, it’s a great start in the ideation because you’re learning about their mental models and whether they understand metaphors like radio and pagination buttons.

With this prototyping method, you’re not getting them to design the product, instead, you’re analyzing their sketches to understand their thought processes.
Start prototyping your ideas today. Enjoy unlimited projects!
Ryu Saki is a designer who came up with a method for designing a low-fidelity prototype with Google Sheets. And by low fidelity, we mean really low fidelity, yet it has its practicalities! In his post, he walks us through how he created a Google Sheets prototype for a web portfolio.
He first began by creating a vision and user story, then went on to list out all the content, pages and menu items the site would have. He then created tabs for each page and included the relevant content on each page, linking each tab up to a Home tab with a highlighted menu. Pretty neat use of Google Sheets!

Creating a prototype like this is a brilliant way to bridge the gap between conception and prototyping because it helps you come up with the information architecture and to focus on the main screens required.
Now let’s look at how you could go about presenting your prototypes to your client or developers to get that all-important buy-in and move on to the next stage.
We’ll go over some of the most important techniques you can use for presenting your prototypes. You don’t have to use all of them because, just as each prototype is different, so too is each audience and presentation. Therefore, feel free to try out the ones you feel will help you most in your next prototype presentation.
Having different applications open during a prototype presentation can be a recipe for chaos and client sighs. Switching between different apps like PowerPoint and then to your prototyping tool can slow things down, confuse the client and make for a messy experience. You can even get confused, misplace files and spill the jar of water. You get it, no one wants to go there.
To avoid all this palava, we recommend you try and include all of your files in the same place – your prototyping tool – for a smooth and seamless presentation. Thankfully, with tools like Justinmind, this is really easy.

For example, in Justinmind, you can easily create a slideshow within your prototype using just one screen. To move on to the prototype, just switch screens. No need to hop back and forth between PowerPoint, Google Drive and god-knows-what!
The first and most obvious one and, we really can’t stress this enough, is to get to know your audience beforehand. Get to know what they’re expecting to see, as well as the limits of their knowledge.
For example, are you going to be presenting to a client, to developers or to your design team? Depending on the answer to that question, you’ll have to prepare your script and your presentation accordingly. This will help you be clear on what type of feedback you’re looking to obtain before a presentation begins.
Planning to ask your audience the right questions is just as important a presentation technique as planning what you want to say to them.
For example, the client won’t be able to give you certain technical specifications because they may not have the answer, whereas the developers won’t know if something is on-brand or not or whether something is the real goal or not. Establish what kind of feedback you’re aiming to get from your audience.

This means preparing the questions beforehand. If you’ll be presenting your prototype to a client, you might ask the following:
- Is this the type of experience you wanted for the user?
- Is this how you expected that feature might work?
- Do you feel this interaction encapsulates the brand’s personality?
For a developer, it might be something more like “do you think it’s technically feasible to have this feature work across one screen only?”
This prototype presentation technique is not so much about expectations management as much as it is simply informing the audience what you’re going to be present. Trust us when we say this is important to avoid confusion and misunderstandings!
Have a disclaimer screen before you display your prototype that explains briefly what a prototype is and that it doesn’t reflect how the final product may or may not turn out. This is especially important with low-fidelity prototypes to avoid that face-palming moment of “why is it all black, white and grey and the text in latin?”

Setting expectations is also important because you need to ensure everyone, including yourself, is focused on the real goals of the prototype and not simply getting bogged down in the mere aesthetics. Yes, the aesthetics are important, but what are the main functionalities you’re trying to design for your target users? Do they work as expected? Will they have the impact on the user that the client wants?
For best results, notify your audience with as much advance as possible so they have time to think about and prepare for what they’re going to see provide feedback on.
Start prototyping your ideas today. Enjoy unlimited projects!
Bringing your user flow maps to your prototype presentation can be quite a handy technique. Printing out copies for everyone there is even better!

User flow maps make a great bit of supporting documentation to go with your presentation as they act as a practical guide for the client. At a glance they’ll be able to glean the context behind each screen and understand where you are in the prototype. No more “what were the steps before this screen again?” or “could you go back again, please?”
When you present your prototype to your client or to your developer, you may want them to interact with it, or you may want them to take it away and try it out themselves later to review it further.

Therefore, try to include descriptive buttons throughout your prototype presentation that enables anyone else who hasn’t created it to understand and navigate through it. Even if it’s just to make the experience easier for yourself during the meeting, it’s worth thinking carefully about how the slides and screens can be navigated.
An example might be a simple “open prototype” or “close prototype” button and having one base screen or start screen that the user can navigate back to from anywhere in the prototype presentation. This also prevents the relentless percussion of hammering the back and forward buttons.
Lastly, for ease of reference, consider keeping all of the documentation, whether that be functional specifications, user stories or annotations all in the same prototype link.
This one, of course, only applies if you created a storyboard leading up to your design. Sometimes storyboards are necessary for designs, depending on how difficult the ideation phase is. However, if you did storyboard your design or feature before your started, why not bring it to your presentation as a simple handout?

The client will be able to see the comic-strip formula of your user interacting with the product in their daily lives. Therefore, when you demonstrate the various screens of the prototype and the user flow, the storyboard will put everything into even greater context. It will also add a certain storytelling quality to the presentation, something that always boosts engagement. And after all, an engaged client is much more likely to provide actionable and helpful feedback.
Another practical tip – and this one might seem like a no-brainer – checking that everyone will be able to access the prototype on their mobiles, laptops, or even tablets beforehand. If it’s a mobile app, the client should be able to access it on their mobile device, so they can navigate through the prototype themselves and have a realistic experience. This can help them understand your design even more.

Prototyping tools like Justinmind are perfect for this because simulating your prototype is easy. All you have to do is share it via a link in a browser, or download the Justinmind application to simulate it on a smartphone or tablet.
Start prototyping your ideas today. Enjoy unlimited projects!
This one goes without saying, but you should definitely have all of your design work backed up by data and real facts and figures. If your product’s still in the early stages of the design process, make sure your low-fidelity prototype design decisions have been backed up by some user research.

You can even do this by simply using a survey platform like Typeform, Google Forms or SuveyMonkey to ask questions to your potential users. Or in the case of a more fleshed-out design, you may have already carried out some usability testing that proves that the design works for the users.
It’s always helpful to back your design decisions up to show that it is not subjective designer art. It also helps the client to stay objective and is more likely to elicit buy-in. You also have the added likelihood of the product being a success if you’re on the same page as the user.
While not always a requirement, adding in transitions between the slides of your prototype presentation helps avoid disorienting your audience and to make the presentation run much more smoothly. You might even think about adding in transitions within your prototype in between the various screens, especially if it’s a low-fidelity prototype – even if it’s just a blank white page.
The KISS principle (Keep It Simple, Stupid) is important when it comes to presenting your prototype. Long, waffling speeches will put your audience to sleep, as will dull, content-heavy graphs for user data.
The arrangement of your content and layout is just as important as what you’re going to say in your prototype presentation. Think about using fun and engaging infographics to represent things like user testing data or research and getting straight to the point about core features in your prototype.
Afterall, they say that a picture is worth a thousand words. We say a prototype is worth a thousand more! Make it count and engage your audience throughout your presentation.
There are many creative methods for prototyping and you don’t have to use them all. There are no rules set in stone in the design world so much as there are guidelines. You’re free to use whichever one you like to get the creative juices flowing.
However, the prototyping methodologies you do choose will depend a lot on your team, the clients you work for, as well as other factors, such as the budget, deadline and the technical requirements. Nonetheless, we always recommend creating at least a low-fidelity and a high-fidelity prototype before developing your product.
In addition to the myriad of prototyping methodologies available to the modern UI/UX designer, there also exist many tried and tested techniques to present them. Again, the techniques you choose to present your prototype will depend on everything from the stage of the design process you’re in to the client you’re dealing with.
Life is all about choice and trade-offs, but we hope this post has given you some useful ideas for how to move forward with your design projects.
PROTOTYPE · COMMUNICATE · VALIDATE
ALL-IN-ONE PROTOTYPING TOOL FOR WEB AND MOBILE APPS
Related Content
 Learn how to design better e-learning platforms with user-centered UX principles, real examples, and high-fidelity prototyping tips to boost engagement and learning outcomes.13 min Read
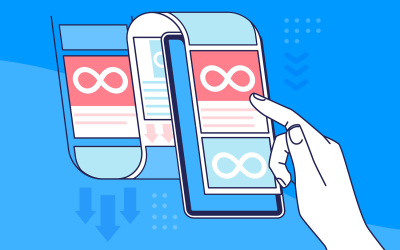
 Infinite scroll keeps users engaged, but it’s not always the best choice. This guide breaks down when to use it, when to avoid it, and how to design it right.14 min Read
 Learn how to design web and mobile app prototypes, how to test them and what to look for in a prototyping tool in this complete guide.15 min Read


