From wireframe to interactive prototype with Justinmind’s Kendo UI kit
With Justinmind’s Kendo UI kit, wireframing interactive web and mobile applications is faster than ever
Introducing Justinmind’s Kendo UI kit! The new UI kit contains all the UI components you need to create and build native-feel, interactive web and mobile wireframes in the style of the Kendo framework, using Justinmind’s free wireframe tool.
The days of wasting prototyping time on component hunts or building widgets from scratch are over. With Justinmind’s free Kendo UI library, you can do more work in less time: no more re-creating buttons, calls to action or progress bars.
Justinmind’s UI kit packs a punch – with over 70+ components to choose from, design problems now have detailed-orientated design solutions. With these components, your UX design will be consistent from start to finish.
In this post, we’ll also walk through how to create and prototype your own e-commerce website from initial idea to interactive website wireframe using Justinmind and the Kendo UI kit.
Kendo UI is a complete component library which helps designers and developers create high quality, high performance responsive web and mobile apps.
Kendo framework means you can build HTML5 and JavaScript applications using the latest web and mobile standards. It combines the best of HTML5, CSS3 and jQuery and benefits from broad browser support including Chrome, Safari and Firefox. And with Justinmind’s new Kendo widget library, designers can create native feel rich web and mobile app wireframe with a drag and drop.
Kendo’s UI framework has everything you need to build JavaScript applications seamlessly. The framework comprises three distinct products, all of which are included in Justinmind’s widget kit.:
- Kendo UI Web: contains all the main elements of the Kendo kit including DataSource, templates, drag-and-drop and themeable widgets.
- Kendo DataViz: HTML5 powered, mobile-ready data visualization widgets.
- Kendo UI Mobile: native UI widgets for building HTML5 powered mobile apps.
Many developers and designers use UI frameworks as a foundation – a starting point – because they’re widely used and understood. A framework like Kendo’s can be used to ensure standardization across all web and mobile apps so that designs are consistent and adhere to predefined configurations.
With Justinmind’s Kendo widgets, you can create web and mobile application wireframes that look and feel just like products built with the actual framework, as well as customizing any UI components to your own preference.
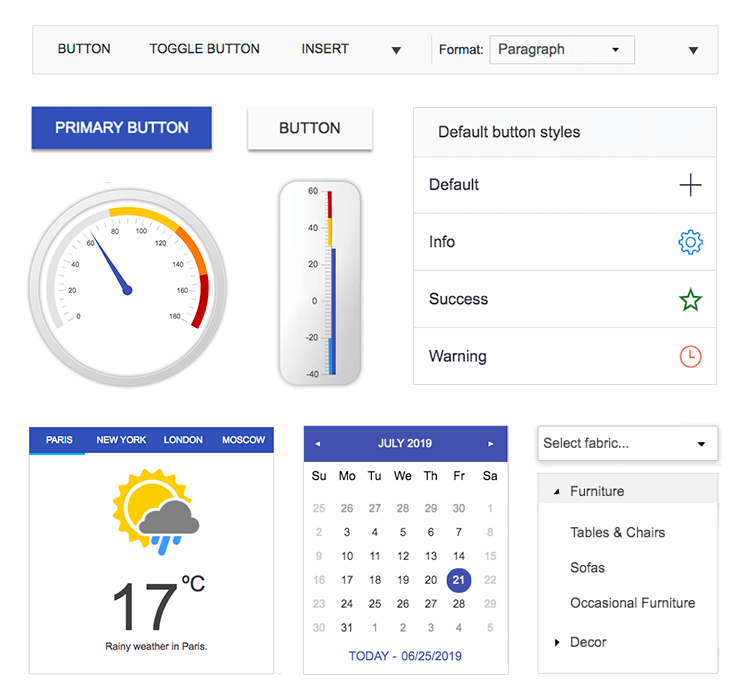
Save time and reworks and work with over 70 customizable UI components including:
- Grid
- Editor
- Scheduler
- Charts
- DropDownList
- Window
- Upload
- TreeView
- ProgressBar
- TabStrip
To put the framework into action, follow these 4 steps to begin:
- Download Justinmind wireframe tool
- Download Kendo from UI kits page
- Import the UI kit into Justinmind. The widgets are visible on the left hand side
- Start a new prototype using over 70 Kendo UI components!
As soon as you’ve downloaded the UI kit you can get started creating web and mobile experiences. Together let’s create a e-commerce website which uses Justinmind’s Kendo widgets to illustrate just how easy it is to get from initial idea to interactive wireframe.
In Justinmind, create a new web prototype. From there, you can decide on the screen dimensions. We’ll stick with the default in this case but feel free to adjust to your own preferences.
Now we have our blank canvas, we want to populate it with images, text and other widgets from Justinmind’s pre-defined libraries, as well as the Kendo UI kit you’ve just downloaded.
Remember that the Kendo library is entirely customizable, so our version will look different from the default styles found in Justinmind. All the more reason to experiment and have fun with the UX design.
Let’s add a hero image. Hero images are a great way to impress users who visit your site and act as a way of showing off your product or services. Drag the standard Justinmind image widget to your canvas and resize it accordingly. Ideally, you want to have the image to take up a quarter to half the length of the screen for full impact.
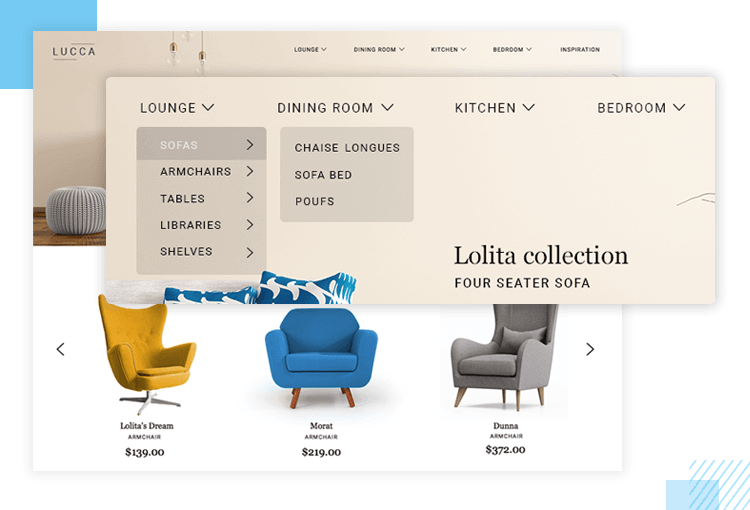
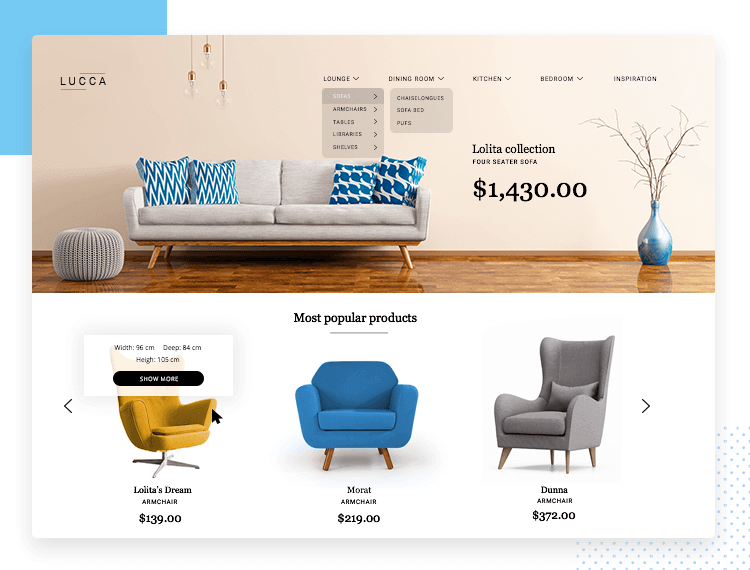
Most homepages have a navigation bar found at the top. Our e-commerce website will have dropdown menus where users can navigate to other areas of the website. We can use Kendo UI’s menu orientation widget. Drag this widget to the top right hand side of your screen. In the Events panel, you can link your navigation elements to other screens.
Don’t forget that you can reuse content with templates to save you time when designing. This means repeated elements such as navigation bars and logos can appear in the same place each time you make a new screen creating consistency across your web and mobile apps.
You can add an inspirational text, sales copy or a dramatic call to action on your hero image as this can help increase conversions. If you wish to add a button, use a button widget. You can add Events to the button. For example, an ‘on click’ Event could be used to take the user to another screen. This same process can be applied to your top navigation, too.
To the left of your navigation bar, you can add another image widget if you have a logo you want to insert or a text widget if you simply want to write the name of the e-commerce website. You don’t have to settle for the standard fonts either – Justinmind has full Google Fonts integration.
Below your hero image, we’ll add a section for most popular products.
In our example, we used Kendo’s ScrollView. It’s similar to a carousel – which can also be constructed simply in Justinmind with dynamic panels – in that the user has to click either left or right to move through the content. Thankfully with the Kendo UI, you can save time by simply dragging the ScrollView widget onto the canvas and populating it with your own content.
ScrollView isn’t the only way to play with content in the e-commerce app. The Loading Content with AJAX widget is a great way to give users an bonus bit of content that will add value to their experience.
When the user hovers over an image, a pop-up appears with additional information relating to that image, in our case to show the dimensions of the product with a call to action inside the window with ‘Show more’.
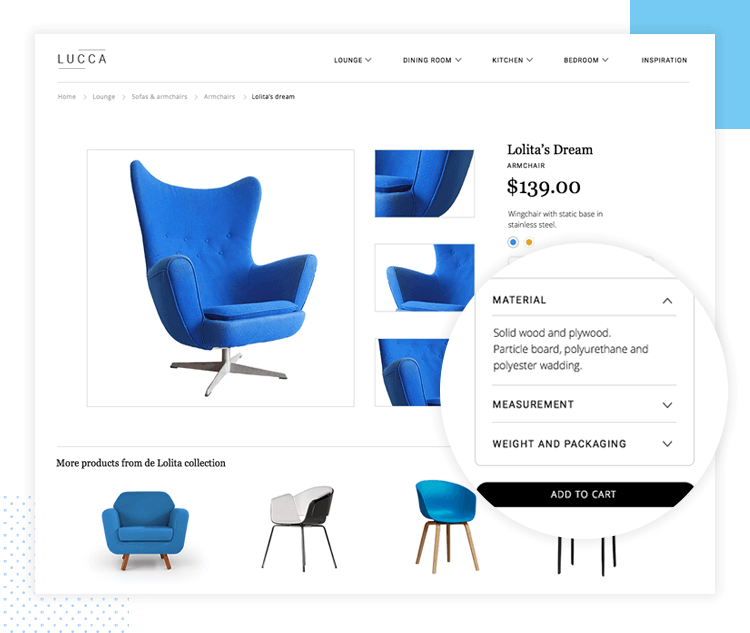
Now we can focus on a product page within our web prototype. A product page like the one we’re going to create will show you the potential of the Kendo UI kit. The main features of a product page are the images – a chance to show off your products and impress customers. This is where we can use the Replace/Effects in the Kendo UI kit.
With the Replace widget, when users hover over the smaller images on the right, the image will be enlarged on the left. This means users will get a more detailed look at the product on offer, along with enticing copy.
We also added radio buttons to indicate a change of color for the chair which can be done using the radio button widget in the widget panel under Forms and Input.
Let’s say a chair comes in two colors: blue and brown. You can use multiple dynamic panels to put the content in, then add an On Click > Set Active Panel event in the Events panel. Users can click the radio buttons which will trigger which content to show in the dynamic panel.
Using Kendo UI’s PanelBar means you can hide and display additional content using drop downs. In our example, you can see a box which contains Material, Measurement and Weight and Packaging and each of these has a drop down arrow to reveal information. It looks advanced at first glance but with the pre-made UI component all you need to do is add your own text.
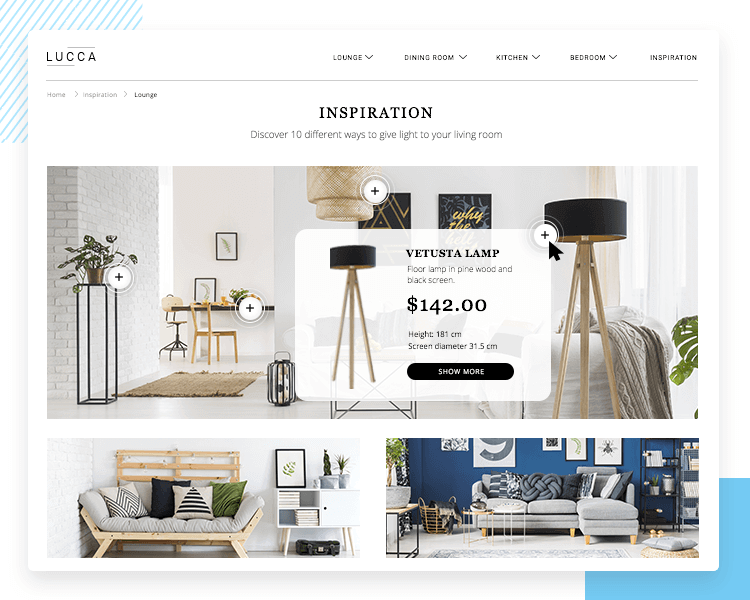
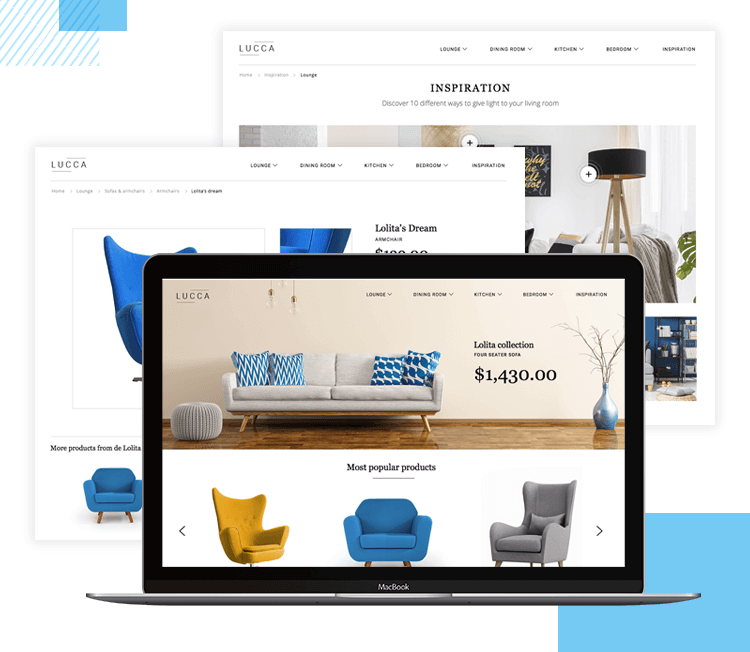
Our inspiration page has a lot to offer while remaining relatively simple by UX design standards. The inspiration page uses the same navigation bar we used throughout the e-commerce website so you know how to construct most of this page already. Plus many UI elements are repeated, which also makes for faster prototyping.
Since this page is meant to inspire, it is made up of mostly image widgets except for the main hero image.
What makes this page pop is one of the powerful Kendo UI widgets included in our new kit: Tooltip. You can upload an image with various products then add hotspots. These hotspots, once hovered over, can reveal additional information such as price, size and product name. It’s a great widget that can be used in many different contexts.
And with that, you’ve created a homepage, product page and inspiration page of an e-commerce website using a mix of standard Justinmind widgets and Kendo UI components.
With 70+ customizable widgets and hundreds of standard Justinmind widgets, you can create interactive wireframes and prototypes that stay true to the Kendo UI framework in no time at all. Download it now.