Free Font Awesome UI kit: design awesome web & app interfaces with awesome icons
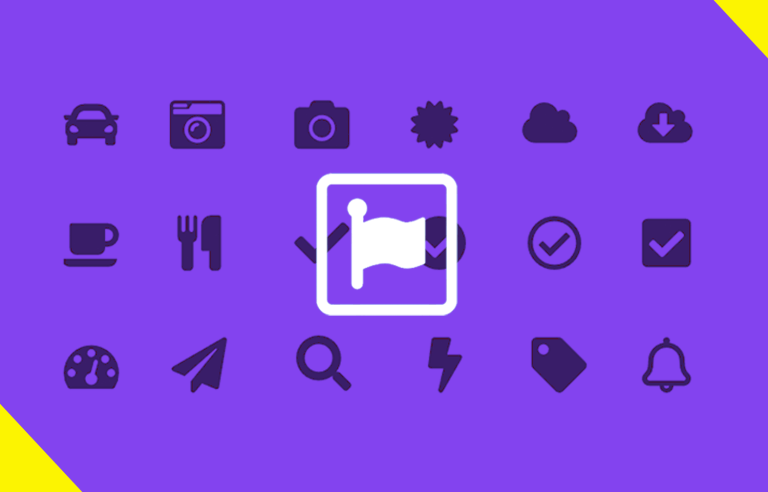
This Justinmind UI kit has just been updated to help you create the perfect look and feel for your web and mobile app UI designs using the latest Font Awesome icons. Our Font Awesome UI icons kit has every icon you need to create an engaging and meaningful user experience.
Icons are an essential part of UI design. The icons you include in your screens need to be clean-cut and comprehensible to offer the best possible user experience. Font Awesome, a project by Dave Gandy, is the most popular way to add icons to your websites and apps.
And now all the latest and most popular of these digital icons are available in your favorite free wireframing and product design tool! You’re just a few clicks away from creating fabulous designs with Font Awesome icons.
Justinmind’s Font Awesome UI kit contains a wide collection of Font Awesome web and app icons. All of our icons reflect original Font Awesome designs; with the option to customize the size and color of the icons to suit your specific design requirements.
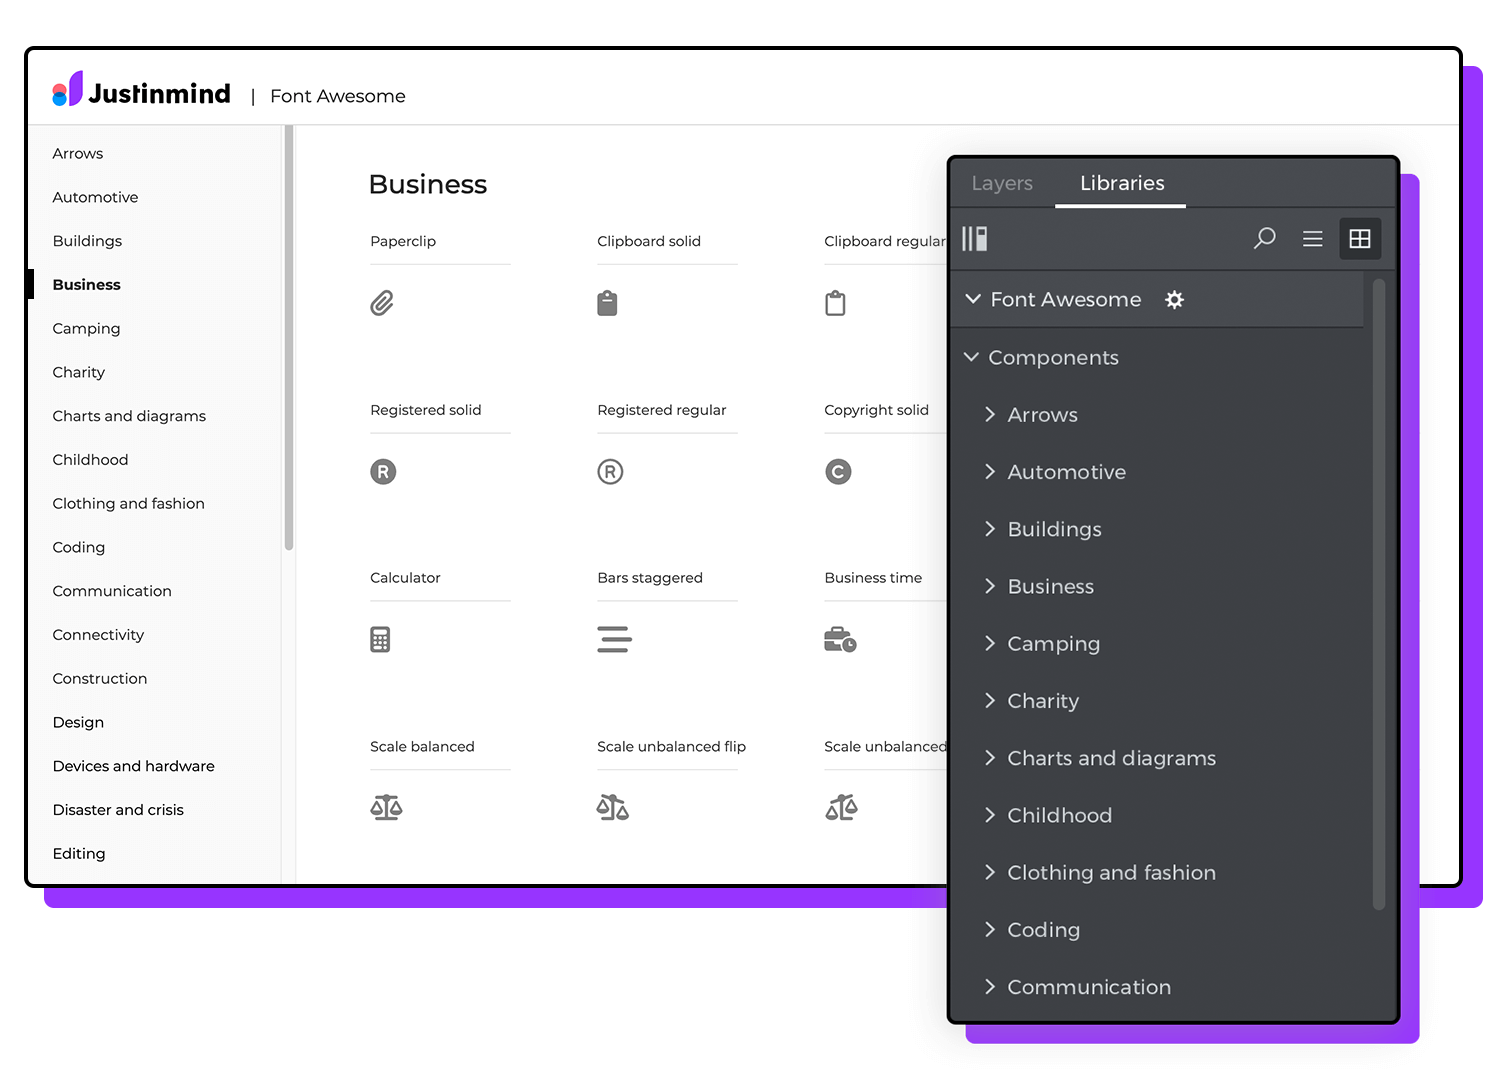
Justinmind’s dedicated UI kit has all of the icons you need, all in the same place and ready for you to use throughout your design project, making adding icon components simple and easy.
Let’s take a closer look at this popular UI icon library!
Our Font Awesome UI kit contains over 700 vector icons. All of our icons have been designed according to Font Awesome’s latest standards – including icon names, groups and location within the library.
Let’s take a look at what’s included in each icon category:
Arrow icons: this is where you’ll find all icons related to wayfinding. Use any of the icons in this category to indicate a direction and help users find their way.
Automotive icons: this category includes a selection of icons ranging from a variety of vehicles to automotive-related icons such as gas pump, battery and gauge icons.
Building icons: here you’ll find a variety of icons referring to any structure that has a roof and walls, including home, city, and businesses and worship building icons.
Business icons: this category includes all icons most often used by businesses, you can use them to help users know what they can do: filter, locate,etc. or where they can find specific business details such as phone number, reviews, etc.
Camping icons: a wide variety of icons related to the outdoors.
Charity icons: here you’ll find icons related to charity, donations, and NPOs.
Charts+diagrams icons: this category includes a selection of icons that can help you convey data, show information and track results.
Childhood icons: here you’ll find the most popular maternal and childhood related icons such as sports, children, games and stroller icons.
Clothing+fashion icons: a selection of the most popular clothing icons.
Coding icons: because sometimes it is just appropriate to use icons instead of words for easy identification.
Communication icons: this category includes a collection of icons of the most popular forms of communication -from envelopes to an icons icon!
Connectivity icons: there’s really nothing much worse than a slow service or loss of connectivity (well maybe there is, but you know what we mean) the icons in this category are well known and will stand in for any connectivity message you want to convey.
Construction icons: these construction related icons include small construction tools and instruments that may be used by builders, in renovations or construction projects.
Design icons: here you’ll find all a variety of icons related to paint, art, graphic design and project creation to name a few.
Devices+hardware icons: icons in this category include a combination of computer related products as well as the different items we use with our devices.
Disaster+crisis icons: the selection of items in this category refer to any natural or human-made disasters.
Editing icons: here you’ll find the essential icons you can find in any editing tool.
Education icons: here you’ll find the most commonly used icons related to school activities as well as learning items and tools icons.
Emoji icons: crucial for communicating in the digital world, these selection of emojis will add emotion to what could be otherwise a flat text.
Energy icons: this category includes a variety of icons related to energy in all of its forms -from classic to alternative energy sources icons to the icons of the items related to its use.
Files icons: this category includes all icons that are files and folders.
Food+beverage icons: this set of icons includes the most popular food and kitchen related icons, such as food, desserts, beverages, and kitchen utensils.
Gaming icons: this category includes controllers, headphone set, trophy and dice icons and even a cute Pac man ghost. All the necessary icons to create content for gamers, esports, or the more classic games.
Gender icons: people from different genders are covered in this icon set.
Hands icons: here you’ll find a variety of hand gestures and signs, including thumbs up, high five, and many other universal hand gesture icons.
Holidays, travel and hotel icons: in this category we’ve included the most commonly used travel related icons as well as those you can use for each holiday season.
Household icons: this category includes a wide range of items you might find lying around the house (or office), including a sink, chair, bed, rug, bath, and sofa.
Humanitarian icons: as explained by Font Awesome themselves, “these icons are a collaboration between OCHA (United Nations Office for the Coordination of Humanitarian Affairs) and Font Awesome. They depict themes of interest to the humanitarian community such as clusters, disaster types, categories of affected people, and relief items.”
Image+video icons: here you’ll find icons related to the creation of videos, audio and images.
Logistics icons: this category includes the most commonly used icons for everything related to delivery, moving, and packaging.
Math+symbols icons: here you’ll find all the essential mathematics icons.
Media icons: here you’ll find the most popular media playback icons. Everything you need to change or adjust any media content.
Medical+health icons: this category features medical staff, bacteria and viruses, medical tools, organs, and other health icons.
Science icons: here you’ll find a collection of icons of items you can find laying around in a chemistry lab as well as related concepts icons.
Security icons: the security icons in this category include popular icons universally related to internet security, files and devices protection, and security in general.
Shapes+spinners icons: this essential set of icons, includes simple and clear shapes and spinners that can be added to any project.
Shopping icons: this category features a variety of icons related to stores, online shopping, ecommerce as well as the items and tools related to sales and purchases.
Social icons: includes everything social, to interact, get connected and share online -the ones you can no longer exclude from any project.
Sports+fitness icons: the icons in this category cover a variety of sports, as well as other physical activities as well as popular items related to that.
Text formatting icons: this collection of icons covers every option to format text –including align option icons, tables, borders and spell check icons.
Time icons: here you’ll find the most commonly used date and time icons as well as the items and tools related.
Toggle icons: this category includes the essential toggle icons needed for any UI design, including on/off toggle switches as well as circle and circle dot icons.
Transportation icons: here you’ll find planes, trains, automobiles and boats to name a few.
Weather icons: weather icons in this category are commonly used and therefore their meaning is easily understood universally. Cloudy, sunny, or windy, these icons cover any weather forecast.
We recently wrote about the importance of proximity in UI layout design. Proximity means that UI elements and icons placed close together should correspond to each other, so that users are able to recognize and associate them easily. Make sure that the icons you place side by side are closely related to make it easy for users to find their way around.
Also, note that all of the icons have been designed using vector graphics. This means that they are scalable and that color editing your icons is simple and fast. We’ll explore vector graphics in depth later on in the post. If you’re in the market for more vector files, check out our post on places to get free vector images.
Follow these 4 steps to get started with Justinmind’s Font Awesome icon kit:
- Download the Justinmind tool if you haven’t already
- Download the free Font Awesome icon kit from our Interactive UI components page
- Justinmind will open on your desktop
- Navigate to the Libraries palette, where you’ll see the Font Awesome kit
- Start adding icons to your design
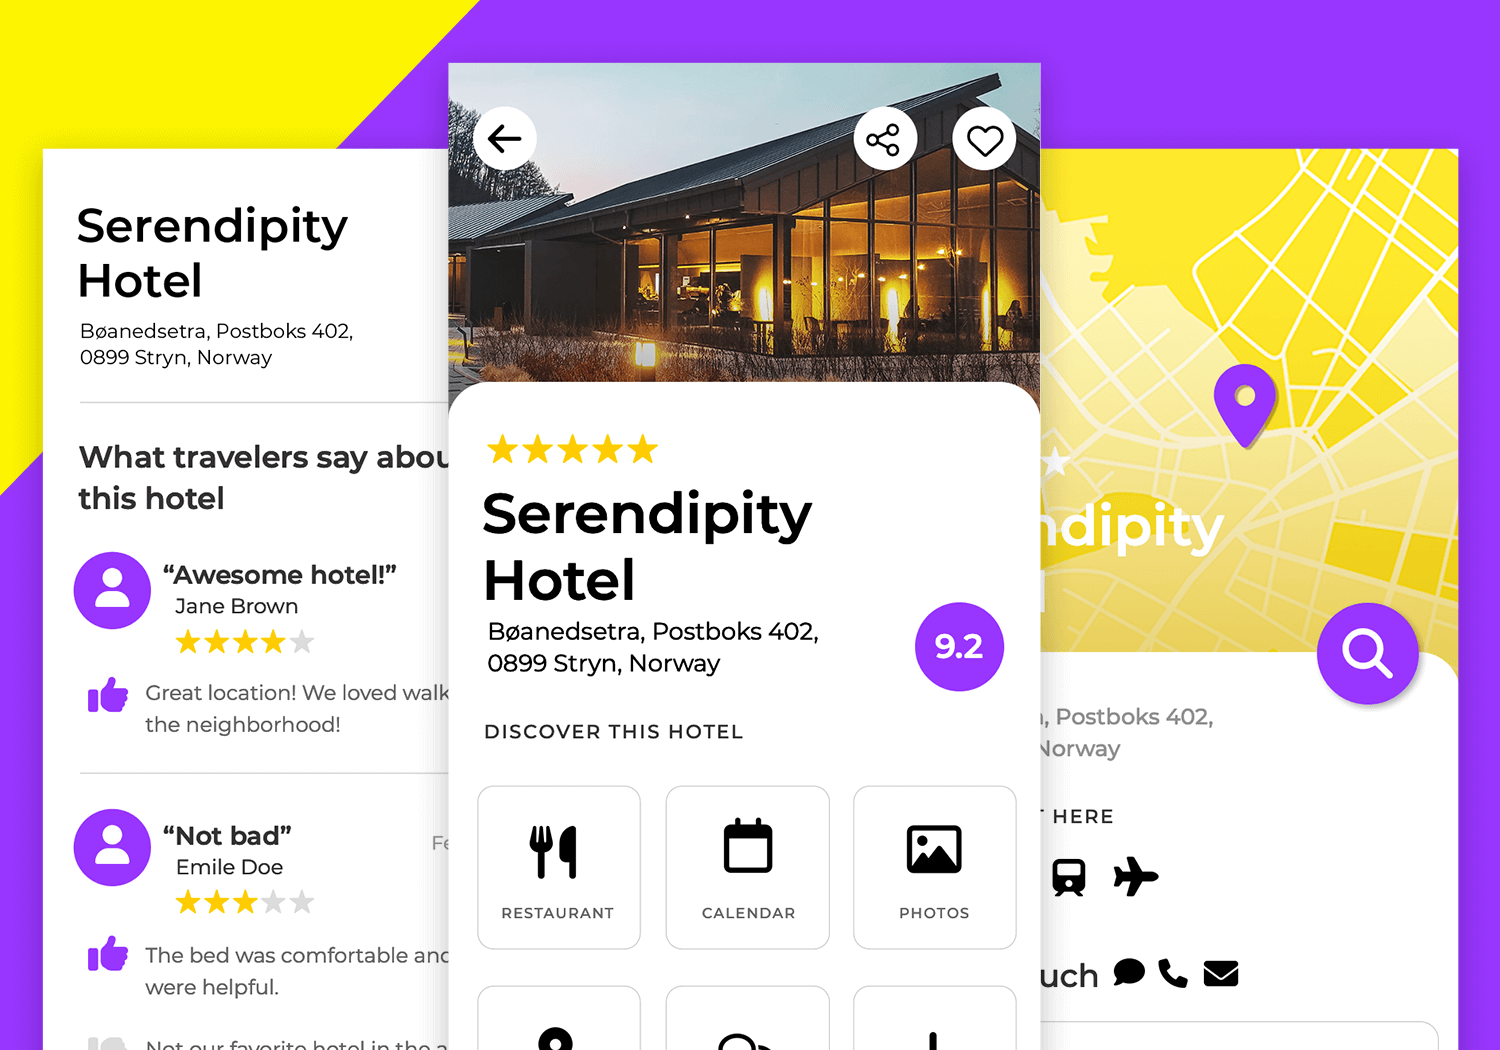
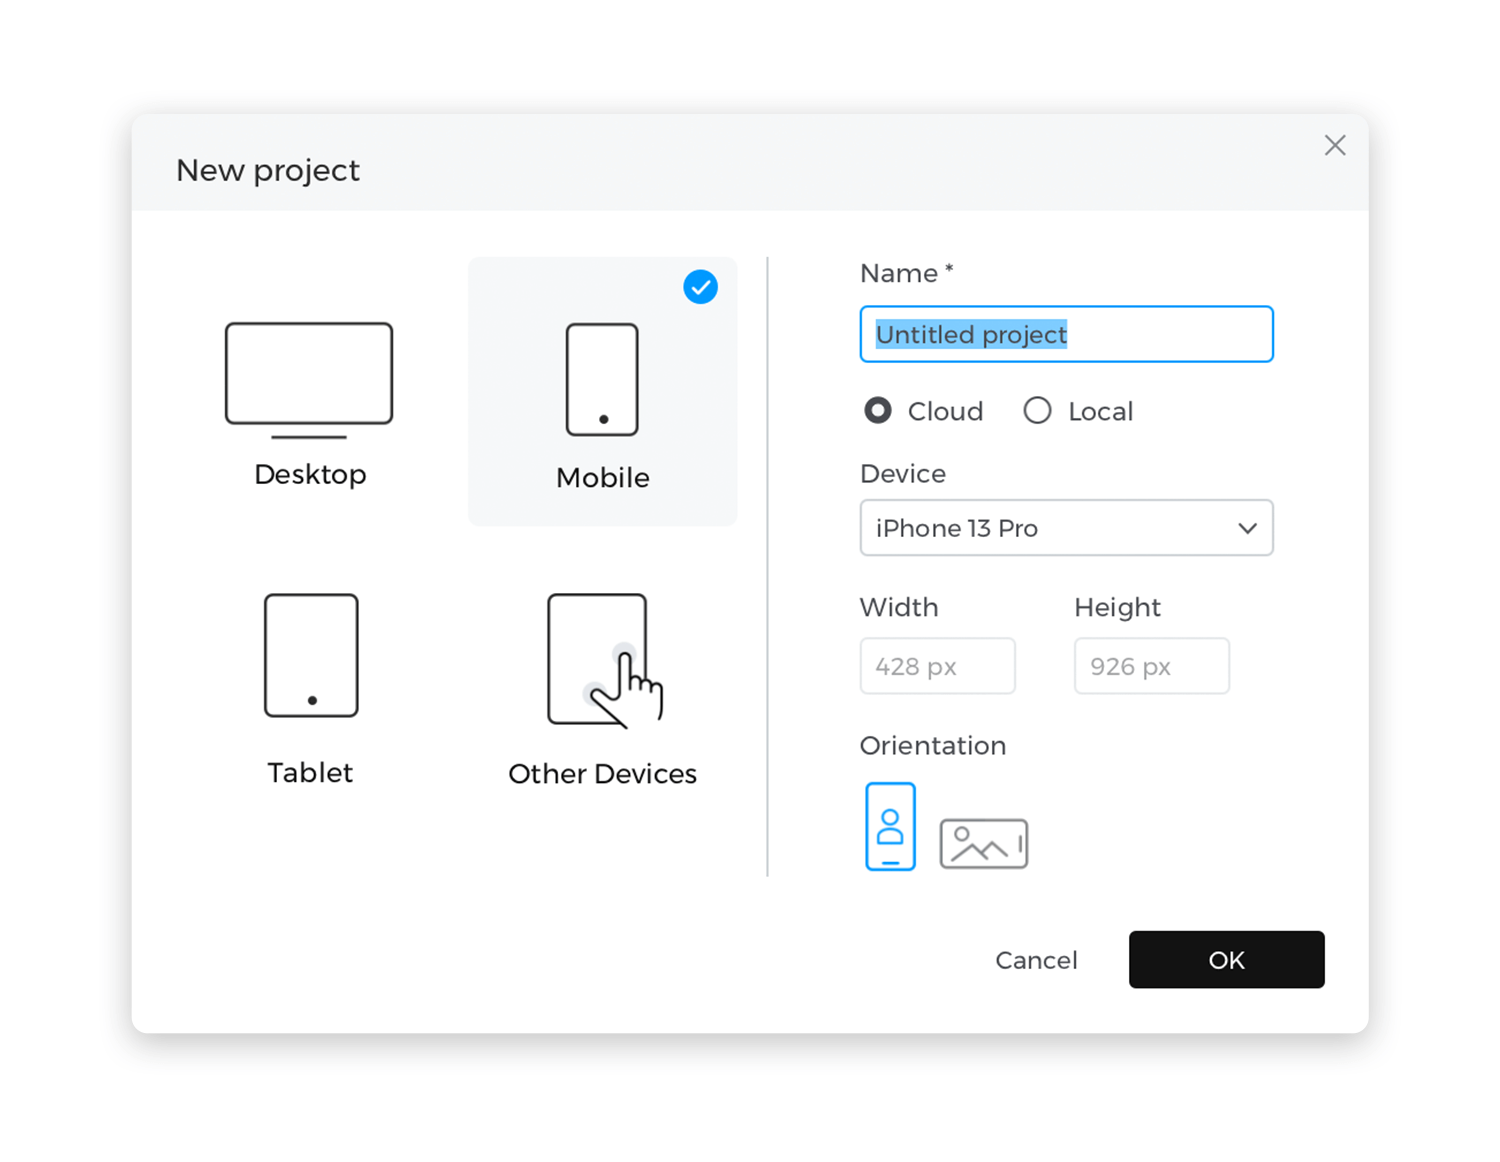
In our example, we’re going to create a hotel reservation mobile app wireframe using Font Awesome icons. Note that we are using Justinmind’s iPhone 13 Pro mobile template, but you can use any of our mobile device templates.
Let’s start by creating our app’s initial screen
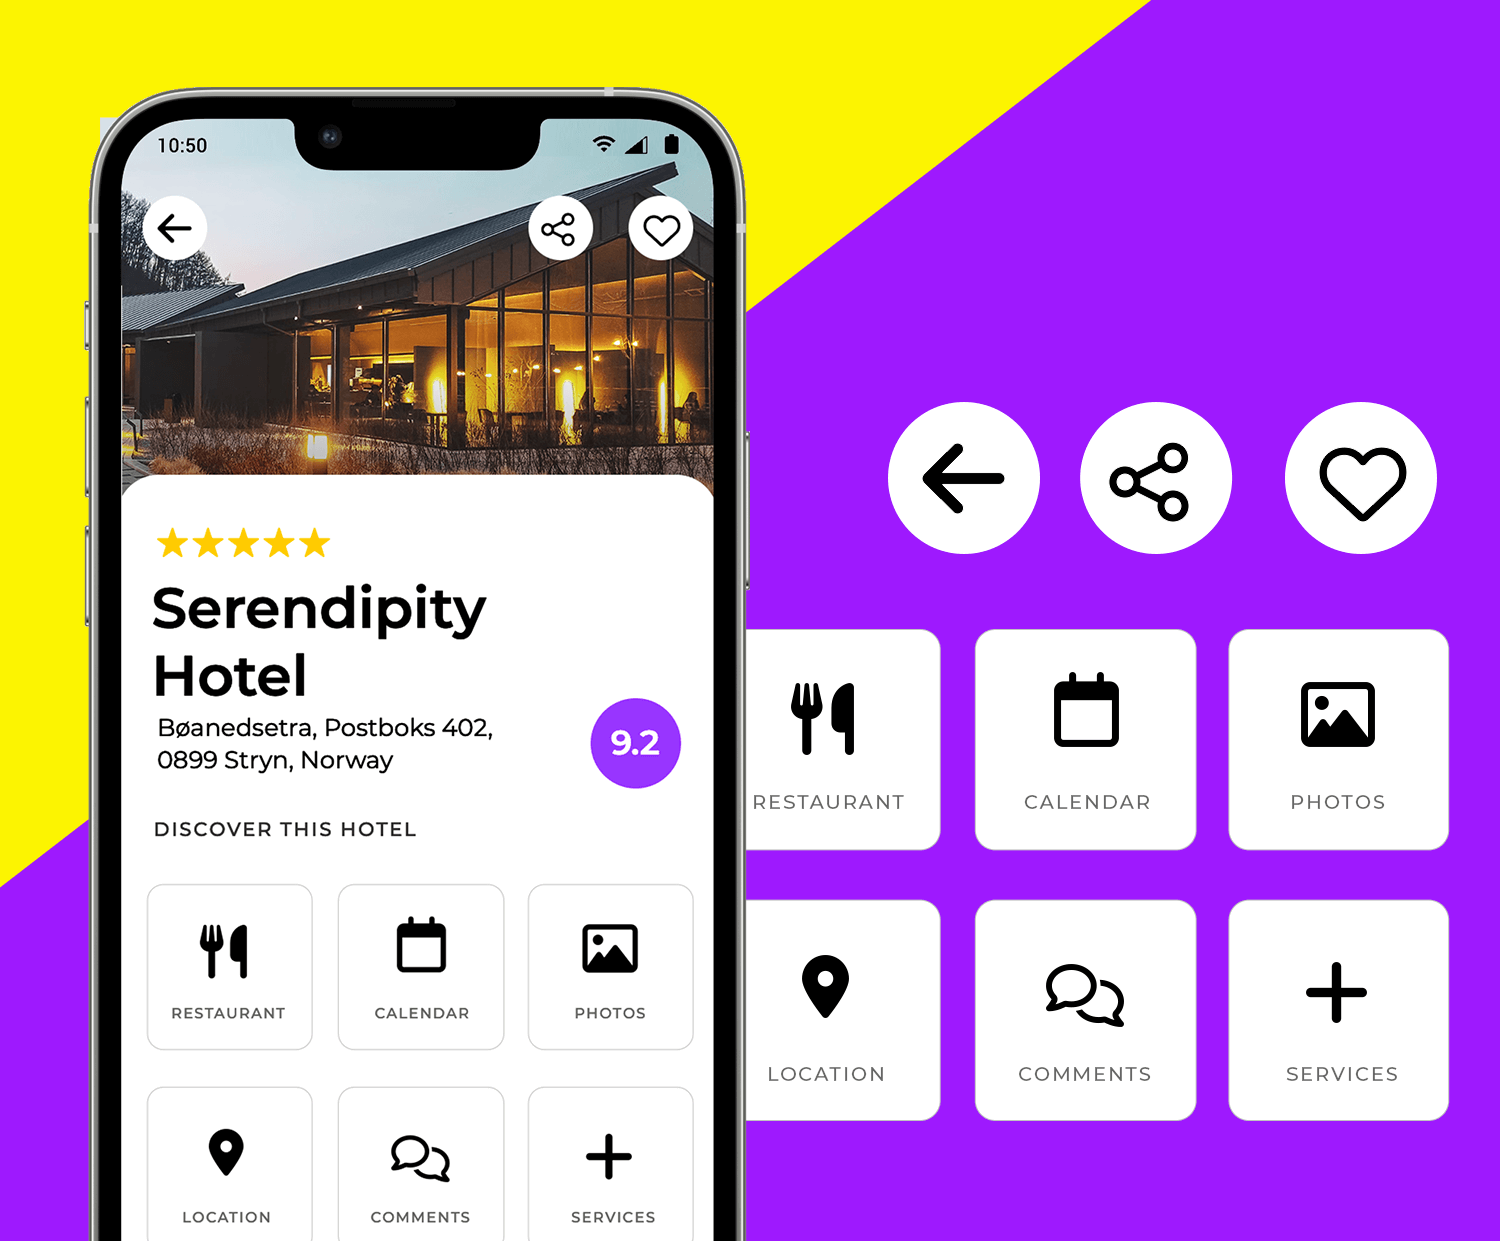
From the iOS components library, drag the Status bar to the top of the canvas and place it carefully around the notch.
From the Basic library, drag an Image widget to the canvas and place it below the header. Add an image of your hotel. Use Text widgets to give the hotel a name, description and price. Use the Font Awesome Ranking star icon in the Business category to give it a star rating out of five.
Below, create a grid of hotel features and helpful information. Start by dragging a Table widget from the Basic library to the canvas. In the Properties palette, change the number of rows to 2 and columns to 6.
Next, choose a set of icons from the Font Awesome kit to add to the table. To match our example, choose the following icons:
- Kitchen set from the Household category
- Calendar days solid from the Time category
- Image regular from the Image and video category
- Map location from the Camping category
- Comments solid from the Communication category
- Plus from the Maths and symbols category
Drag the icons directly into the table. Note that the cells in your table are set up with central alignment by default, so your icons will automatically be slotted into the center of the cell. No need to fiddle around with spacing! Learn more about prototyping grids in Justinmind.
If you want to resize or change the color or any other styling of your Font Awesome icons, go right ahead! The Properties palette is your oyster.
At the bottom of the canvas, add a Button from the Basic Widgets and write “Find your room” in it.
Next, we’ll create the Services screen.
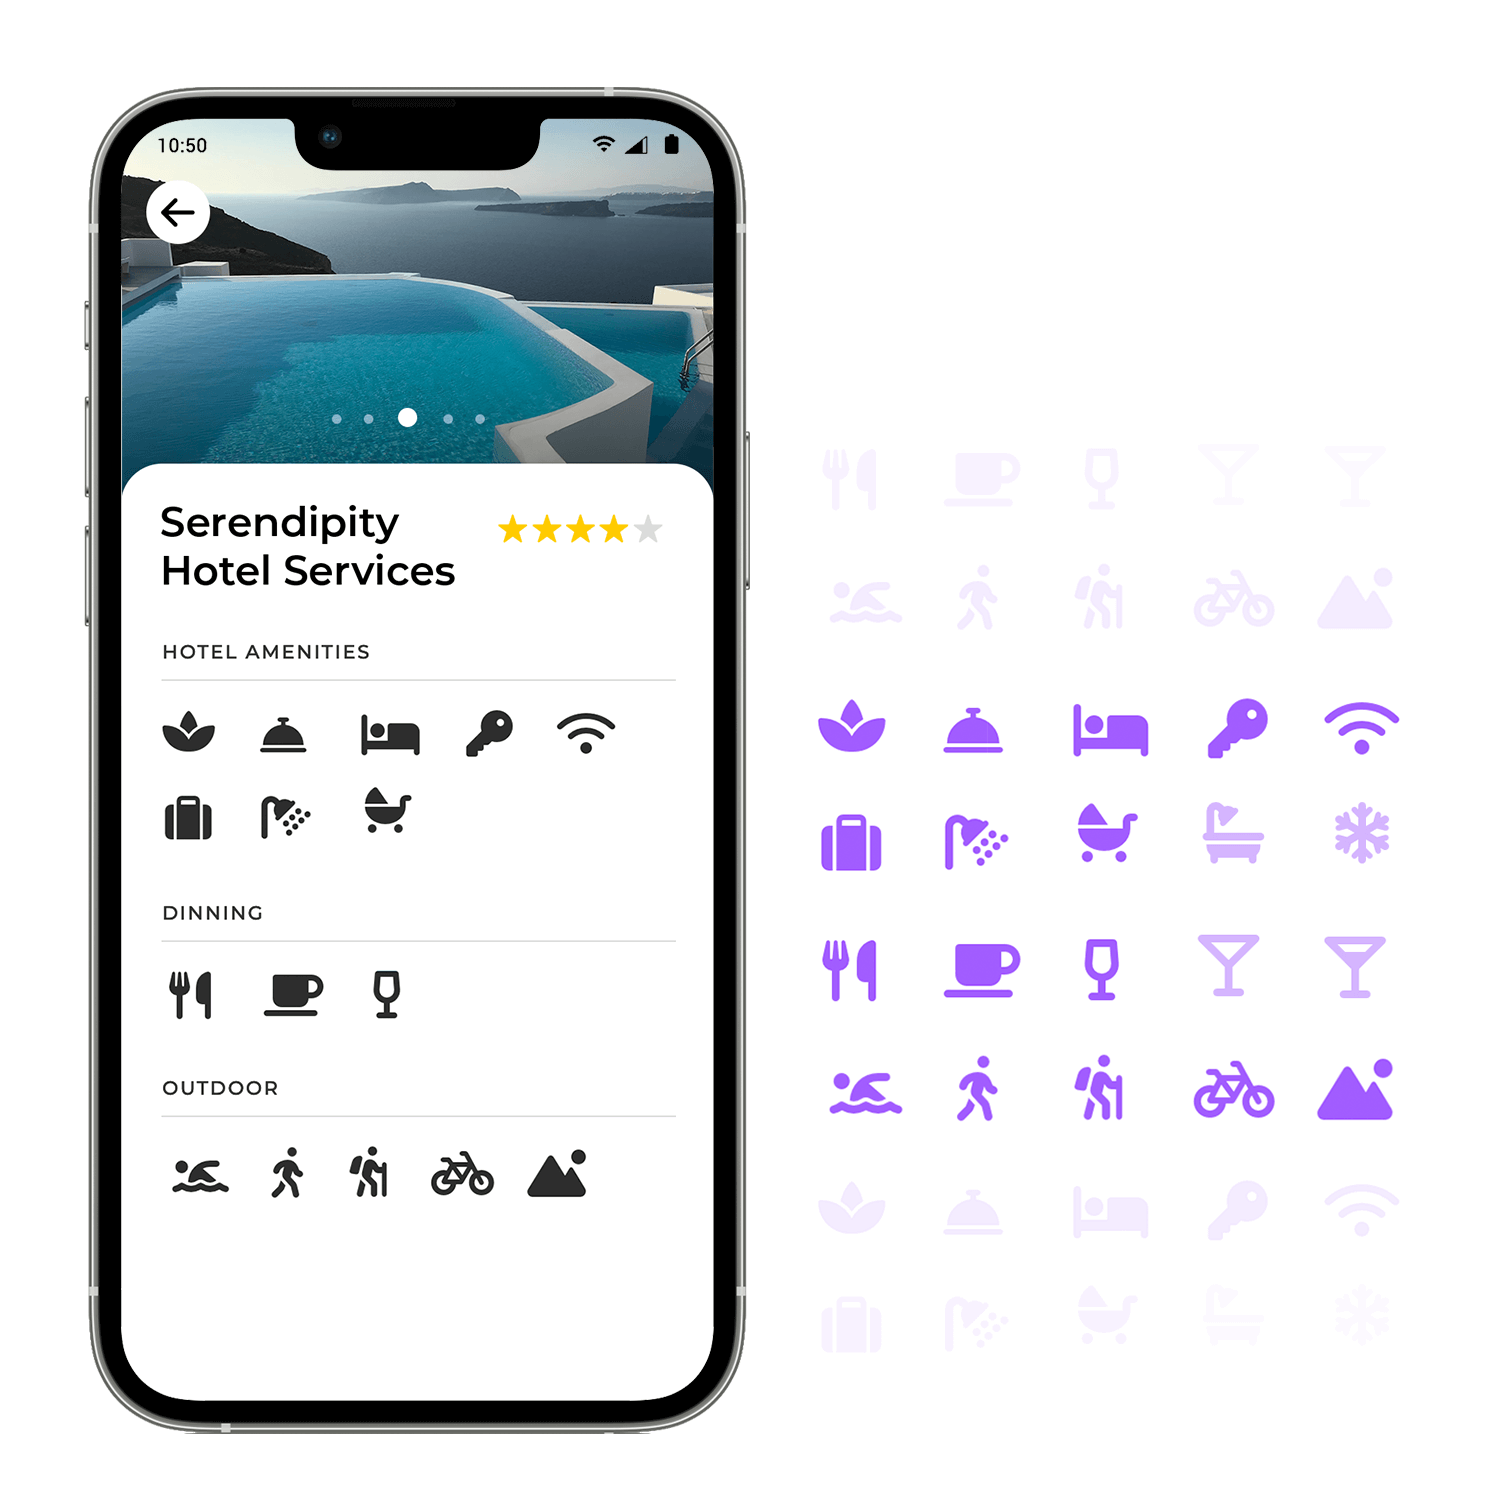
To do so, go to the Screens palette and click the ‘+’ button to add a second screen. Give it a name (Services for instance) and click “OK”. While you’re at it, create two additional screens and name them “Contact” and “Comments” respectively.
Click on the Services screen in the Screens palette to start editing it. Now it’s time to choose the services, features and amenities you want to include in this screen.
To match our design example, choose your preferred icons that correspond to: hotel amenities, dining, outdoor activities, and other (e.g. shopping, gaming and music).
Give each category a header (using the Text basic widget) and group each category together (right click “Group”). Grouping UI elements together allows you to edit and move them all around the canvas at the same time. Place your groups of UI elements on the screen to match our example.
If you’d like to include a carousel in your design as we have, follow the instructions to learn how to do so in our support center.
Now, go to the Contact screen in the Screens palette.
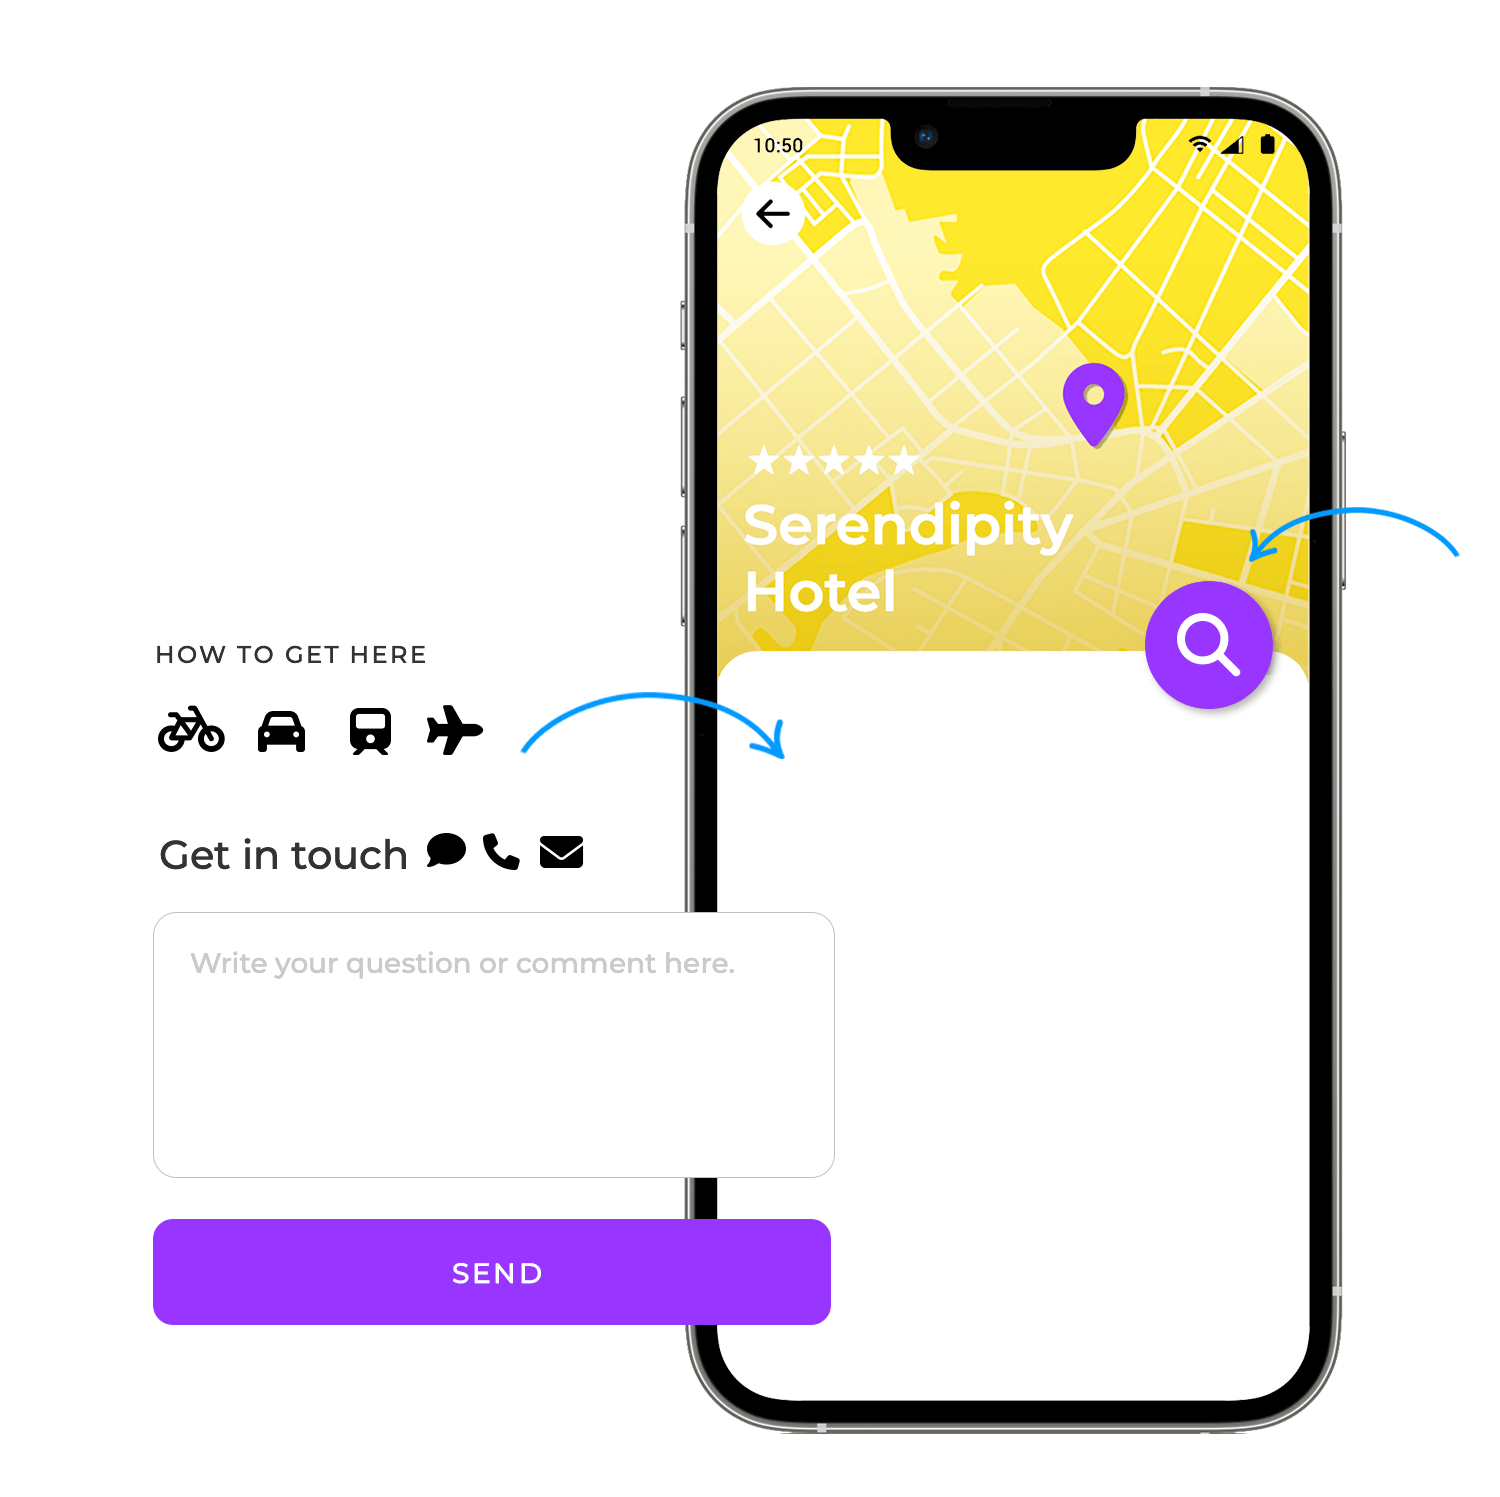
To reproduce the map we have in our example, drag the Maps screen example from the iOS components kit to the canvas. If you want users to be able to interact with the map (i.e. search it and pinpoint locations), drag and drop the Map pin marker.
Then, drag a Rectangle from the Basic components library to the canvas. Change its color to white and reduce its height so that it only covers the bottom half of the canvas. Make sure that it’s sitting on top of the map, rather than underneath it.
Drag a set of Font Awesome icons on top of the rectangle. These should be related to travel. In our example, we’ve included the Bicycle, Plane, Car and Train icons. Group the icons together and give the group a header (e.g. “How to get to your hotel”).
Now do the same but with icons related to communication. We’ve included the Comments solid, Phone and Envelope icons.
Finally, create a form with a button at the bottom of the canvas so that users can get in touch with the hotel directly from this screen. Learn how to prototype forms and inputs with Justinmind.
Now, go to the Comments screen. This is where users can read reviews and feedback from previous guests to get an idea of whether a particular accommodation will be to their liking.
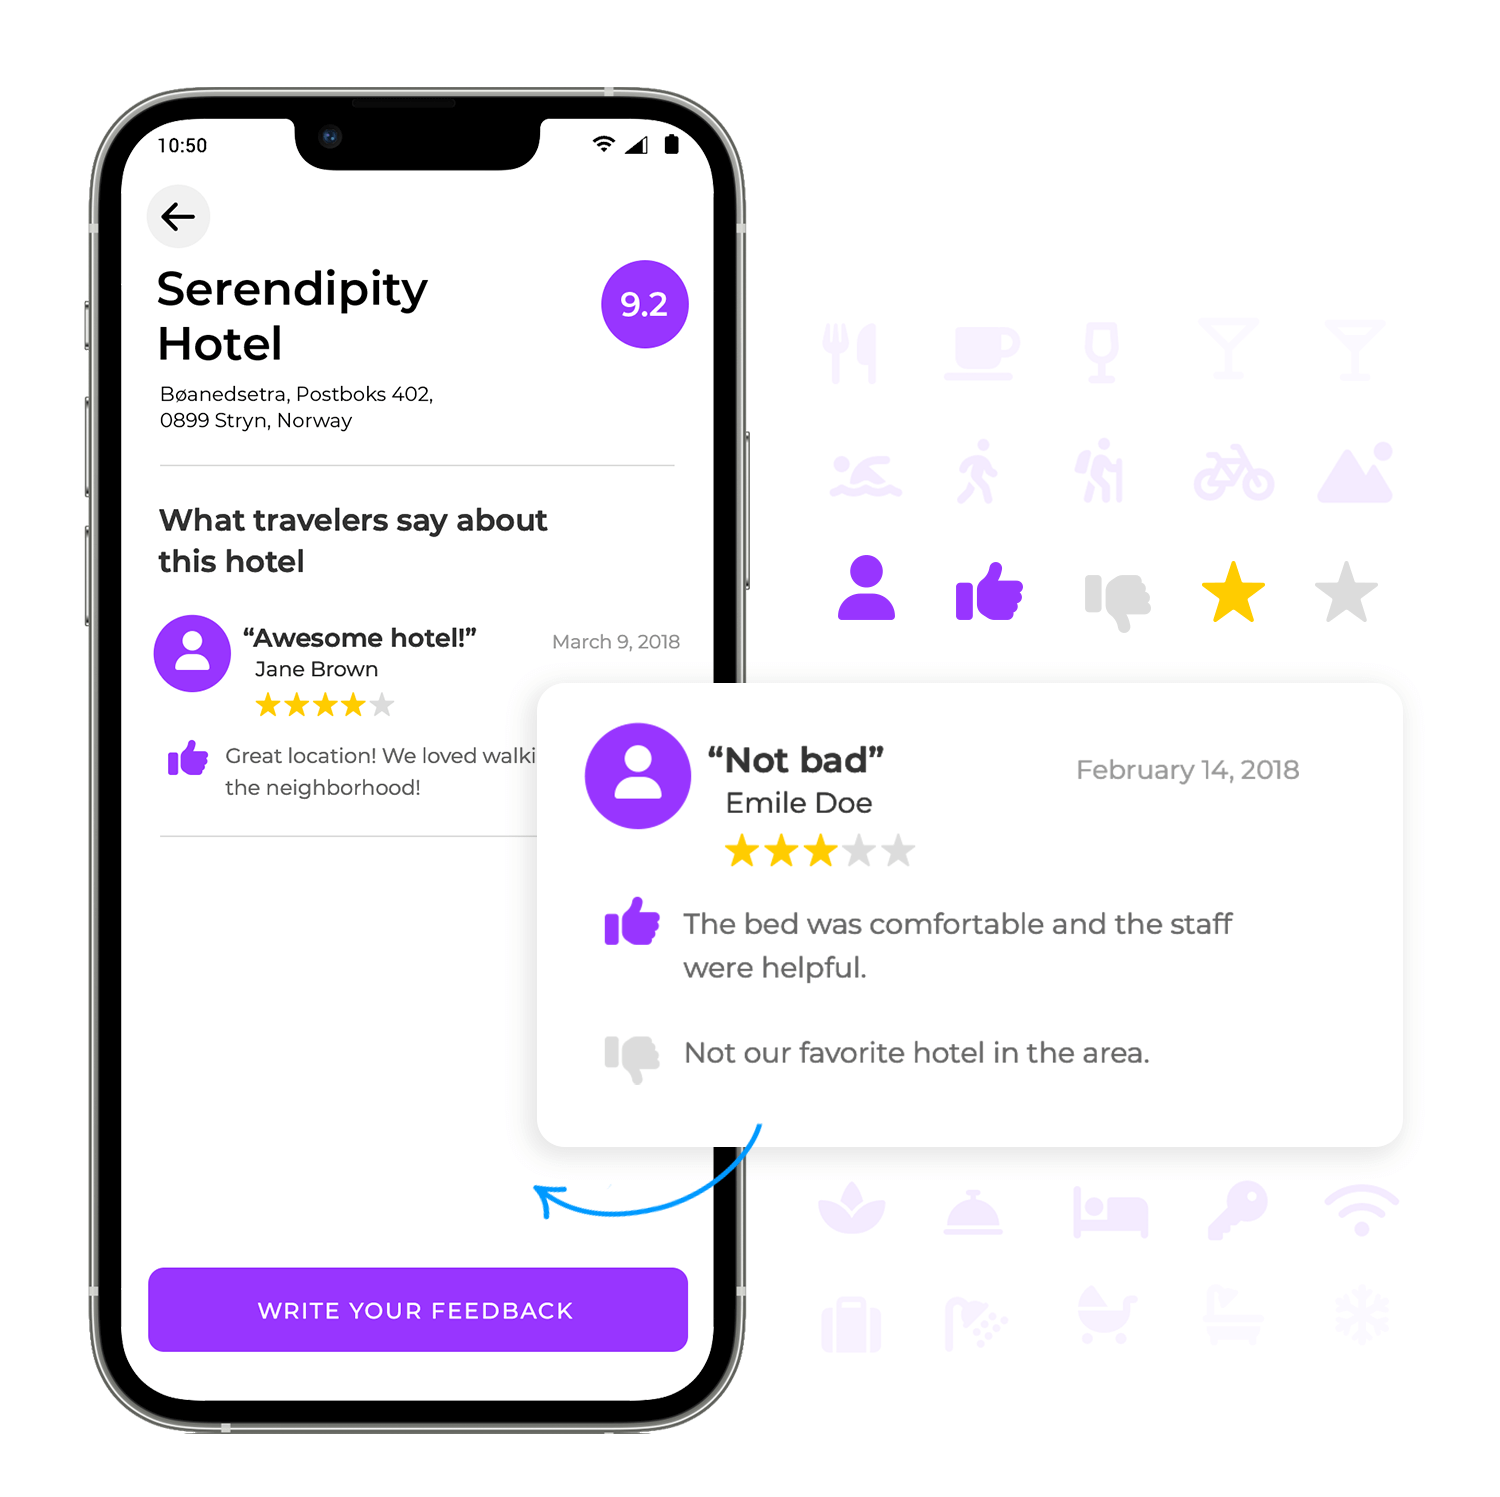
To design this screen, start by adding a header with a Text from Basic widgets.
We’ve used a star rating system, using the star and thumbs up/down Font Awesome icons. However, there are plenty of other user satisfaction icons to choose from, such as the hearts and smiley/frown emoji icons.
To match our example, drag a combination of empty and solid star icons to the canvas. Change their color to yellow (#ffc444 to match our example) and group them together. Below, drag a Paragraph widget to the canvas and write a hotel review in it. Group the star group and Paragraph together and place them at the top of the page, below the header.
Now copy the group and paste it to create additional user reviews. Remember to change the star rating and the text!
To match our example use Thumbs up and create a Thumbs down icon by flipping it vertically, to distinguish between positive and negative feedback.
Finally, add a Button to the bottom of the canvas and name if “Write your feedback”, so additional users can give feedback about the hotel. Learn about button design for more creative wisdom.
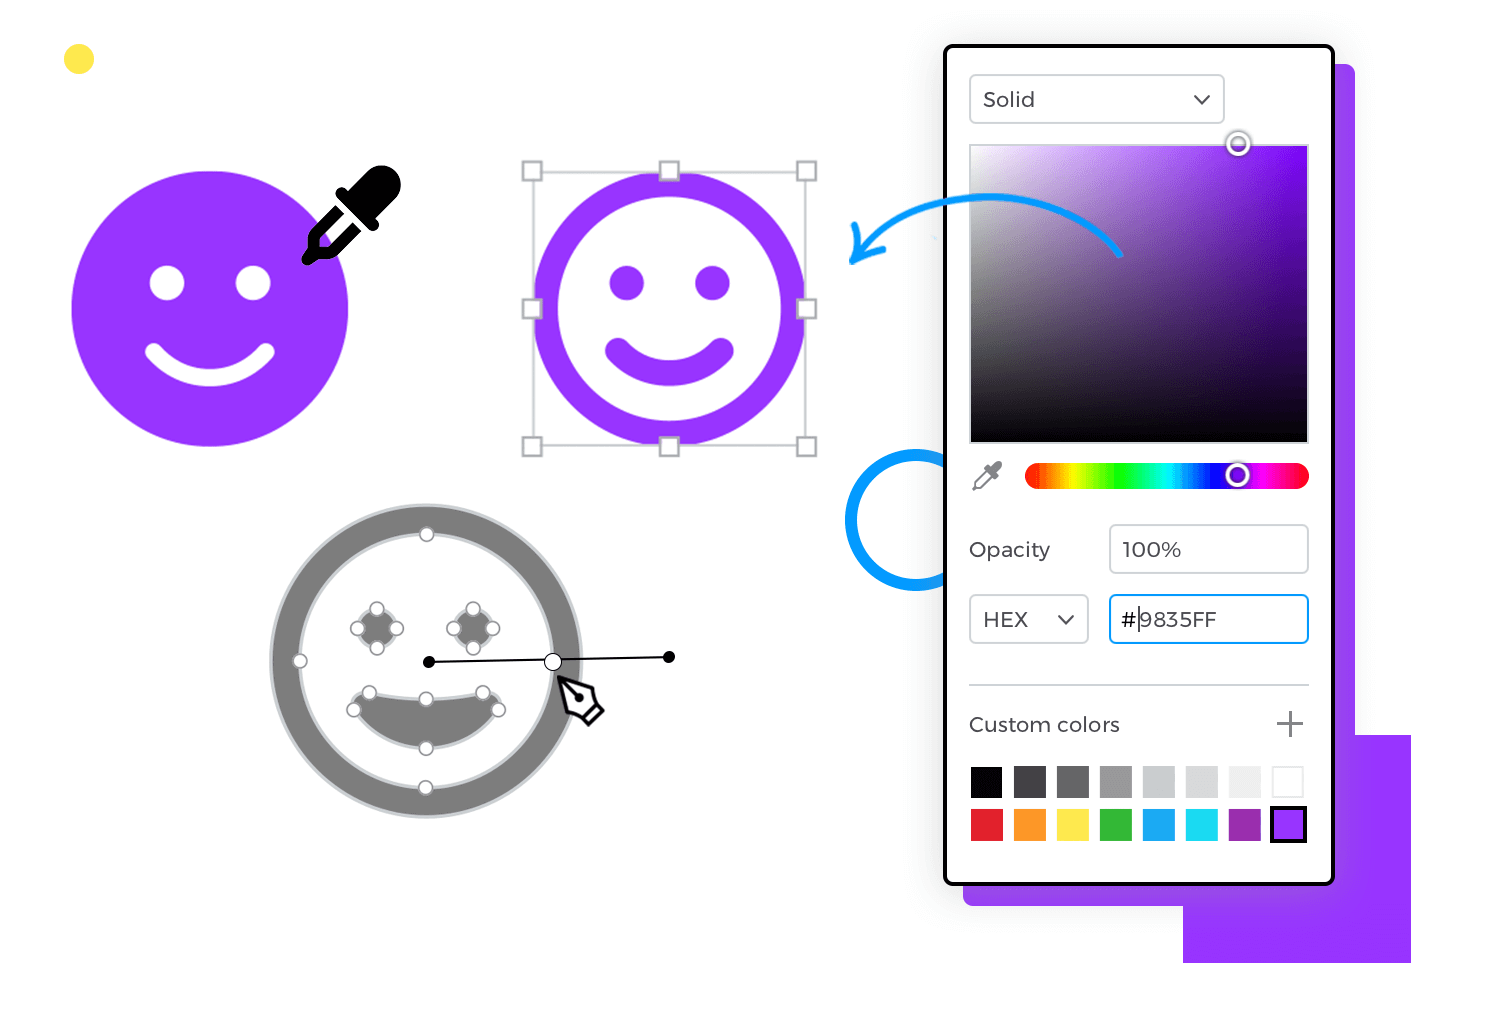
Our icons have been created using vector graphics, the standard for icons creation in user interface design. This makes a huge difference to your design process.
Vector images are stored as mathematical formulas and don’t rely on pixel information (unlike raster images). This means that they are totally independent of size and can be customized with different styles (color, border, transparency, shadow etc.) as well as enlarged or shrunk without loss of quality.
Go ahead and check out our post on the power of vector images if you want to learn more.
Using our Font Awesome UI kit saves you precious design time. Drag and drop any of our readymade icons directly onto the canvas to build out your designs in no time.
And don’t forget, icons are a great way to make your design accessible to users. Icons are fast to recognize and need no translation, making them a great usability tool for your UI design. Remember to stick to standard icons for the most important aspects of your design!
Justinmind’s Font Awesome UI kit offers a visually consistent set of icons that works well on any screen size or device, and easily adapts to your brand or project design.
Icons are a great way to convey meaning quickly in UI design. They are easy to use and vector graphics make them highly flexible and customizable while offering the highest-quality for your design. Font Awesome icons will give you the freedom to design according to your specifications.
New icons are released every year, which means the cultural lexicon of emoji and icons continue to evolve with every update to iOS and Android. Moreover, they have become consistent across platforms, which means you can streamline their use across devices.
Therefore, make sure your next project follows consistent icon design to ensure you are communicating the right message.
So don’t delay. Download Justinmind’s Font Awesome UI kit and explore 700+ brand-new icons now!
PROTOTYPE · COMMUNICATE · VALIDATE
ALL-IN-ONE PROTOTYPING TOOL FOR WEB AND MOBILE APPS
Related Content
 Justinmind 10.7.5 now includes Samsung Galaxy S25 & S25+ simulators, allowing designers to create high-fidelity prototypes with accurate dimensions and real-world interactions.1 min Read
 Justinmind 10.7 is here with the iOS 18 UI library, new device frames like iPhone 16 and Pixel 9, and integrated design templates for seamless prototyping. Experience smoother workflows and intuitive design.3 min Read
 Justinmind's groundbreaking innovations in prototyping technology have earned it the prestigious Proddy Award for Best Prototyping Product of 2024.4 min Read
