Multi-user editing
Co-editing is a feature that allows multiple users to edit the same project simultaneously.
Add and manage editors
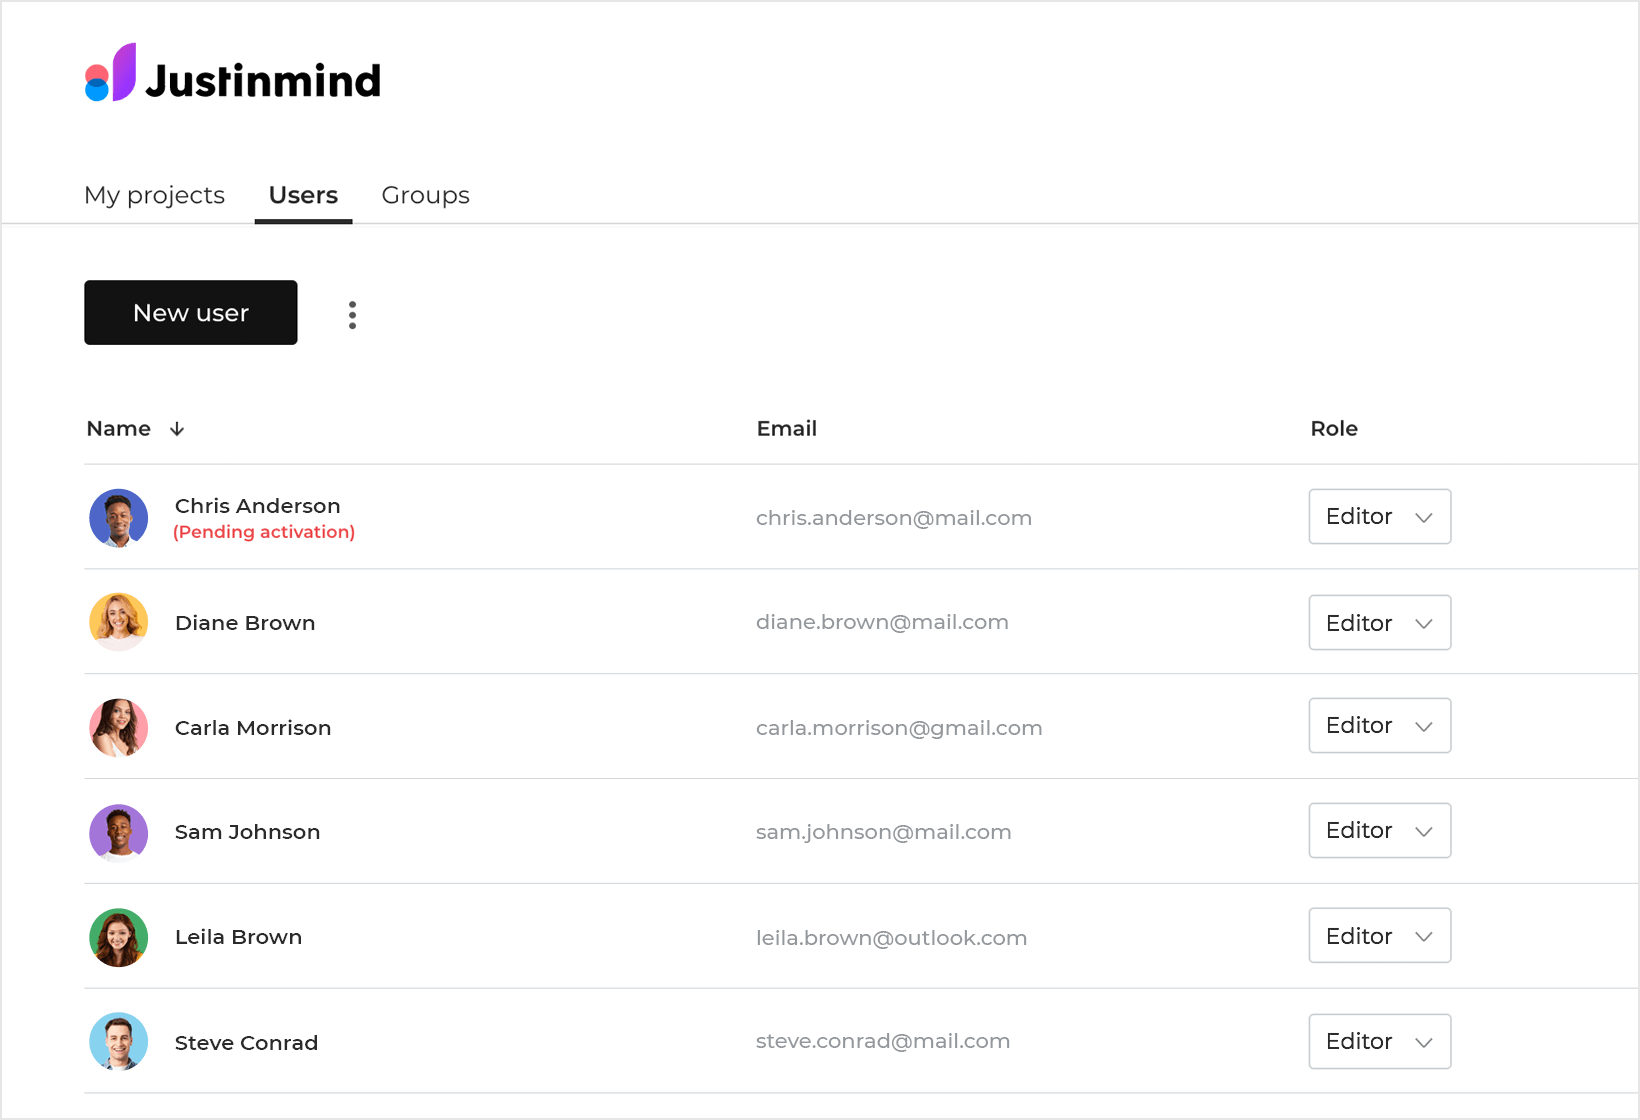
In the “Team” section, you can view the list of users as well as their respective information, such as name, email and role.

In the upper right, you can invite new editors by clicking “+ New user”.

- In the “New User” dialog write the email of the person you want to invite.
- (Optional) Set a “First name” and “Last name”.
- In the “Role” options, select “Editor” and click “OK”.
After a person has been invited to edit a project they will get an email notification with a link to activate their user.
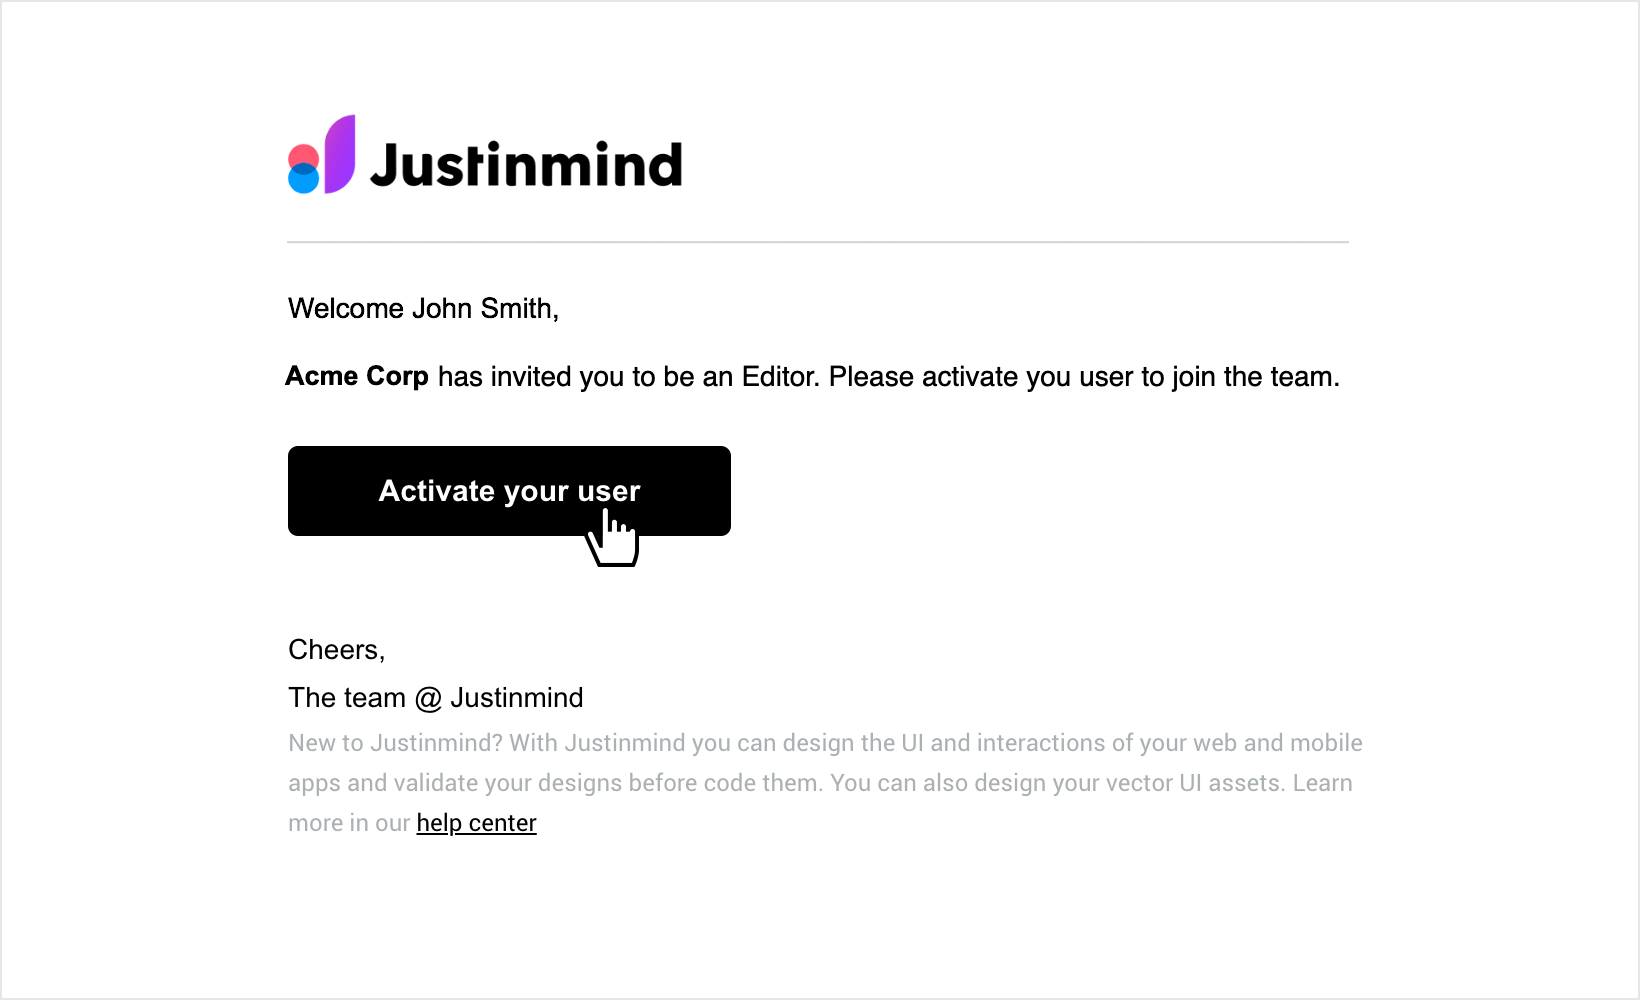
To activate a user, they should enter their First name, Last name, and enter a password.

Successful user activation will show a confirmation message with the download button to download the Justinmind prototyping tool.

Once the user has been activated, they will appear in the user list with their corresponding role. If the user is pending activation you will see the corresponding message next to their name.

You can also invite users as editors from the “Invite users” section in the sidebar of your Home dashboard. Just click on “Invite users” to open the dialog, enter the email address of those you want to invite and select the “Editor” option. This dialog allows you to invite several people at a time.

Sharing for edition
You can invite people to edit a specific project directly from the “My projects”/ “Could” tab. Open the right-click menu of the project and select the “Share” option.

The “Share with editors and viewers” dialog will open. Here, select “Can edit”, then click on the textbox to select from the existing users list or add new editors by entering their email addresses, or selecting the “Add editor” link at the bottom.

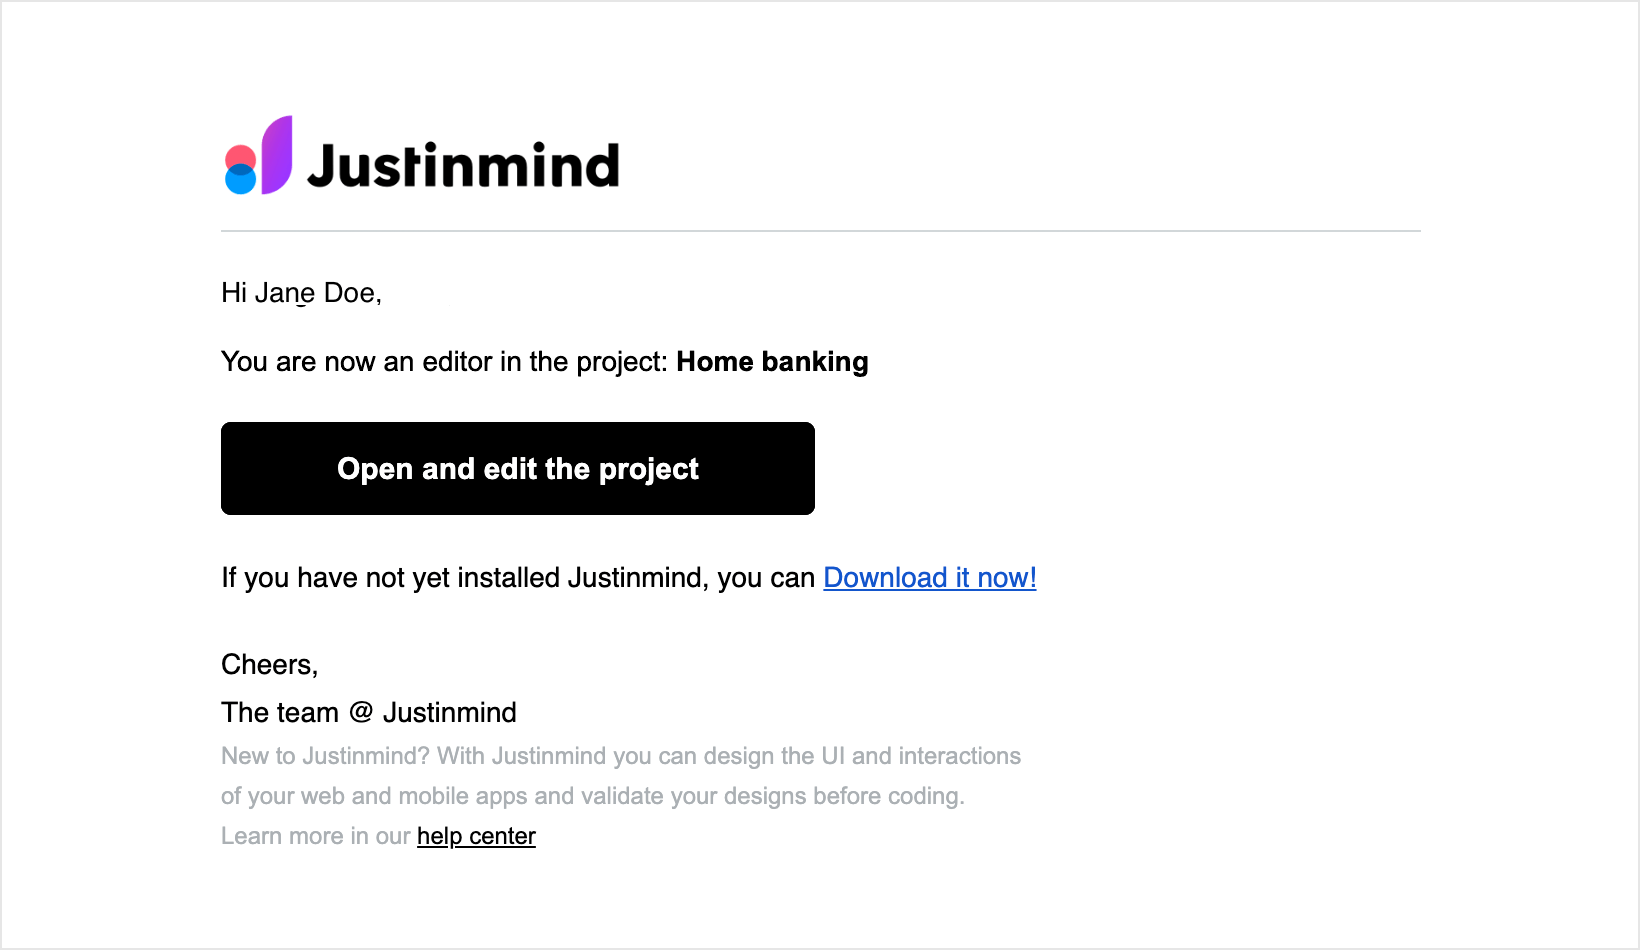
After a person has been invited to edit a project they will get an email notification to edit the project.
You can remove editors at any time by clicking the three dot menu to the right of each user and selecting “Remove”.

You can also add editors to your project when you are designing, by clicking the “Share” icon in the top toolbar of your workspace.
![]()
![]()
The same “Share with editors and viewers” dialog will open.
How co-editing works
Justinmind allows collaborative editing, meaning that a project can be simultaneously edited by 2 or more users.
When you are working on the same project with other users, the items you are currently working on will be locked, and any unused items will be unlocked automatically.

Each user working on the same project will be differentiated by color, and hovering the mouse over the lock icon will show the name of the person currently editing.

How to add annotations
When you are working on a project and save changes, a success notification will appear at the bottom of your screen with the option to add annotations.

In the “Add annotation” dialog you can write the corresponding version annotations, and decide whether you want to notify users of the changes you just made.

You can also view and add annotations from “View history” in the main menu. To do so, go to the main menu “File”>“Collaboration”>”View history”. Each time you save changes, a new version is created.

In the “View history” dialog, you can see, edit and add annotations to your own saved versions, as well as see the changes that others have made in each version of the project.

In the “View history” dialog, you can also create a new project from an older version of the design file.

Some useful tips
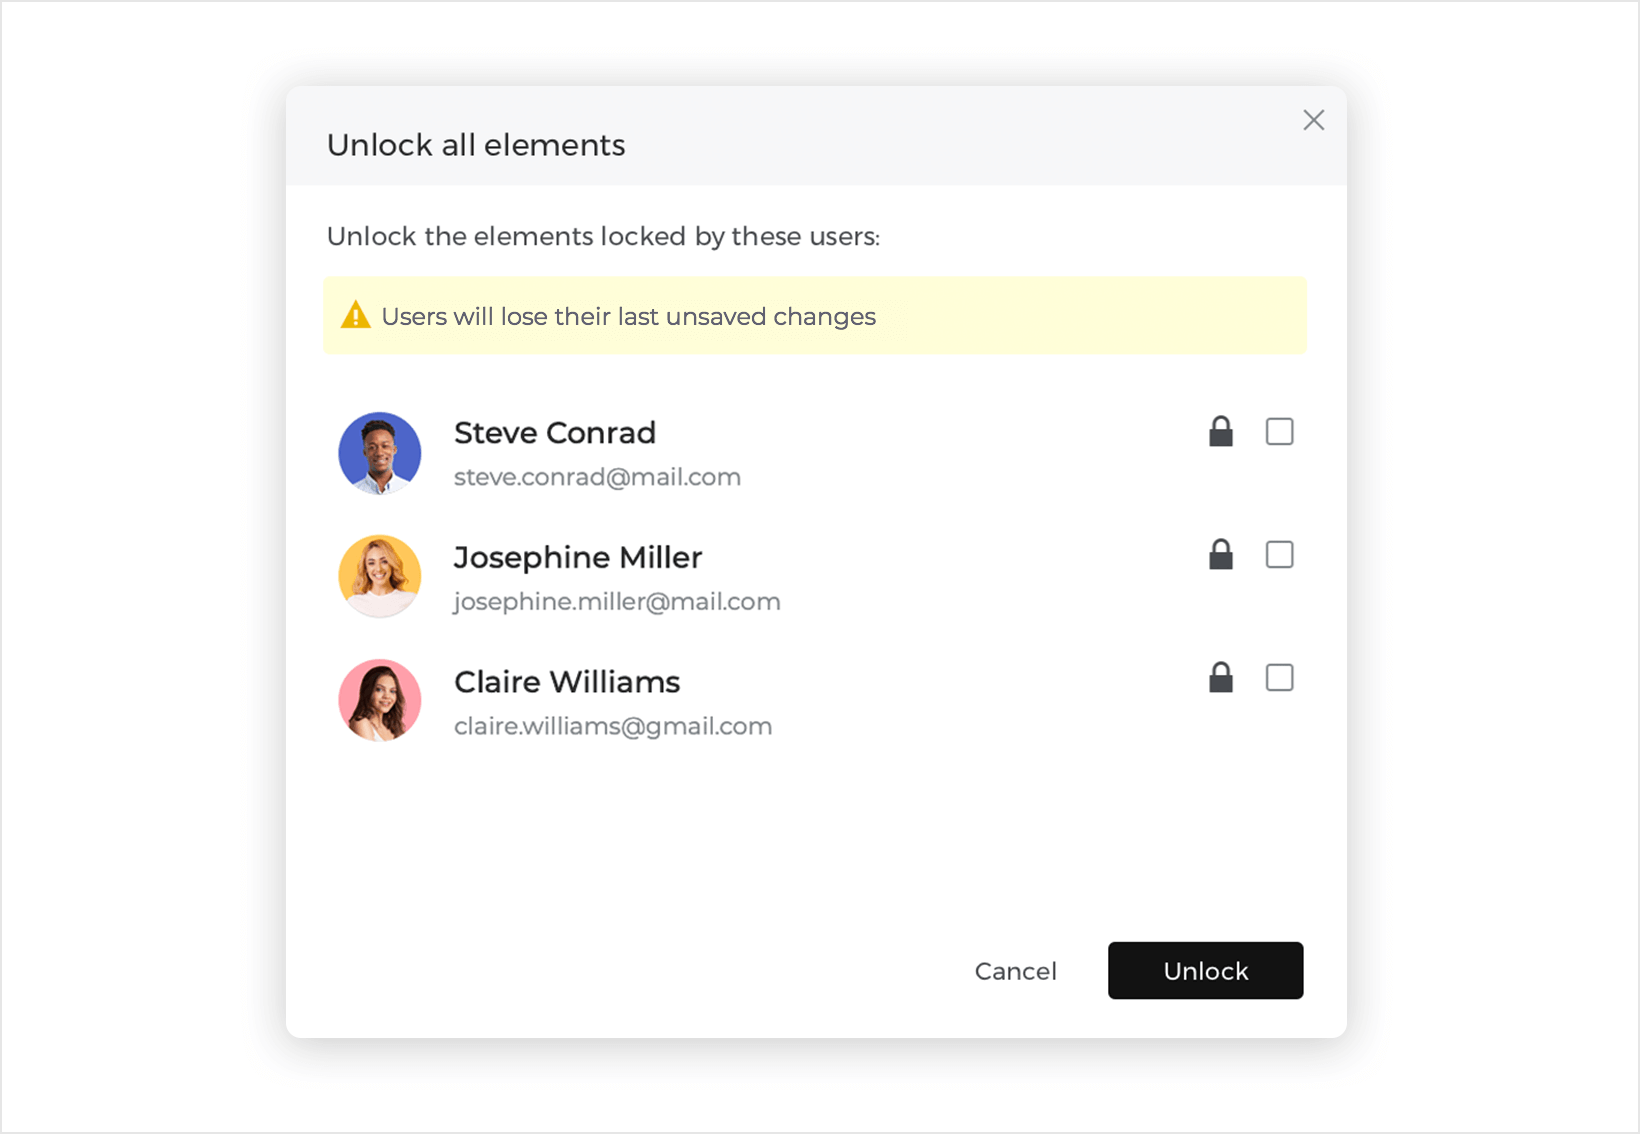
- The “Unlock all” option in the right-click menu of a project allows you to force the unlocking of all elements and screens.
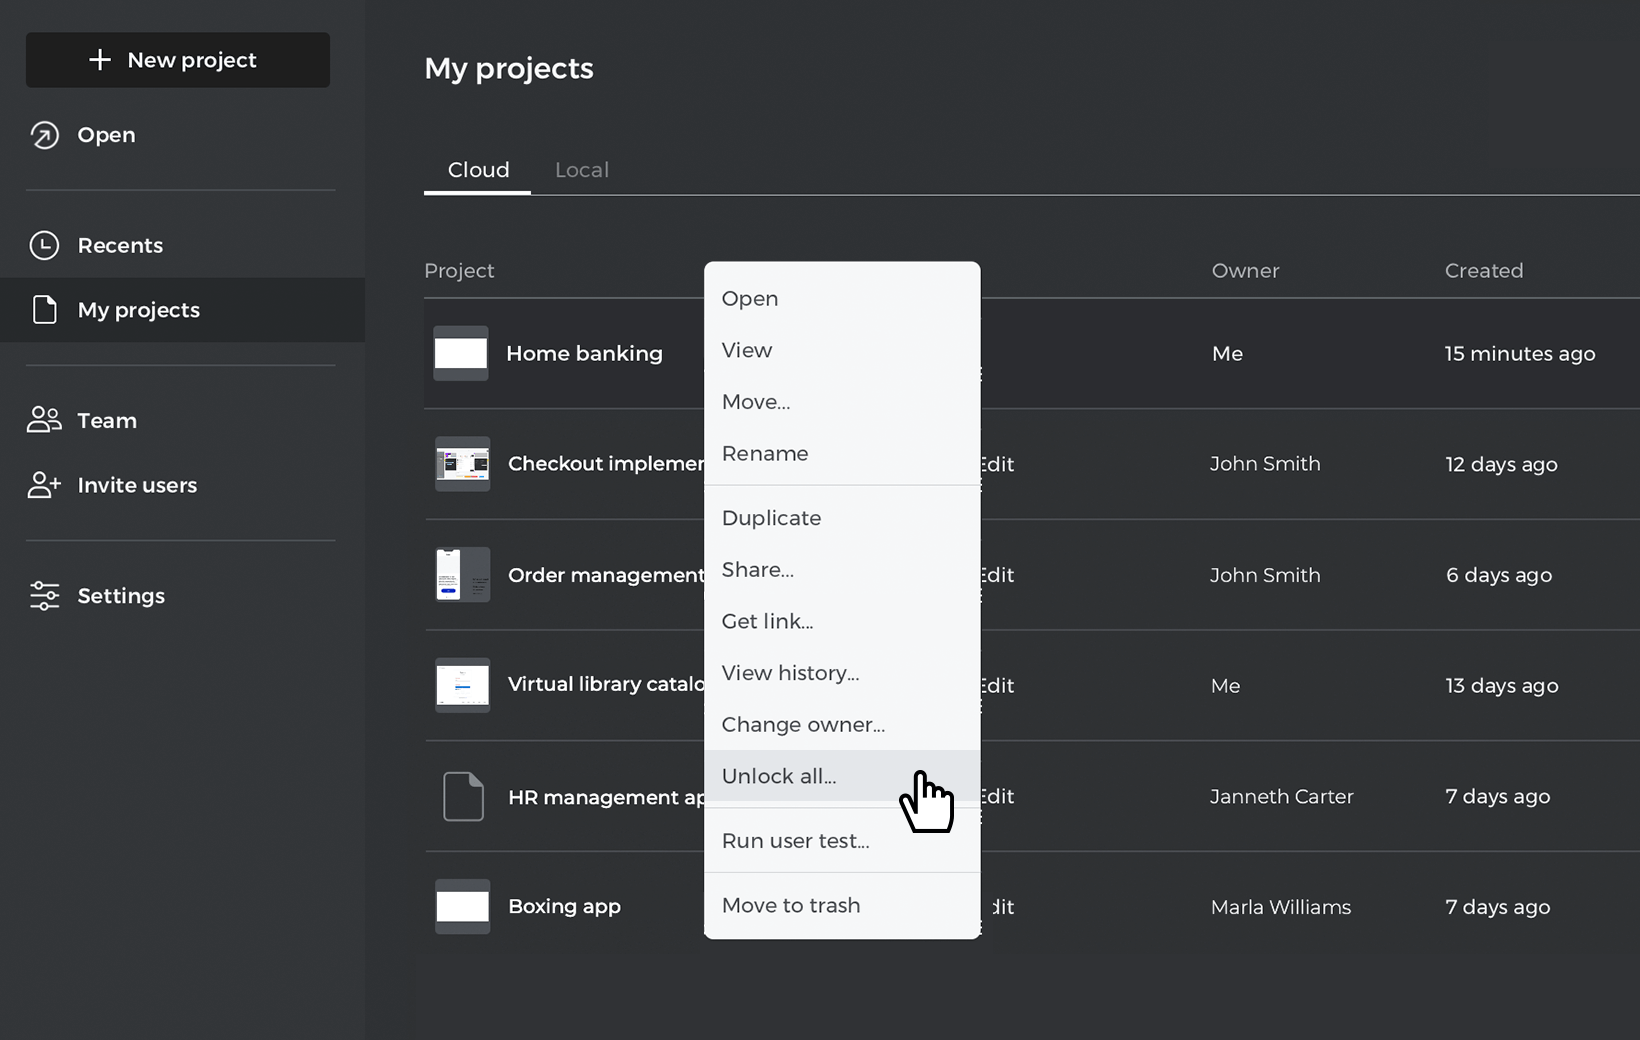

It’s recommended that you avoid using the “Unlock all” option and use it only if necessary, since unlocking all the elements of a project will discard any unsaved changes from all users currently editing.

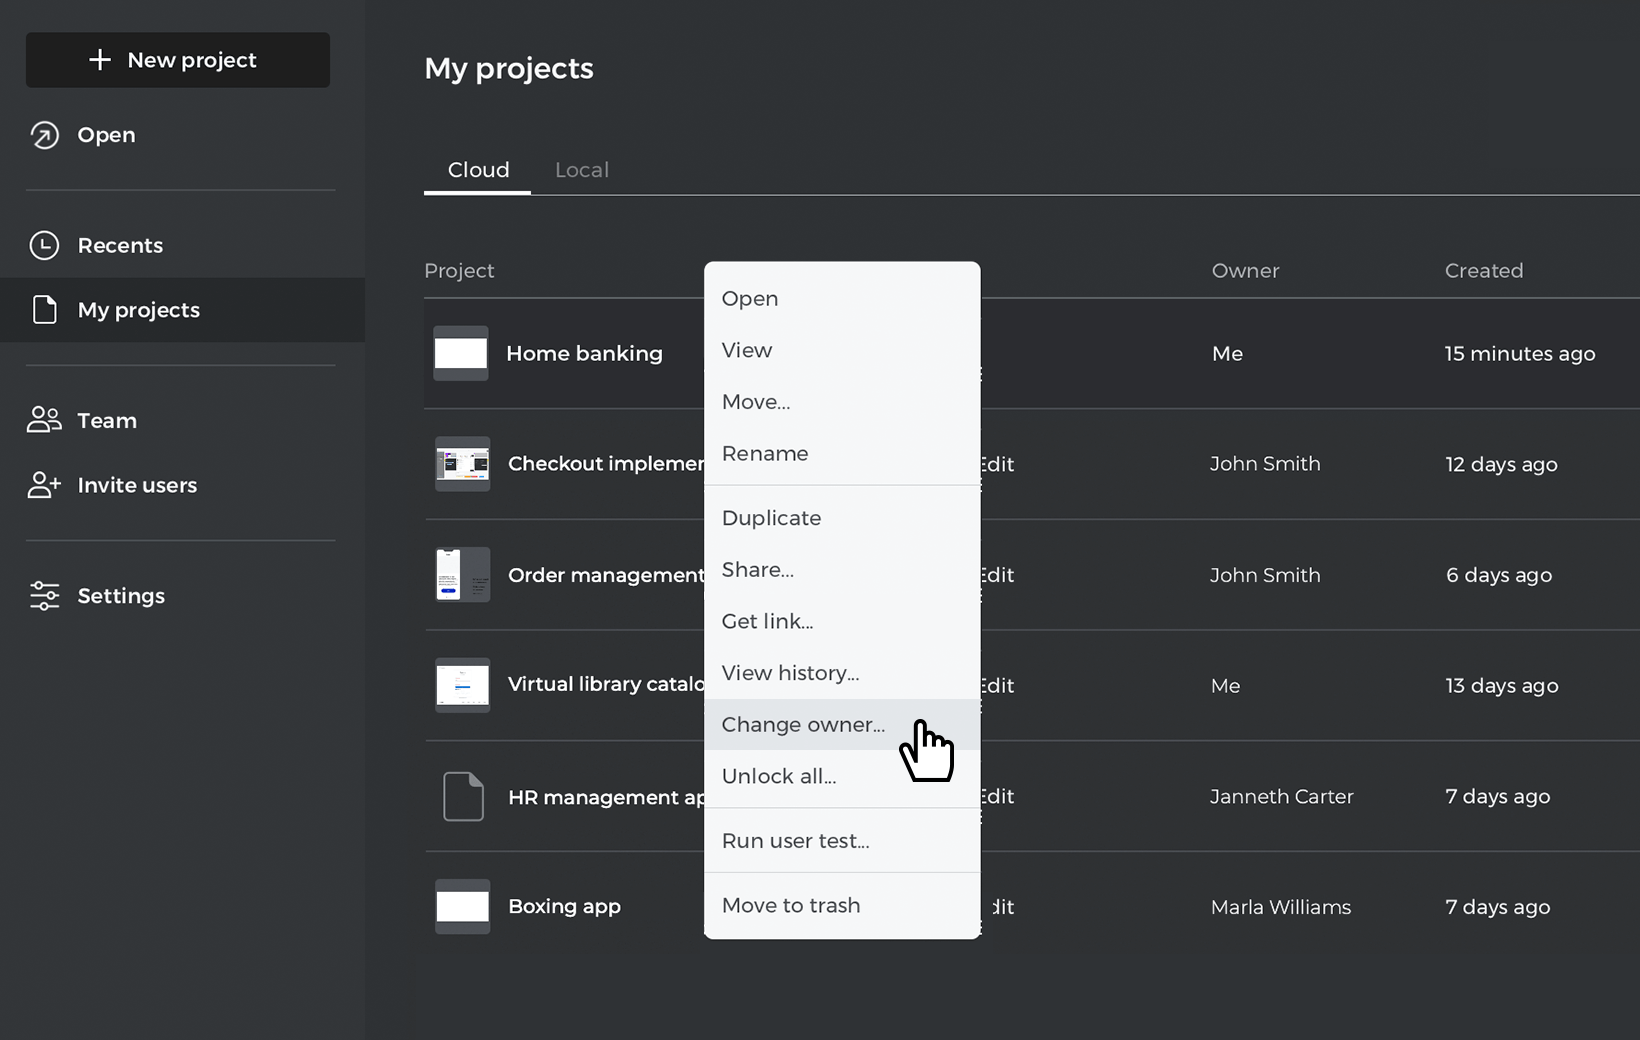
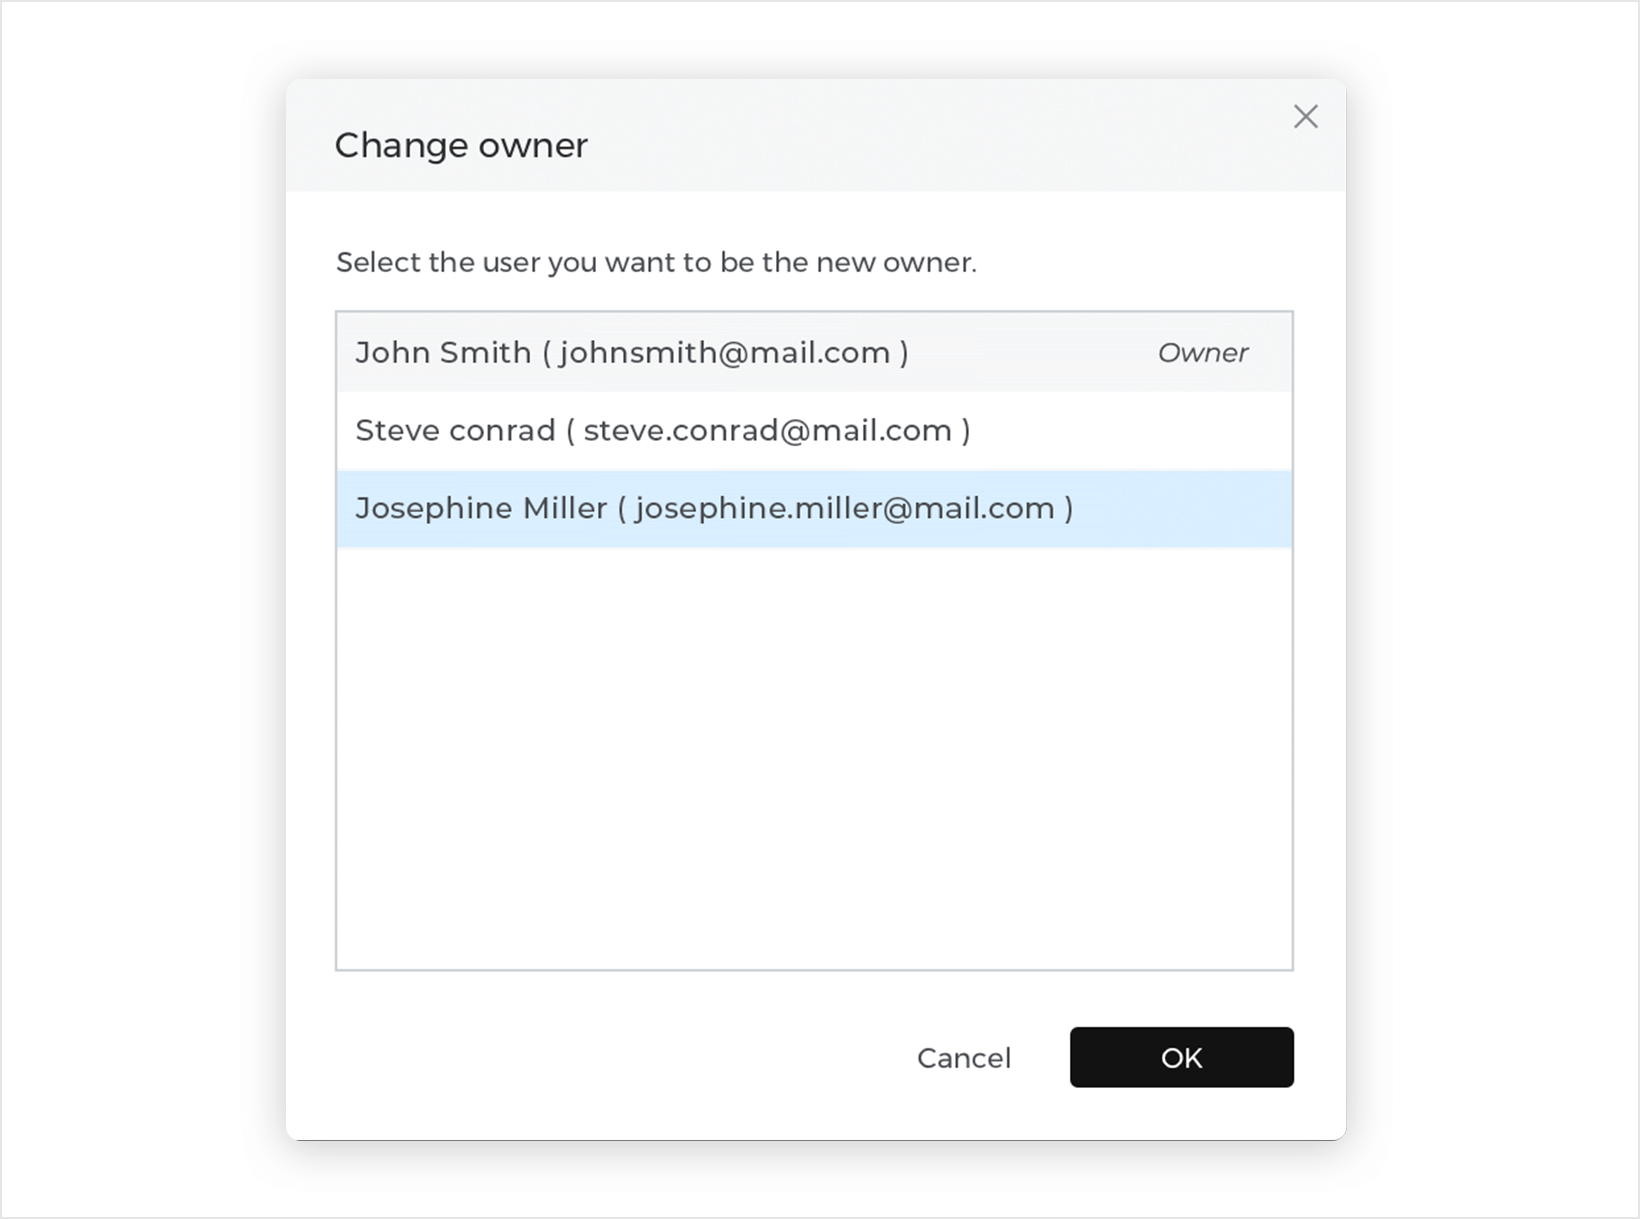
- The “change owner” option in the right-click menu of a project allows you to transfer the ownership of a project to another user.


Bulk importing editors from a .csv file
You can add multiple editors to your account at the same time by uploading a comma separated value (.csv) file and save time.
Before you get started
To add editors to your account you’ll need the following data to populate your .csv:
- Email addresses of the people with whom you want to share.
- A blank sheet in a spreadsheet program, such as Microsoft Excel or Google Sheets, saved in comma separated value (.CSV) format.
Importing user details from a .csv file
You can create and upload your file following the next steps:
- Open your blank worksheet in your spreadsheet program and fill it in. It must include all the exact column headings as shown below, where the first column heading is “Email”, then “First name”, followed by “Last name”, “Password” and “Role”.
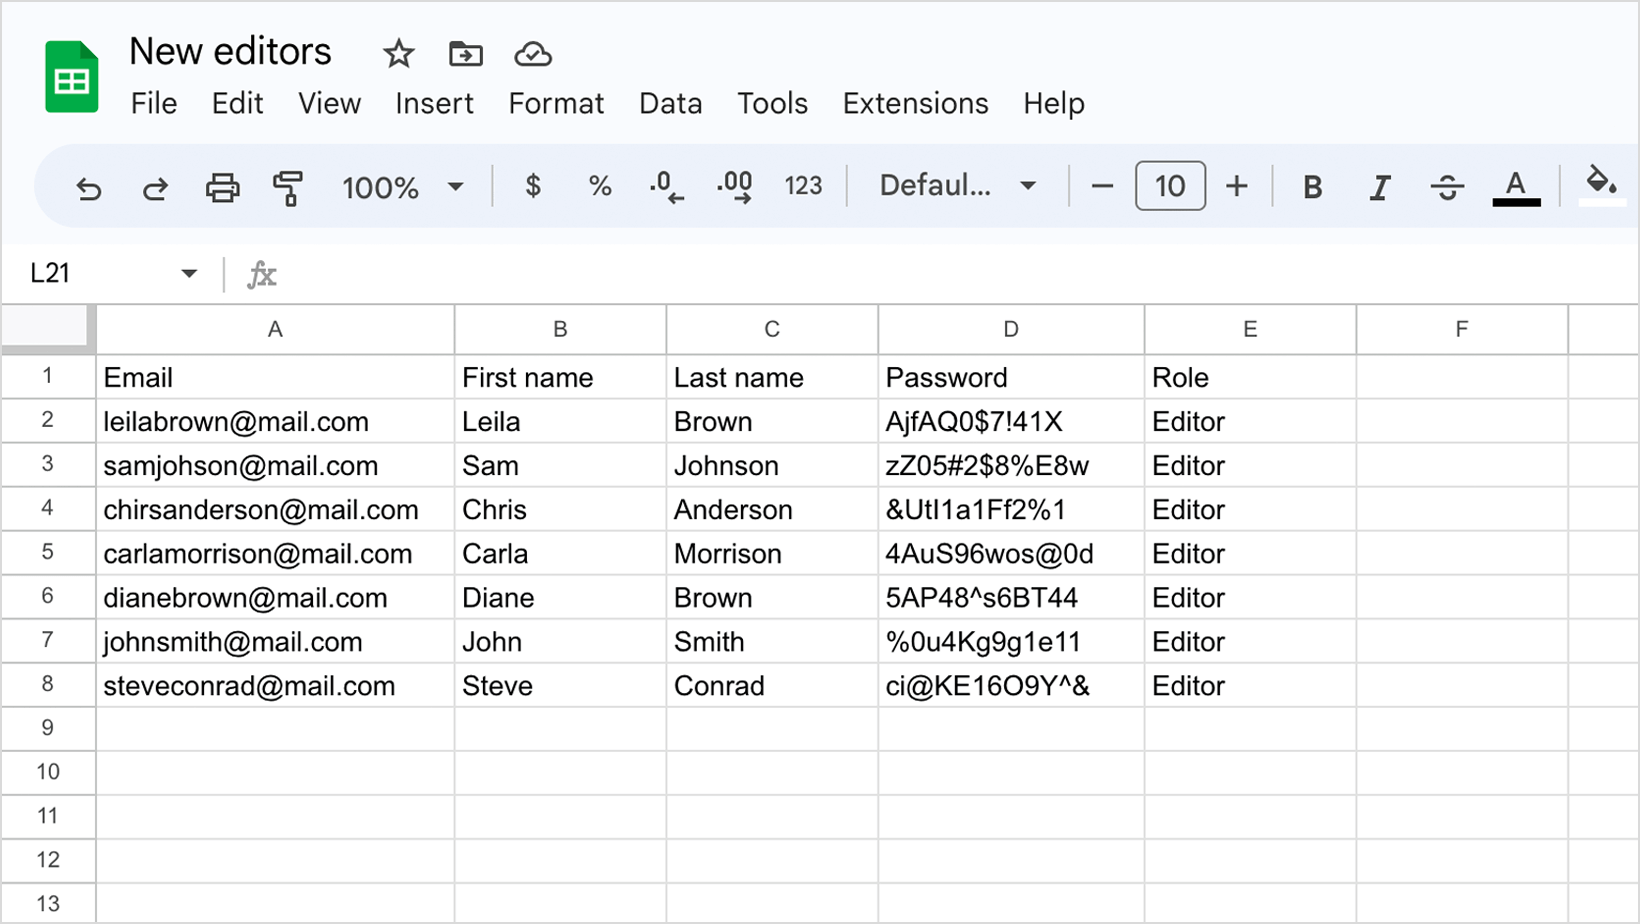

- Enter the values for all the required fields for each user: “Email” and “Role”
Enter the optional values if applicable (“First name”,“Last name”, “Password”).
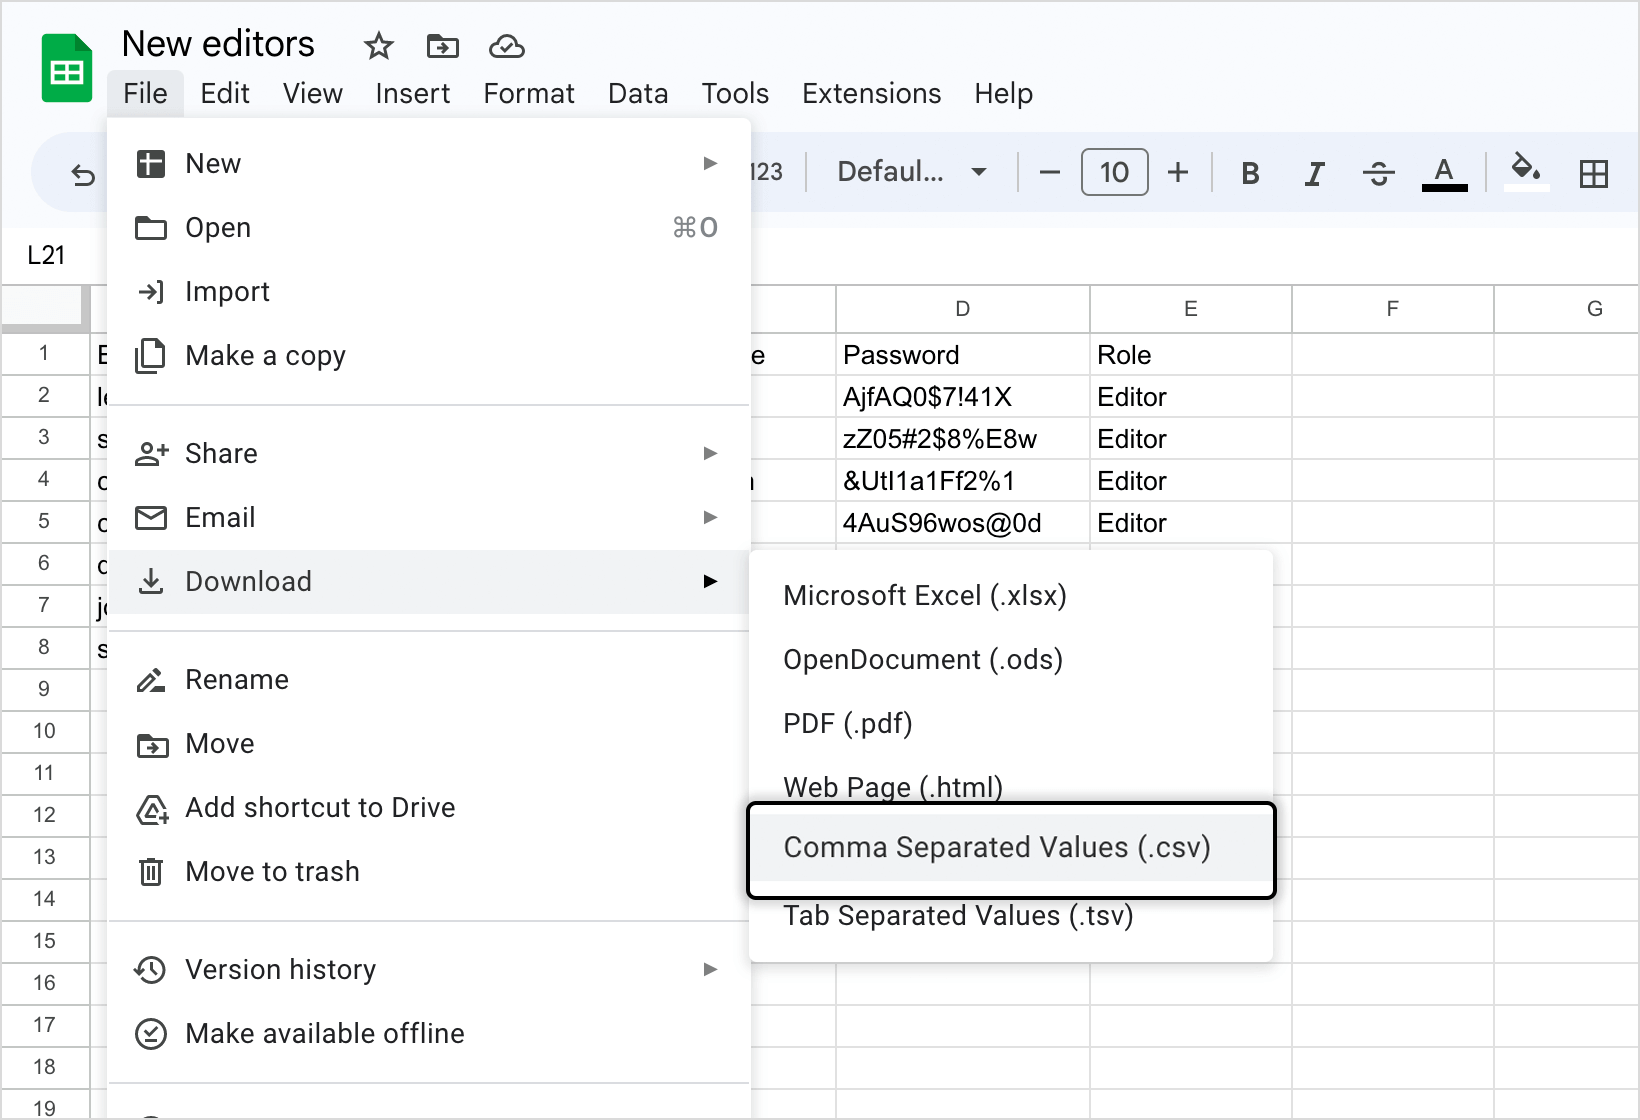
Save/download the file in .csv format.
 Note: the same applies when bulk importing users with different roles (editors and viewers) just enter the correct “Role” for each user.
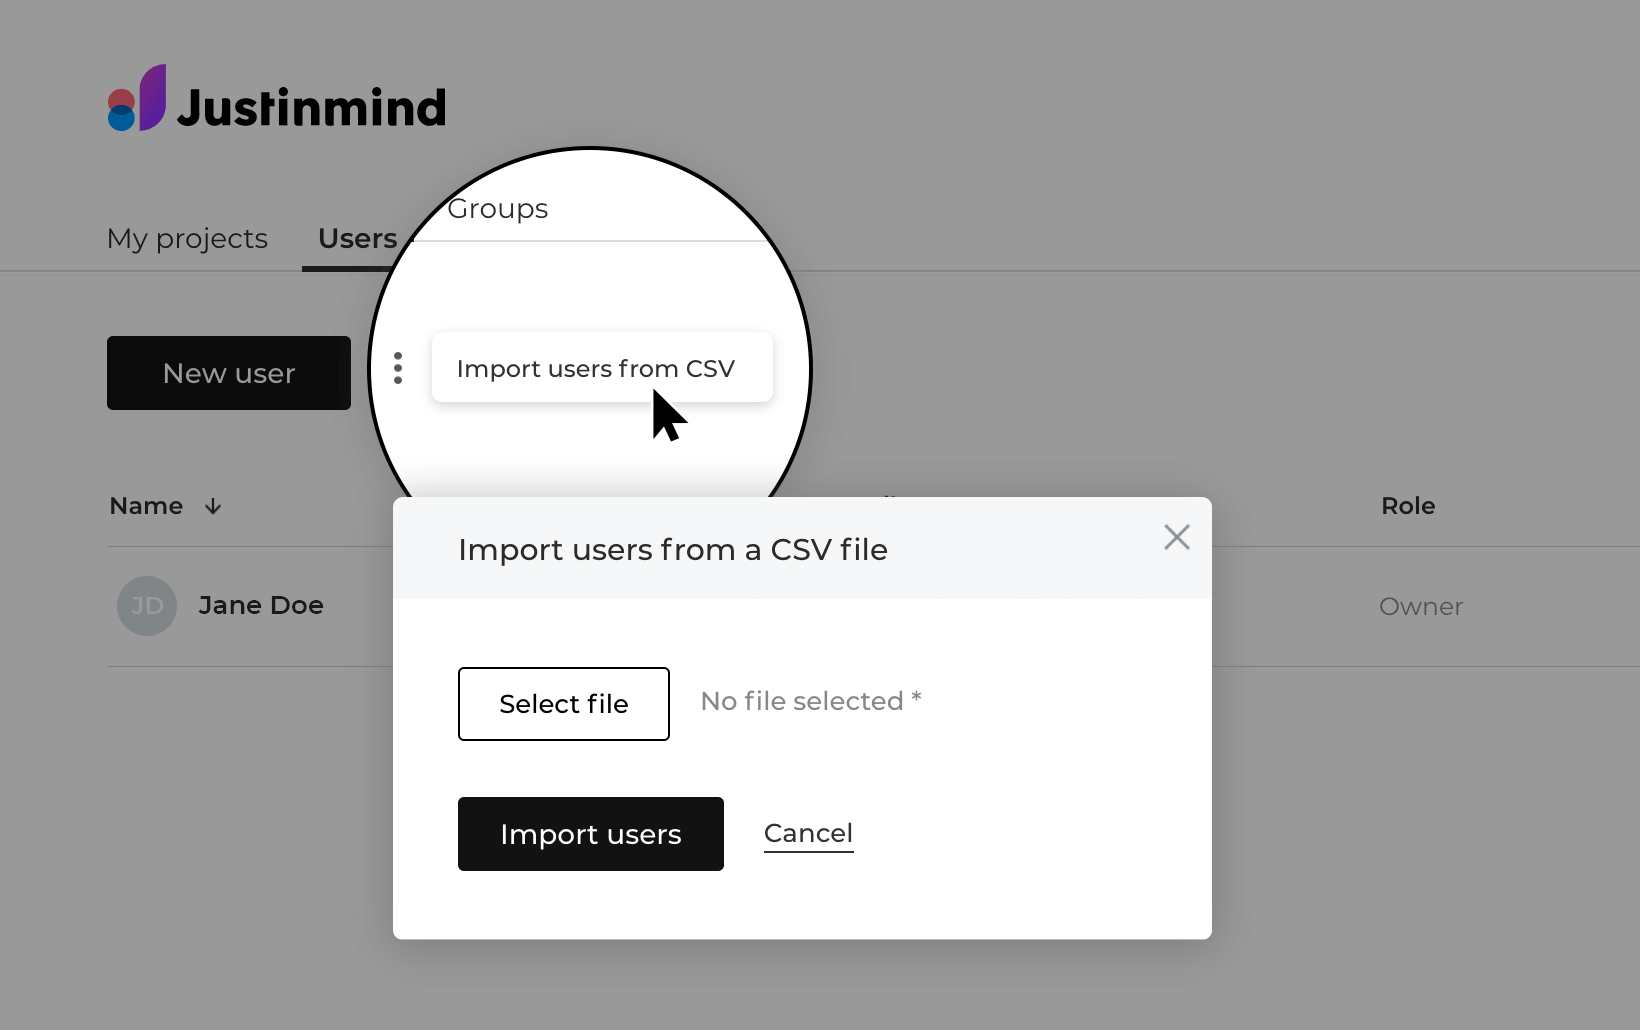
 - Go to the “Users” section in your online account and open the three dot menu next to the “New User” button.
Select the “Import users from CSV” option to open the dialog, and click “Select file” to browse to your .csv file location.
Once selected click “Import users” to confirm the file upload.