The pros and cons of moderated and unmoderated usability testing – get clued up in less than 10 minutes!
Users shouldn’t have to think too hard when they land on your site or app. By performing usability testing, you can ensure that your interface is effective and intuitive, and that your users are satisfied.
Usability testing can take place in many forms, from eye tracking and heatmaps to actual face-to-face interviews. However, most of these types of testing fall into one of two categories: moderated and unmoderated usability testing.
For anyone who doesn’t know the difference, this is the post for you. You’ll learn how and when to use these techniques, plus explore the benefits they can bring to your design process. So read on to get informed about the right usability testing technique for your UX project!
- What is moderated usability testing?
- How do you conduct moderated usability testing?
- Best practices for moderated usability testing
- What is unmoderated usability testing?
- How do you conduct unmoderated usability testing?
- Best practices for unmoderated usability testing
- Benefits of unmoderated usability testing
- Moderated vs unmoderated usability testing: the takeaway
As UX design evolves as a sector, we begin to have a better understanding of what it takes to create a great product – and user testing is a crucial step towards that goal.
But even though most of us know that we need at least some form of testing to validate the design, it can still be confusing to narrow down the specific ways to go about it. Precisely because there are so many different ways to carry out usability testing, people can get overwhelmed and get stuck trying to choose a method.

One of the most important questions in shaping your usability testing process will be deciding on moderated or unmoderated usability testing. Both have their own sets of benefits and challenges, and the right choice for you can vary greatly depending on the product or the team.
Moderated usability testing is a usability testing technique that involves the active participation of a trained facilitator or moderator. These are classically held in a UX lab or in a corporate setting – but modern testing tools now allow for remote moderated usability testing as well. The most popular ones are also integrated with Justinmind’s prototyping tool.
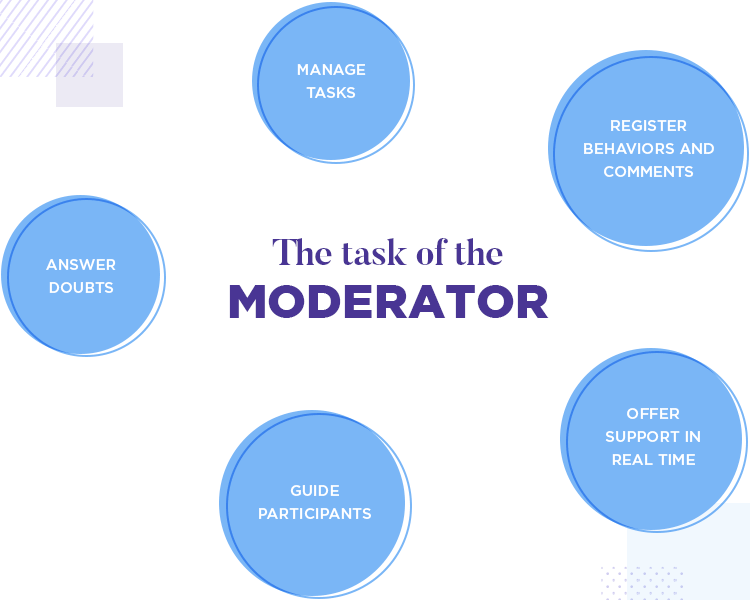
Moderated usability testing facilitators need expert knowledge of the product being tested. They are in charge of administering tasks, guiding participant, recording behaviors and comments, answering questions and replying to their feedback about the test – all in real time.
Moderated usability testing can be done either in-person or remotely. If done remotely, participants will need to share screens with the moderator so that the test can be conducted in real time. Participants are often asked to think aloud as they complete tasks; this helps moderator follow their train of thought in terms of how they get from touchpoint A to B.
Usability testing is an important part of the user experience as it helps UX teams to understand how their target users interact with their product. Moderating usability tests goes one step further in helping UX teams connect with their users and helps them to collect additional metrics about the “how” and “why” of participants’ responses to the study.
This technique is often used earlier on in the design process than unmoderated usability testing. This is because it allows UX teams to ask participants follow up questions about their responses – which is key when working out the overall concept of a design project.
It is true that moderated usability testing can come with a nasty price tag. Getting participants, a moderator and the product in the same room for about an hour per participant can get really expensive. So expensive, in fact, that this kind of user testing is just not within the reach of many designers.
Remote moderated usability testing helps with that nasty bill by allowing the moderator to interact with users online instead of face-to-face. Even by choosing a relatively expensive user testing tool, the cost of remote and on-site testing can seldom be compared.
As with many debates in the UX field, the answer is “it depends”. Mostly, however, it will depend on what you choose to prioritize. For some design teams, the hefty bill makes on-site moderated usability testing a mere fantasy. In that sense, remote moderated usability testing is a wonder to behold.
With getting participants sitting in front of a computer and having them share their screens, you get fantastic insight into the user and their behavior. There is, however, some naturality that is lost. When silence reigns, it can be difficult to know when to ask the participant questions.
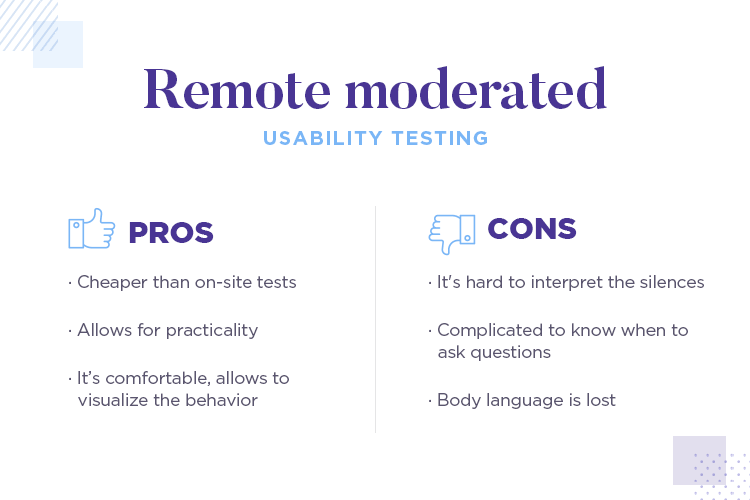
Their silence could mean they are confused, distracted, in thought or just bored. For moderators, the line between interacting and interrupting the participant can get blurry.
And so, there is a bit of body language that is lost when moderated usability tests are done remotely. In this scenario, the moderator can still ask questions and interact with participants but there is no doubt some insights, as minor as they may be, are lost in translation.
Moderated usability testing is a process with many different steps, all culminating in the interpretation of the user behavior. As with many young sectors such as UX design, there is still a bit of debate on what this process entails.
For example, some designers may believe that a moderated usability testing process has three parts, going from pre-session to follow-up questions. The issue is that there is a whole phase of planning before you can ask the user anything – sort of like setting the stage before a show.
A usability test involves a lot of different factors. It’s not like you can shove your product in the face of the first person you see on the street and ask what they think. You need to know what kind of people you’re after and what you want to ask them.
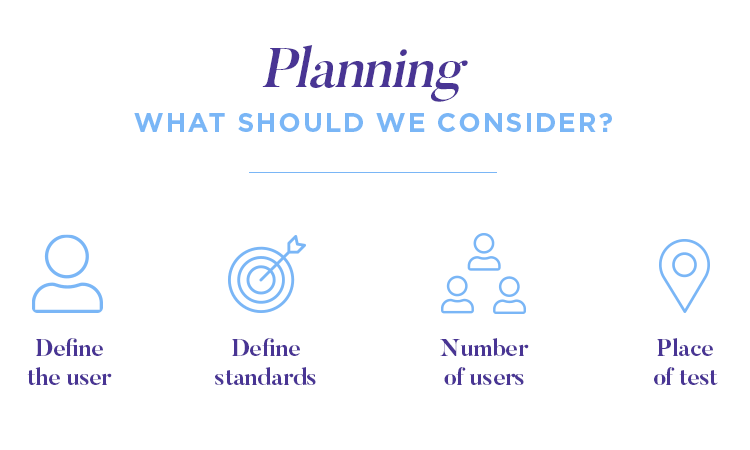
And so, before you get to do any actual testing, you have to plan ahead. It’s important to understand that this planning will include defining your goals and key elements that will be tested – what kind of participants you’ll want and what the test will be like.
All moderated user testing needs due planning and a structure.
Knowing what parts of the product you want to test isn’t enough, you need to know where you want to go regarding each of these elements. It’s preferable to be specific whenever possible, and avoid broad goals such as “to have users successfully purchase one item”. Instead, go for something along the lines of “at least 70% of users need to complete a purchase within 2 minutes”.
These specifics will help you and your team understand if the design lives up to your standards – making the decision, to reiterate on the design or to accept it as it is, easier. That way, you can create a certain workflow in which elements clearly pass or fail these standards, saving time for everybody.
This is also the time where you’ll need to narrow down on some other factors, such as how many people will participate, your target users, where the test will be and so on. The more thoroughly you do your homework, the less unpleasant surprises you’re likely to encounter in your moderated usability testing.
If you have already defined the details of your moderated usability testing, it’s time for you to recruit participants for the study. This will certainly bring about a few key questions that are tied to recruiting, such as to hire the services of an external recruiter.
The matter of recruiting yourself or paying for a third party to do this for you will depend, most likely, on your budget. Finding 5 to 6 people sure sounds easy at first, but finding the right 5 people can represent a huge challenge. And so, many design teams find it better to bring in external help, such as People for Research.

Alternatively, recruiting may be less of an issue if you’re using a user testing tool that already provides that service. Some user testing tools have grown to be very advanced, and allow you to not just conduct the moderated usability testing remotely but to even get recruiting done quickly. UserZoom, for example, offers clients a huge platform of possible participants for you to choose from.
Don’t miss out: Justinmind is fully integrated with UserZoom, for quicker and better workflows. Check out all the available Justinmind integrations with user testing tools for more information.
No matter how you go about recruiting your participants, it’s important that you screen them appropriately. That means you’ll want to make sure these people are in the right demographics and show the right behavioral traits you seek in your users.
You’d be surprised at how many loose ends can survive until this phase of your moderated usability testing. By now, you should have a clear idea of where you are and where you want to get with your standards and goals. Now, comes the time to decide on a couple more things.
Depending on your product, you may find yourself deciding on what device to carry out testing. If your product is a website, what browser will you be testing with? Will participants be using a Mac or PC? If a PC, then what version will they be running on their computer? These questions matter, and will likely depend on what the majority of your target audience uses.
On a separate but similar note, you’ll also have to decide how you’ll be conducting the moderated usability testing. This refers not just to the testing tool you’ll be using, but also the actual questions and tasks you’ll present participants with. Here is the classic structure of a moderated usability test:
- Pre-session questions: these tend to be simple in nature and focus on the participant’s expectations. They can also include questions on the participant’s lifestyle or general behavior.
- Actual tasks: they can vary greatly depending on what you’re testing. For brand new products, they tend to focus on frequently performed tasks (like making a purchase) that are crucial for the operation of the product (like paying for the purchase).
- General experience questions: assess how the participant would describe or rank their experience with the product. You can establish some parameters such as ease of use, general satisfaction or other parameters that better suit your test.
Moderating user tests has a certain art to it. You have a few key things to bear in mind as you moderate the test on participant after participant, such as maintaining consistency throughout the entire thing. After the 5th participant, you’ll probably be painfully aware that you’ve asked the same exact things using the same exact words – consider that a good sign.
The main goals you should have when conducting your moderated usability testing are to not influence participants and to take note of everything.
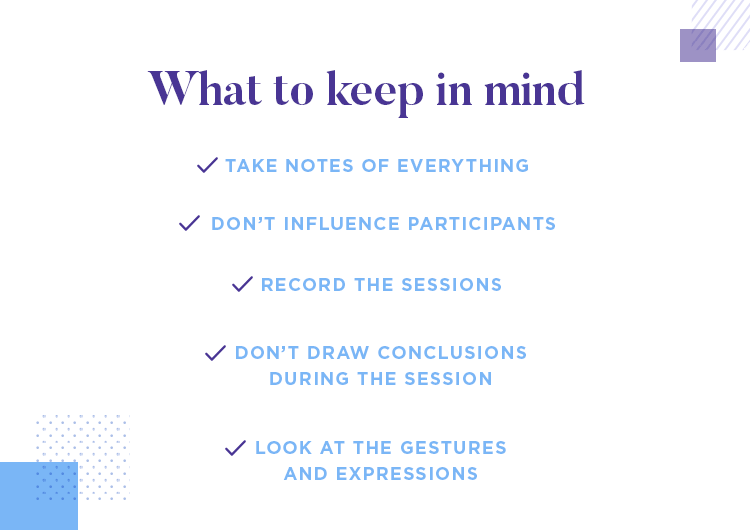
Not influencing participants can be tricky, as experienced researchers will tell you with a sigh. In broad strokes, it’s all about not revealing too much and not sharing information that isn’t required for users to complete said tasks. As Laura Klein explains in her book, moderators often stain test results just by introducing the product.
For more in-depth: UX for Lean Startups by Laura Klein is rich in precious UX research information. It makes for a reading that is both light and enlightening.
It’s likely that user’s reactions and their screens are recorded in the testing. Logically, you can refer back to these recordings in order to draw conclusions but it is also important that you take notes as the testing progresses. For interesting expressions, make sure to write down what the user’s facial expression is and the time stamp so you can find that exact moment later on.
It’s generally recommended that you refrain from actually drawing your conclusions while the moderated usability testing is taking place. Not only will it open the door to you missing a detail or two while writing things down, but it can also increase your partiality and lead to biased observations.
Getting all the data is only part of the way to a successful usability test. Moderated or not, your test will likely result in quite a bit of data – which means you’ll need to go through all of it and organize your thoughts.
This process can be made easier or more difficult according to the testing tool you use. Many good tools out there allow you to make notes right on the video recording, or give you information already in graphs and other visual means.
You’ll want to go through each video or recording and take note of issues, problems, questions or anything else that may represent an insight to the study. This process is usually quick in qualitative studies where you’ll be reviewing 5 or 6 videos. With larger studies, however, this can grow to be a lengthy task.

Keep an eye on the key metrics and goals that you established before. How do the metrics compare to your standards? How do they relate to your goals? The idea is that you want to analyze where you are in comparison to where you want to be in regards to usability.
As a general rule, try to keep your report on your findings straightforward. It’s important to remember that your design team won’t be the only one reading the report. Most likely, you’ll be sending that report to other major stakeholders who will, no doubt, appreciate an easy-to-read document. Here are some advisable traits for your report:
- Don’t use any lingo related to UX or design – your stakeholders may be business analysts and investors.
- Try to use visual aids such as bar charts to show data on larger studies.
- Have a clear section dedicated to the actual conclusions and learnings you got from the test.
- If you feel like the charts and graphs of the tool fall short, export the data and create your own so it shows the right pieces of information.
Facilitators should aim to build a good rapport with the test participant in order to get the best results. The deeper the participant’s trust in the facilitator, the more open they’ll be about their thoughts and feelings.
Plan for test derailment. Problems often arise and being able to reset your test quickly will help you avoid wasted time and flustered participants. It’s best to develop a certain procedure for common obstacles in your moderated usability testing, such as users becoming stuck on a certain task.
Another valuable best practice for any kind of usability testing is to run a pilot test, so you can be sure that each piece of the puzzle fits well to form a good test.
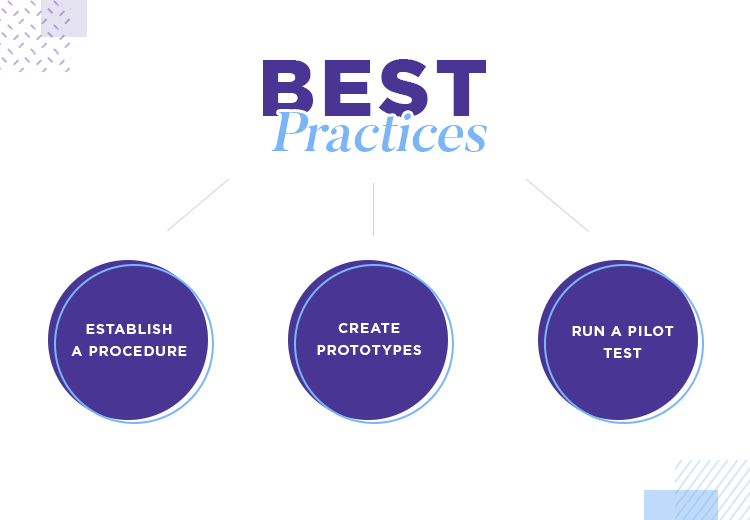
Use prototypes to test your features. Depending on the stage at which you are performing moderated usability testing, you may want to use a low fidelity wireframe or an interactive prototype. Either way, keep things visual to keep the user flow natural.
Generally, however, it’s best to test with a higher fidelity in your prototype as it will give you a more realistic idea of how users perceive the final product. Testing lower fidelity wireframes is also a viable method for validating the building blocks of your product, such as your navigation design.
Unlike moderated usability testing, unmoderated usability testing is completed by test participants in their own environment without a facilitator present. This technique is typically quicker and cheaper than moderated testing (although not always), making it a good choice for UX projects with tight deadlines and budgets.
The majority of traits of unmoderated usability testing are the same as for moderated tests – with one crucial difference, of course. In unmoderated usability testing, there is no researcher to moderate the test as it develops.
It’s important to understand that unmoderated usability testing has a few important limitations. For example, it’s not recommended to run unmoderated tests on prototypes with low fidelity or on wireframes. These can often be confusing to users, and the lack of guidance may result in shaky results.
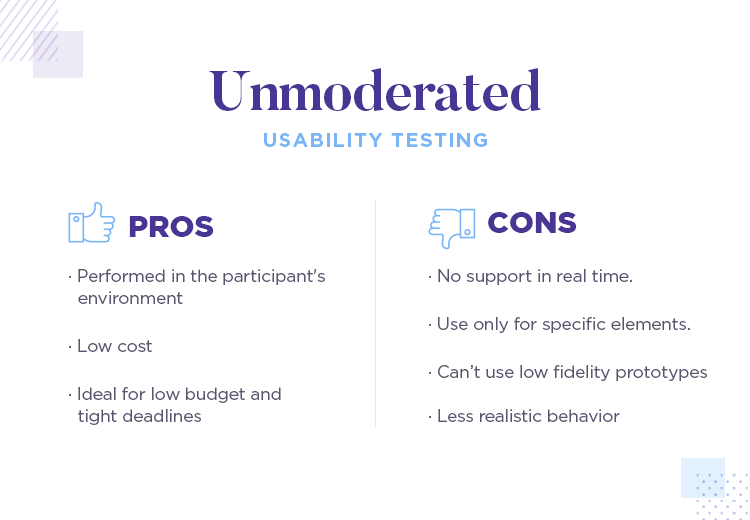
In unmoderated usability testing, participant users are likely to be less invested and engaged. While that may not seem like an issue, it does contribute to less realistic behavior on the part of the participants – which affects results.
As always, start your usability study by defining its specific objectives, and then designing the questions and tasks. Unmoderated usability testing is similar to its moderated counterpart in the sense that it requires all the same preparation and planning, and follows the same structure.
Note that when performing remote unmoderated usability testing, it’s particularly important that tasks are simple and clearly written. You won’t be able to steer participants in the right direction if anything goes wrong so obtaining useful data relies on you setting clear instructions.
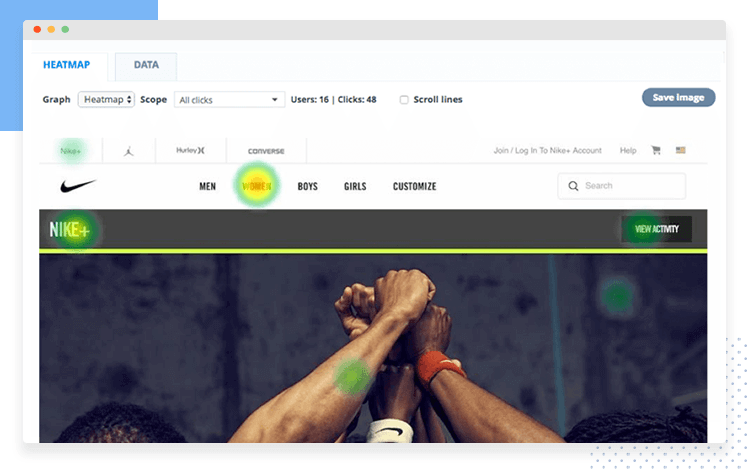
You’ll need an online tool designed for remote unmoderated usability testing, such as Loop11 or UserZoom. These tools will enable you to record user sessions and show the time taken on each touchpoint. Participants will also be able to leave feedback for the UX team to look at once the test is complete.
Don’t miss out: Hear directly from folks over at UserZoom how UX research leads to updates that matter. If you’re a firm believer in data-driven design, that article is for you!
Another benefit of these tools, as we’ve seen before, is that many will help you with the setting up and recruiting of participants. Those that are integrated with your wireframe tool are likely to give more efficient results.
Consider testing your usability testing tool before sending the test URL out to participants, mocking up a real test situation. You could even try pilot testing on a member of the team who wasn’t involved in designing the test questions.
Take advantage of the fact that unmoderated usability testing is cheaper and faster by including more test participants. This will work as a safety net in case some of the remote participants don’t show up for the actual test.
Make sure you follow up with test participants post-study. You’ll want to get as much feedback from them as possible, and since you’re not in the room with them, you’ll need to reach out afterward.
- Unmoderated usability testing sessions are shorter than moderated testing and results are much quicker
- You can recruit participants from a wider geographical area for a larger sample of behavior data, as unmoderated tests are done remotely
- There’s less chance of human error or bias, so results are generally more accurate when there are recordings of both facial expressions and audio
Usability testing is an essential UX practice, helping you uncover barriers in your design process and improve the user experience of your product.
Moderated usability testing gives you the opportunity to interact directly with your target audience and gain a profound understanding of their pain points and goals. The downside of this technique is that it takes longer and is often more expensive, taking into consideration the travel and participation costs of test participants.
In contrast, unmoderated usability testing is a quick, cheap and simple approach to collecting data about your users. With immediate turnaround, you can afford to recruit more participants for a wider test sample. But even though you’ll gather more results, your tests will be limited in scope as you’ll need to ensure that every single test instruction is crystal clear.
