VR and AR setup and simulation
Test your designs and prototypes in both Augmented Reality and Virtual Reality with Justinmind. This feature allows to do user testing on systems beyond web and mobile devices expanding the posibilities of what you can design with Justinmind. Take a look at the video below to see the type of experiences you can simulate:
Testing your prototypes in AR (Augmented Reality)
In order to test your prototype with AR first open it and then select the option from the main menu “File – Simulate – XR settings…” (XR stands for ‘Extended Reality’). Then, in the dialog that shows up, select the option Augmented Reality:
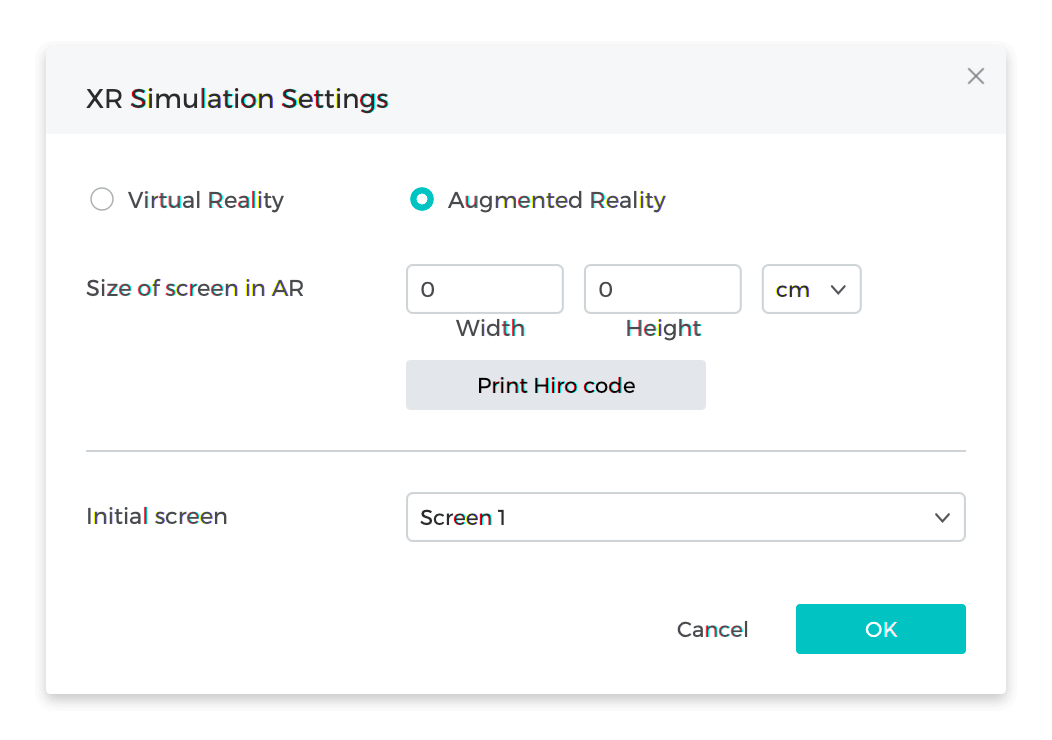
Select how big the screen should display either in cm or inches. Click on the ‘Print markers’ button to print the tracking codes that you will later place where you want to show the screens and in your finger. They are the same for any prototype so you just need to print them once. Once you have set all your parameters, hit ‘OK’.
Finally, click on the ‘Goggles’ icon next to the ‘Play’ button in the toolbar to launch the AR experience. Your prototype will be published in your online account and you’ll get a URL and a QR code. Open that QR code in your phone to start the AR experience. If you’re using an iPhone, the only browser that supports AR right now is XR Viewer by Mozilla although Safari will also support it in the near future.
Click the ‘Start’ button in the page that is loaded in your phone and then the phone camera will be activated. Move the phone around the room so the system maps your sorroundings. Place your phone close to all the tracking codes to show the screens of your prototype and then the one in the finger close to the camera so the system captures all. If you loose the tracking of either of them, just place the camera close to the code to recover the tracking. You can just hold the phone with your hand or use an AR device like this one MagiMask.
Testing your prototypes in Virtual Reality
With Justinmind you can display your prototypes in any 3D model and experience them using Virtual Reality. To do so, you first need a 3D model and a prototype made with Justinmind. The 3D model must be a .glb file. You can turn any 3D model file into a .glb file using the free application Blender or any other 3D modelling software. Check this video to learn how to turn 3D models to .glb files using Blender. You can find lots of 3D models in any of these websites: CGTrader, Sketchfab or TurboSquid.
- Open your prototype file.
- Select from the main menu “File – Simulate – XR Settings…”.
- In the dialog that shows up, select the .glb with the 3D model.
- Click on the ‘Set up model’ button. A browser will launch and it will let you configure the location of the screens and the initial point of the tester in the 3D model. Check this video to see how to set up your 3D model properly
- Once the set up is complete. Close the browser and go back to Justinmind. Then hit ‘Ok’.
- Click on the ‘Goggles’ icon next to the ‘Play’ button in the toolbar. A QR code and a URL will show up after uploading the prototype to your account. Insert that URL on the device you want to use for VR. If you use a VR headset like Oculus or HTC VIVE you’ll need to open that URL using the internet browser in that device and then click on the ‘VR’ icon on the bottom right part of the window. If you use a mobile phone like iPhone or Android, you can just scan the QR code using your phone camera to launch the browser.
If you use a mobile phone instead of a VR headset there are a few things you need in order to have the full VR experience. First, you’ll need some bluetooth controller or game pad to be able to move around the 3D scene. For iPhone we recommend something like this IFYoo Game Controller and for Android any bluetooth controller should do. Once in the VR scene, move around using the controller and trigger the events on your prototype by leaving the floating ‘circle’ in the place you want to click and then click on the button in the controller.